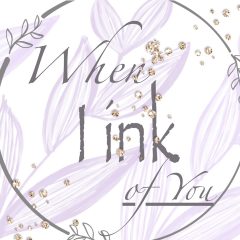
Botanical Illustration Inspired Watercolor

In this class, Jaycee goes over types of watercolor paper, color blending, color lifting, and the use of watercolor for documenting plant species purposes.

Card 1

I chose a no-line coloring image from Altenew’s Watercolor Coloring Book for this card and colored the floral images in Shades of Purple from Altenew’s Artist Watercolor 24 Pan Set. I used the wet-on-wet technique to lightly color the petals first. Then, I dried and added pigment along the inside of the petals in layers.

For the Foliage, I used Rock Collection to color and shade the images. Once the panel air dried, I darkened the foliage veins and partially shaded the florals with a colored pencil.

I heat embossed “If friends were flowers, I’d pick you” from HoneyBee stamps in silver embossing powder and attached it with black foam tape. Finally, I added silver sequins to compliment the sentiment.

“Card” 2

I began with another no-line coloring image from my coloring book for my second card and used the wet-on-wet technique to layer color onto my canvas. I first colored the petals in Cherry Blossom. Next, I darkened the inside of the petals in multiple layers and used the smallest brush from my Detailed Brush Set to add veins to each petal in small thin strokes. Then, I colored the center in Pockey full of sunshine and Summer Afternoon.

I colored the foliage and stems in Rain Forest first; once dry, I added Tropical Forest along the vein lines and lifted the pigment to give an illusion of light. I also used a white gel pen to add highlights to the edge of the petals.

I decided to frame this piece instead. I mounted it onto pink card stock to put into a gallery frame at a later time. This will be a gift for a dear friend.

“Card” 3

I picked up a couple of small frames while shopping. I thought they would make a lovely gift.

I began by stamping an image from Altenew’s Mini Hibiscus Tea Stamp Set in waterproof black ink onto Arches 100 % Cotton Cold Press Watercolor Paper. Then, I let the ink dry and began to paint the teacup in a mix of Summer Afternoon and Pocket Full of Sunshine. Next, I painted the hibiscus flowers in Red Cosmos and Cherry Blossom. Finally, I used Green Meadows and Green Hills for the foliage images.

I stamped “Hello Beautiful” below the teacup from Altenew’s Build a Flower Triumph Tulip Stamp Set.

Advertisement

Watercolor 101

The third class in my level three course is Artist Watercolor 101 for Paper Crafters with Emily Midgett. Emily goes over the basics of watercolor, the importance of paper, techniques, and creating swatches. 

Card 1

I used the Wet to Dry technique on a page from Altenew’s Watercolor Coloring Book for my first card. I used Cherry Blossom for the petals, Pocket Full of Sunshine for the center, Green Hills, and Rain Forest for the stem and leaves. The colors I used are from  Altenew’s Artists Watercolor 24 pan set. I added a concentration of color to the inside of the petals where the shading would be darkest and pulled the stain towards the edges with clean water. I used Altenew’s Detailed brush set, making it easier to color small areas. For the leaves, I added Rain Forest to the entire area first and mixed the two green shades to add shading to the underside of the leaves and the top of the stem.

Once the page was dry, I stamped “You are the Best” from Altenew’s Paint-A-Flower: Zinnia Magellan Rose. I added the reflections dew drops to compliment the sentiment.

Card 2

I used the Wet on Wet Technique on watercolor paper for my second card. I added Shades of Purple, Cherry Blossom, and Tea Party to create the background. Once dry, I stamped, and heat embossed the Zinnia Magellan Rose image in gold embossing powder. I added color to the floral along the color lines of the background to avoid a muddy mess. Next, I watercolored the leaves with a mix of Rain Forest and Green Hills. I added color until I was content with the look and added ink spatters in the same colors.
Once dry, I added a Simon Says Stamp sentiment and sequins for added detail.

Card 3 “White Flower”

Card 3

For my third card, I chose to create a white flower. I first colored the background from my coloring book. I first used Cherry Blossom and then Shades of Purple. Next, I used my heat gun to dry the panel between layers. To create a white flower, you must add more color than you think. I used Fall Harvest to paint the “white” flower and added more color to the center and under the petals. I used the wet-on-wet technique to achieve this. Next, I used a mixture of Tropical Forest and Green Meadows to paint the leaves. Finally, I added paint spatter with Rock Collection (also found in the Artist Pan Set).

I added a thin frame with a T-Ruler and Fine Liner Pen and “Celebrating you today” from Altenew’s Sentiment Strip 2 Set with foam tape. Finally, I added sequins for a touch of sparkle.