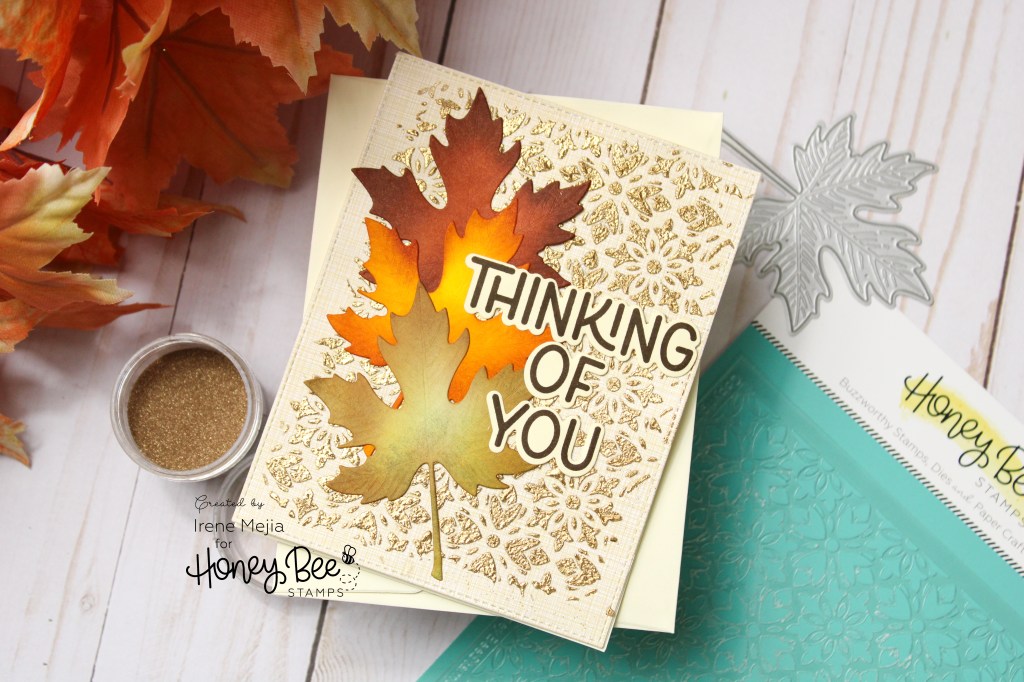
I love a textured card, and especially one with texture that shimmers! I will share the steps to create your own textured card! I began by selecting a patterned paper from Honey Bee Stamps Marvelous Moments 6×8.5 Paper Pad. I chose this pattern because it looks like linen, and its a nice neutral color. I placed my card panel onto my Brutus Monroe Stick and Stamp Mat, and used highlighter Tape told the stencil in place.
Next, I scraped translucent Distress Grit-Paste over the stencil and then poured gold embossing powder over the entire thing. Do not remove the stencil before adding the embossing powder. I do this to avoid having to use anti-static powder. Once the paste is fully coated with powder, carefully remove the stencil, and use a heat gun to set the paste and powder. The embossing paste will bubble as it heats up.
Next, I chose the sentiment “Thinking of You” from the Honey Bee Stamps Fall Foliage Frame Stamp set and stamped it in “Icing on the Cake” Catherine Pooler ink, and I used the coordinating Fall Foliage Frame Die Cuts to cut the sentiment.
The links to the products I used are below. These are affiliate links, so it helps me a lot if you use them to shop at no extra cost!
This class shows you different ways to add beautiful details to your cards. I learned so much, and I very much enjoyed this class.
Card 1
For this card, I chose Altenew’s Crocus Build a Flower Layering Stamp Set and Sugar Plums Crisp Dye Ink oval set. I started with the first layer stamp and Pale Mauve ink. For the second layer, I used amethyst and grape agate for the detail stamp. I masked the first flower to create a second. I made two additional masks and added darker flowers behind the first two. For the darker flowers, I used amethyst for the first layer, grape agate for the second, and plum for the third.
I used gel pens in white and dark purple to add details to the petals. I sparingly used a black felt tip pen to add smaller shadows and lines.
I added ink splatter by pressing an ink pad onto an acrylic block, spritzing water on the ink, and dipping a small brush in the mixture.
I secured my piece to a lavender-colored background and attached it to a blank notecard.
Card 2
I began with Altenew’s statement flowers Stamp. It’s simply beautiful and has quickly become a favorite of mine. I stamped it in memento Angel Pink ink. The color is very light and lends itself to creating “no-line coloring.”
I used Copic Ciao RV21 for the base coloring and a bit of shadowing with R32. For the leaves, I used YG11 in the centers only. The center of the flower was colored with Y21.
I added details to the image with Faber-Castell colored pencils. I added dark pink detailing with #125. I wanted to keep my colors warm, so I opted to shade with browns rather than grays. I generously used colors 187 and 176 to paint the center of the flower, petals, and leaves. To add highlights, I used a white gel pen.
I wanted to keep the floral as the main focus, so I added a small “thanks a bunch” from Altenew’s Many Thanks Stamp Set in gold Embossing powder. For sparkle, I added gold leaf specialty glitter.
I began this project by stamping the outline image first in black dye ink. I used distress oxide inks in Tumbled Glass, Salty Ocean, and Prized Ribbon for the plumage layers. I have a pet budgie, and these colors are very similar to his. Budgies have white feathers at the top of their head as they age, which is why I chose to leave this one white.
I used Faber-Castell (blues) #120 and #147 and Prismacolor 1067 and 1065 (grays) pencils to add details to his feathers.
I stamped the branches in memento London fog ink and filled in shadows and small details with Prismacolor 1056. I used the coordinating dies to cut the images out.
I created the background by blending distress oxide ink in Stormy Sky onto white card stock. I mixed white pigment ink and water to add the appearance of delicate white snow. I also used Altenew’s antique silver ink spray to add a few dark specks. Once the ink was dry, I added a Thank You sentiment from Altenew’s Many Thanks Stamp Set in blue embossing powder.
I arranged the branches and adhered one with foam tape and the other flat with liquid glue. I attached the bird with foam tape. I completed my card by attaching my piece to a blue notecard with double-sided tape.
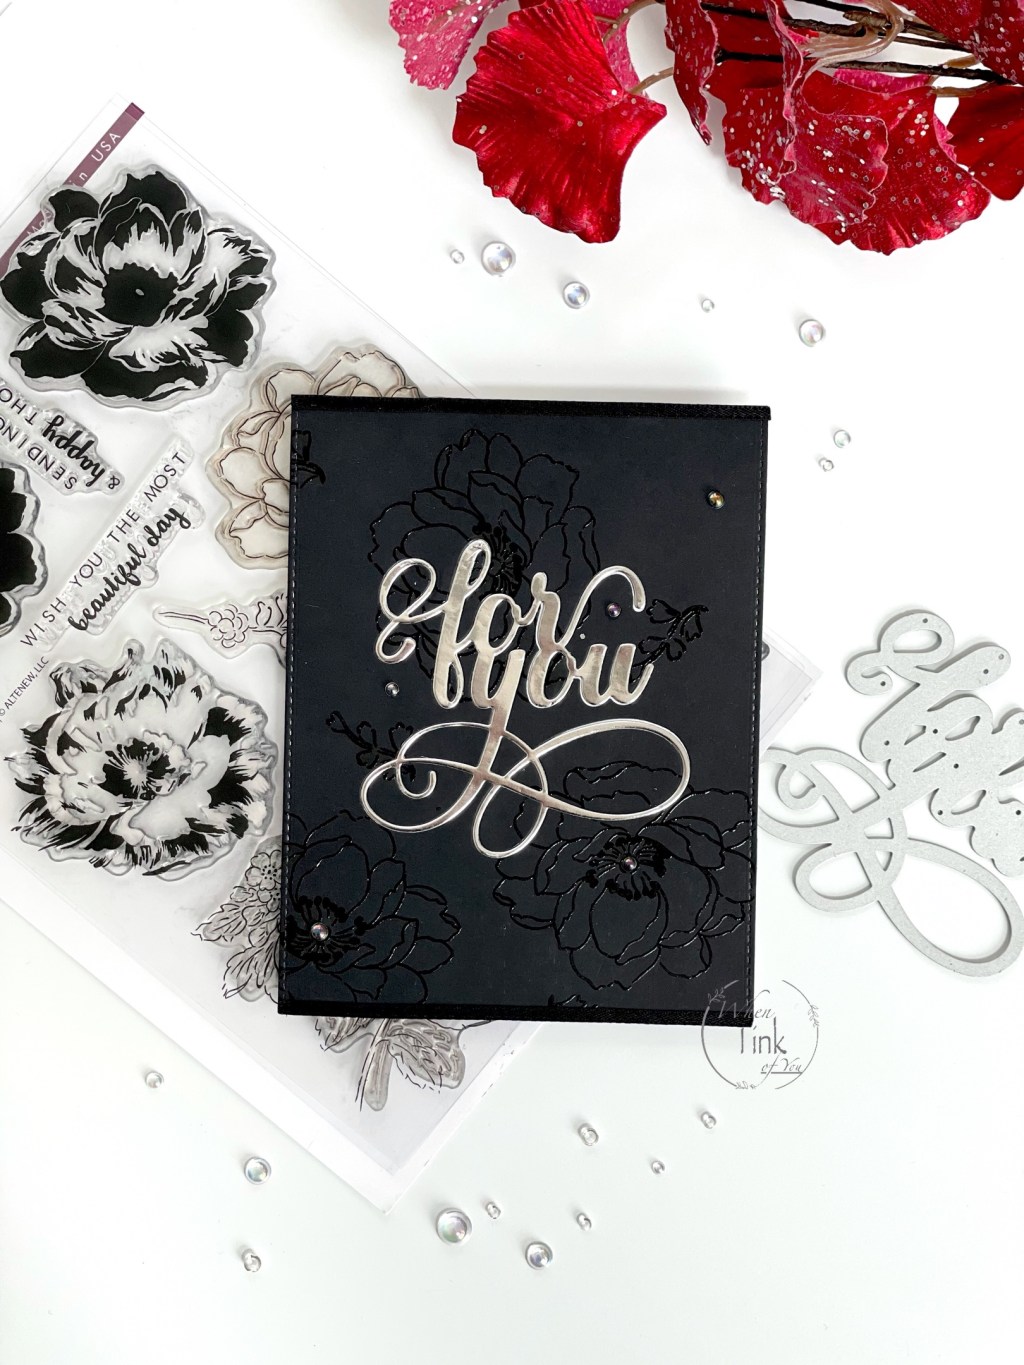
This class shows ways to use many colors on a white background as well as monochromatic color schemes.
Card 1
I have been dying to create a black-on-black card. This course was perfect to use this combination.
I began by preparing black cardstock with antistatic powder and dusted off the excess with an acrylic block. Next, I stamped outline images from Altenew’s Beautiful Day Stamp Set, and heat set black powder over it.
I placed my embossed card stock into my die-cutting machine with a plain sheet of white paper over it. The plain sheet of paper prevents marks from the well-worn cutting plates. I cut the card stock to various sizes, including A-2.
I centered Altenew’s fancy “for you” die onto the cardstock and ran it through my die cutter again, making sure to save the cut pieces. Next, I cut another for you die in silver card stock.
I added double-sided tape to the back of the embossed card stock and placed it onto a black notecard. Next, I added liquid glue to the back of the silver die, cut and inlaid it, and added the small pieces.
I added “dew drops” embellishments and 1/8 inch satin ribbon with liquid glue.
Card 2
For this card, I chose different shades of purple. I began by inking Blossoming Branches 3D Embossing Folder. I used memento ink in Lulu Lavender for the flat areas and distress inks in milled lavender and seedless preserves for the 3D portions. Next, I lightly misted a white sheet of cardstock and ran it through my die-cutting machine in the folder. I then cut it into an A -2 size.
With pearlescent watercolor, I added darker shades of purple onto the details of the piece.
I kept this card relatively simple and masculine. I began with white card stock and Altenew’s Simple Shapes Stamp Set. Next, I used Memento dew drops inks in Lady Bug, Tangelo, Dandelion, and Pear Tart. Finally, I stamped each color three times using the solid square shape stamp.
I chose the sentiment from Altenew’s Birthday Bash Stamp Set. I stamped it with black dye ink and placed a gold foil card stock piece onto a white notecard. I then attached the stamped piece with foam tape.
This course is all about colors and the feelings they evoke. Red, for example, signifies passion and love.
Card 1
Green- Soothing, Natural and Growth
Green- Soothing, Natural, and Growth I chose green for my first project. I began by taping Altenew’s Feathery Stencil to white card stock. Next, I blended distress oxide inks in twisted citron, mowed lawn, and lucky clover. Once the ink was dry, I used a stitched die cut it slightly smaller than A2 size.
I added a gold glitter card stock strip to the center with double-sided tape. Next, I added a lightly inked circle to the center with foam tape. For the sentiment, I used Altenew’s fancy “for you” die. I cut it several times using white card stock and once in green. Finally, I used liquid glue to stack them and attach them.
I masked the newly stamped leaf images and blended squeezed lemon distress oxide ink onto the card background.
I stamped another floral image in a separate area, fussy cut, and set it aside.
Once the ink was dry, I used a stitched die-cut in a slightly smaller size than A2. I also cut Altenew’s fancy “hello” die five times. I glued 4 in a stack and colored the 5th one with a black marker, and glued it to the top of the stack. Finally, I attached it to the card with liquid glue.
For a final touch, I added a thin black satin ribbon to the side.
I followed with spun sugar, worn lipstick, and picked raspberries for the butterfly stencil. I cut my piece smaller than my pink base card and attached a ribbon to the center with double-sided tape.
I heat embossed “I just adore you” from Altenew’s Sentiment Strips 2 onto black card stock and adhered it to the ribbon with double-sided tape.