Easy Ink Blending Techniques

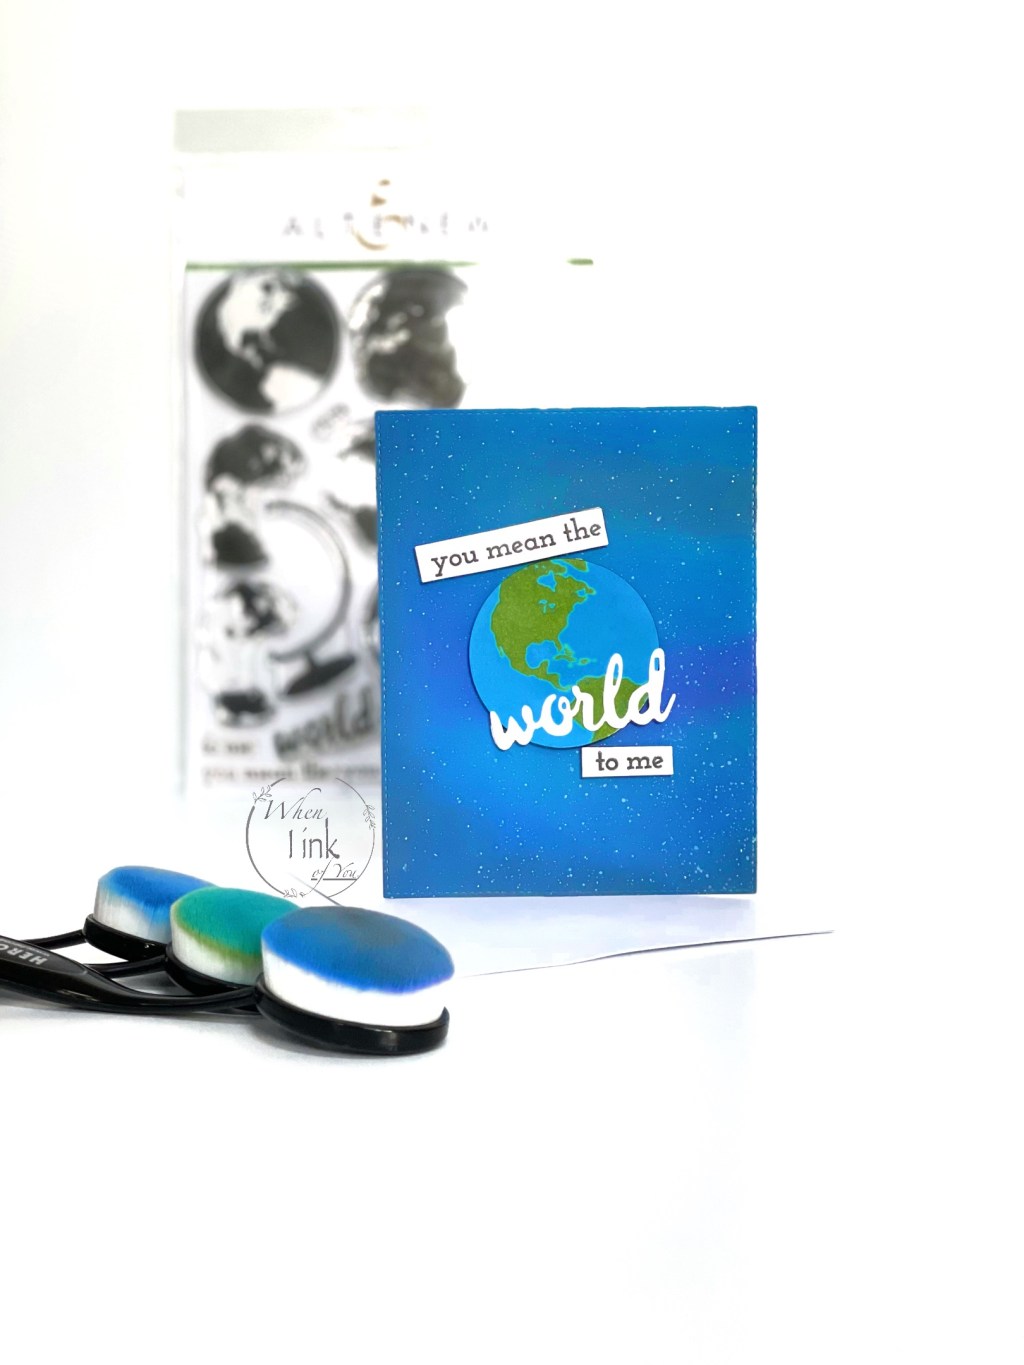
This class is all about one of my favorite techniques, Ink Blending. I enjoyed learning of different ways of using this technique I had not thought of before. If I don’t have the right colored card stock, I can MAKE one. So simple. So beautiful. Here are the cards I was inspired to create with this beautiful technique.

Card 1

Extra Special Stamp set

I began by stamping my floral stamp from Altenew’s Extra Special stamp set in clear embossing ink on white card stock. I used a white pearl embossing powder and heat set it. Next, I began to build my rainbow in the usual order. Using a blending brush, I started with distress oxide inks in Candied Apple, Spiced Marmalade, Squeezed Lemon, Twisted Citron, Peacock feathers, Tumbled Glass, and Prize Ribbon. I created each layer using a circular motion. I lightly went over previous layers to blend each color with the next. Once I was satisfied with the colors, I spritz water on my piece for extra visual interest and let it dry.

I love rainbows. I mean, who doesn’t? Rainbows remind me of my childhood and my sister was a big part of it. For me, she is the best. Thinking of her makes me happy just like thinking of rainbows. I chose the “to the best sister” sentiment included in the Extra Special Stamp Set, and stamped it in black dye ink.

I attached my completed piece at a fun angle over sky blue A2-sized card stock with double-sided tape.

Materials

Card 2

Remember This Stamp Set/ Strength Blooms Stamp Set

This card began as blending practice on a plain white sheet of medium-weight cards stock. 

I used distress oxide ink in spun sugar and worked my way from the bottom to top using a blending brush. The center layer was made with distress oxide ink in worn lipstick followed by festive berries oxide ink for the top. I went over the layers several times adding more ink until I achieved a look I was happy with. I then die-cut it to A2-size.

I stamped the floral outline from Altenew’s Remember This layering stamp set in clear embossing ink at the lower-left corner. I used gold embossing powder and set it with my heat gun. I repeated the process to add foliage and additional floral elements. To add ink splatter, I pressed the festive berries color ink pad on my stamping mat and dipped my watercolor brush in water and ink. I freely splashed my card with the mixture. 

 I used the same mixture of water and ink to color the florals. I used a white ink pad to lighten the areas I thought would reflect light. I used the same method with green ink to color in the leaves of my project. 

The sentiment I chose is from Altenew’s Strength Blooms Stamp Set.

A closer look

Materials

  • Altenew Remember This Stamp Set
  • Altenew Strength Blooms Stamp Set
  • Distress Oxide inks in Spun Sugar, Worn Lipstick, Festive Berries, and Picket Fence
  • Stamping Mat
  • Clear Embossing Ink
  • Gold Embossing Powder
  • Heat Gun
  • Watercolor Brush

Card 3

Big World Stamp Set and Die bundle

The final project for this class is my absolute favorite. I knew what I wanted to do when I saw the Big World stamp set. I grabbed Distressed Oxide inks in Prize Ribbon, Wilted Violet, Peacock Feathers, and Black Soot. I began with Prize Ribbon by blending it throughout white card stock. I colored smaller areas with Wilted Violet and Peacock Feathers. For the edges and corners, I used black soot. I picked up more ink as needed, then blended the Prize ribbon color over the entire area. I die cut a portion of my blended card stock using an A2-sided frame.


For the stars in the background, I splattered white pigment ink with a watercolor brush.


On a separate sheet of card stock, I stamped the water layer of the stamp set using distress oxide in Salty Ocean. The land layer stamp followed in oxide ink in Mowed Lawn. I die cut the stamped world and placed it at the center of my project with foam tape. Next, I stamped. “You Mean the” and “to me” using black die ink and cut them out with a pair of scissors. I placed them both on my project using foam tape. Lastly, I die cut the word “world” and glued it on with liquid adhesive. I secured my project to a blank card with double-sided tape.

Materials

  • Altenew Big World Stamp and Die cut Bundle
  • Distress Oxide Ink (Colors listed above)
  • White Pigment Ink
  • Stamping Mat
  • Watercolor Brush
  • White Foam Tape
  • Double-Sided Tape
  • Liquid Adhesive

Advertisement

All about layering 2

More layering in this course! This class furthered my learning in layering stamp techniques with beautiful stamp sets.

Beautiful Day

Cards 1&2

To begin, I stamped the larger flower cluster stamp from Altenew’s Beautiful Day stamp set on white letter-sized card stock. I used clear embossing ink thought out the entire sheet to create a watermark background. Next, I stamped the peony outline in black dye ink near the lower right corner of my sheet. I layered the rest of the flower with distressed oxide inks in tumbled glass, salty ocean, and prize ribbon. I stamped the outline on a masking sheet and cut it out. I placed the masking sheet over my completed flower and stamped the foliage outline on each side of the flower. I used oxide inks in bundled sage, and mowed lawn for the rest of the foliage.

I repeated the entire process diagonally above my first flower using distressed oxide inks in shaded lilac, stormy sky, and chipped sapphire, to end with a different shade of blue. I added some detail by using the smaller flower stamps alongside the larger florals. I die cut this to A2 size and I used the “sending hugs and happy thoughts” sentiment included in this set. I used sticker gems to add a bit of embellishment.

Materials

  • Altenew Beautiful Day stamp set
  • Black dye ink
  • Distressed oxide ink (listed above)
  • Gem stickers

Using the remainder of my watermarked card stock, I made a second card using the same methods. I chose distressed oxide inks in spun sugar, worn lipstick, and festive berries for the florals. I masked the floral once again, and stamped the medium-sized flower cluster in mowed lawn alongside the flowers and in the corners. I stamped “wish you the most beautiful day” sentiment also included in this set. I used gold colored gem sticker to embellish.

Materials

  • Altenew Beautiful Day stamp set
  • Distressed oxide ink (listed above)
  • Gold gem stickers

I attached the pieces to A2 sized cards using strong adhesive tape.

Vintage Roses

Card 3

I created this card using Altenew’s Vintage Roses Stamp and Die bundle. I love roses in any color but especially in pinks. I began with specialty card stock I had previously cut. Roses are quite romantic and I thought this paper would compliment my roses perfectly.

I used distressed oxide inks in my favorite combination from lightest to darkest. Colors used in order are, spun sugar, worn lipstick, festive berries, and candied apple. I stamped multiple flowers on white card stock and used the coordinating dies to cut them out. For the foliage, I used distressed oxide inks in bundled sage, and mowed lawn and cut them out using the coordinating dies. I also stamped three individual leaves directly onto my specialty paper.

I wanted to add a bit of gold, for this I used a clear embossing ink pen and went over some of the areas of the flowers and foliage. I used gold embossing powder and my heat gun to set.

I played around a bit with the placement of my flowers before securing them. I liked the look of off-set specialty paper, so I secured it to the top corner. I then arranged the flowers to look like a vine of roses. I glued some flat onto the background and used foam squares on the others for a bit of dimension.

For the sentiment I stamped “To my amazing mother” from Altenew’s Extra Special Stamp Set over a smaller and slightly darker card stock stip. I used specialty gold leaf glitter and gold sticker gems to add sparkle.

Layering stamps have become a favorite tool of mine. They give a gorgeous result and can be used in so many different ways.

Materials

  • Altenew’s Vintage Roses Stamp and Die Bundle
  • Altenew’s Extra Special Stamp Set
  • Distressed Oxide inks (colors listed above)
  • Gold Embossing Ink
  • Clear Embossing Ink Pen
  • Specialty Gold Leaf Glitter
  • Gold Colored Sticker Gems

If you are new to Altenew, you can use my referral link for $5 off your purchase. I’ll also get a point boost, it’s a win win!

All about layering 1

In this course I learned how to use layering stamp sets, lining up their matching points, and selecting colors that compliment one another. These stamp sets help you build beautiful and detailed floral themes that look complicated, yet once learned, are created with ease to let your creativity flow.

I’ve created several cards during this course, but I will share my favorite 3 in this post.

Card 1

Usually when working on cards, I die cut many different colors to have on hand for later use. I will typically grab a color and see where my creativity takes me. I chose black, gray and gold for a different spin. I started with black card stock which I die cut using a A2 sized stitched frame. I chose a gray pigment ink for my first layer, and for my second layer I prepped my card stock by using an anti-static pouch. I used a clear embossing ink and embossing powder in gold. I did each of the larger flowers one at a time to avoid any extra powder from sticking to my background. I chose the “Thank You” sentiment from my vintage roses add-on stamp set and placed it on a gray sentiment strip. I used clear double-sided tape to adhere to my base card.

Overall, I love this stamp set’s forgiving nature to a newbie such as myself!

Materials Used

  • Altenew Golden Garden Stamp Set
  • Vintage Roses Add-On stamp set
  • 85lb card stock
  • Gray pigment ink
  • Clear embossing ink
  • Gold embossing powder
  • Anti-static pouch
  • Strong Double sided tape

Card 2

You are sew lovely

For card 2, I chose the Embroidered Blooms stamp set. Being of Mexican decent, I particularly love this stamp set because it reminds me of a Huipil [wipil] , a traditional garment worn by women in Mexico. I had a few blouses like these growing up and they all had white fabric with colorful embroidery. I wanted to make this card simple yet colorful.

I began with a stitched die cut base in white (cut to about 2.75in by 4in). I chose distressed oxide inks in candied apple, squeezed lemon, spiced marmalade, mowed lawn, prized ribbon, and seedless preserves. I began with the center of the larger flower and worked my way outward. I repeated the process for the smaller flowers by beginning with the flower center and working outward. I added foliage by using masking sheets to prevent covering any portion of the flower itself. I used the sentiment “you are sew lovely” included with the Embroidered Blooms stamp set. I then added my centerpiece to a bright blue A2 sized background using foam tape to add a bit of dimension, and attached that to a white card.

This project made me a little nostalgic, as it reminded me of my childhood, and the time I spent with my family in Mexico.

Materials

  • Altenew Embroidered Blooms stamp set
  • A2 notecard
  • White card stock
  • Blue Card stock
  • Distressed Oxide Ink (colors listed above)
  • Foam tape
  • Double sided Tape

Card 3

For Lesson 3, I chose a monochromatic gray palette. I used the vintage roses stamp set and vintage roses add-on set, clear embossing ink, black dye ink, white gel pen, and distressed oxide inks in pumice stone, hickory smoke, and black soot.

I began with a A2 sized stitched frame die cut in gray. I first stamped the foliage base (found in the vintage roses stamp set) in each corner using pumice stone color. The second layer stamp (found in the add-on set) followed with hickory smoke, and for the third layer detail I used black soot. I stamped “Te echo de menos” (I miss you) sentiment from the Label Love Spanish stamp set, in black dye ink. I then used the second layer foliage stamp to add watermark detail in clear embossing ink. Once ink was fully dry, I used a white gel pen to trace around the foliage in the corners and to add small dots throughout the card. I also used a shimmer pen to add a little shine to the gray leaves. I attached it to the card base using strong double sided tape.

Materials

  • A2 White notecard
  • Gray card stock
  • Vintage Roses Stamp Set
  • Vintage Roses add-on stamp set
  • Distress Oxide ink in, Pumice Stone, Hickory Smoke, Black Soot
  • Clear Embossing Ink
  • Black dye Ink
  • White Gel Pen
  • Shimmer Pen
  • Double sided tape

If you are new to Altenew, you can use my referral link for $5 off your purchase. I’ll also get a point boost, it’s a win win!