

In this course I learned how to use layering stamp sets, lining up their matching points, and selecting colors that compliment one another. These stamp sets help you build beautiful and detailed floral themes that look complicated, yet once learned, are created with ease to let your creativity flow.
I’ve created several cards during this course, but I will share my favorite 3 in this post.
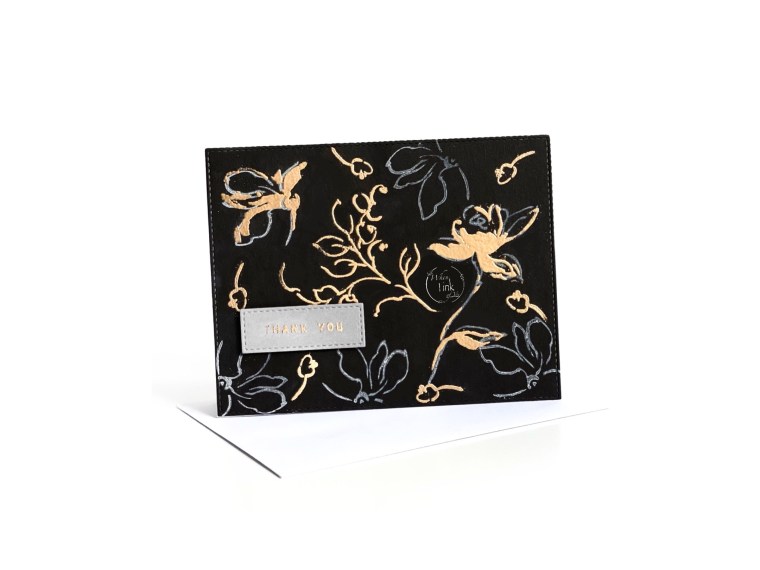

Card 1
Usually when working on cards, I die cut many different colors to have on hand for later use. I will typically grab a color and see where my creativity takes me. I chose black, gray and gold for a different spin. I started with black card stock which I die cut using a A2 sized stitched frame. I chose a gray pigment ink for my first layer, and for my second layer I prepped my card stock by using an anti-static pouch. I used a clear embossing ink and embossing powder in gold. I did each of the larger flowers one at a time to avoid any extra powder from sticking to my background. I chose the “Thank You” sentiment from my vintage roses add-on stamp set and placed it on a gray sentiment strip. I used clear double-sided tape to adhere to my base card.
Overall, I love this stamp set’s forgiving nature to a newbie such as myself!
Materials Used
- Altenew Golden Garden Stamp Set
- Vintage Roses Add-On stamp set
- 85lb card stock
- Gray pigment ink
- Clear embossing ink
- Gold embossing powder
- Anti-static pouch
- Strong Double sided tape
Card 2

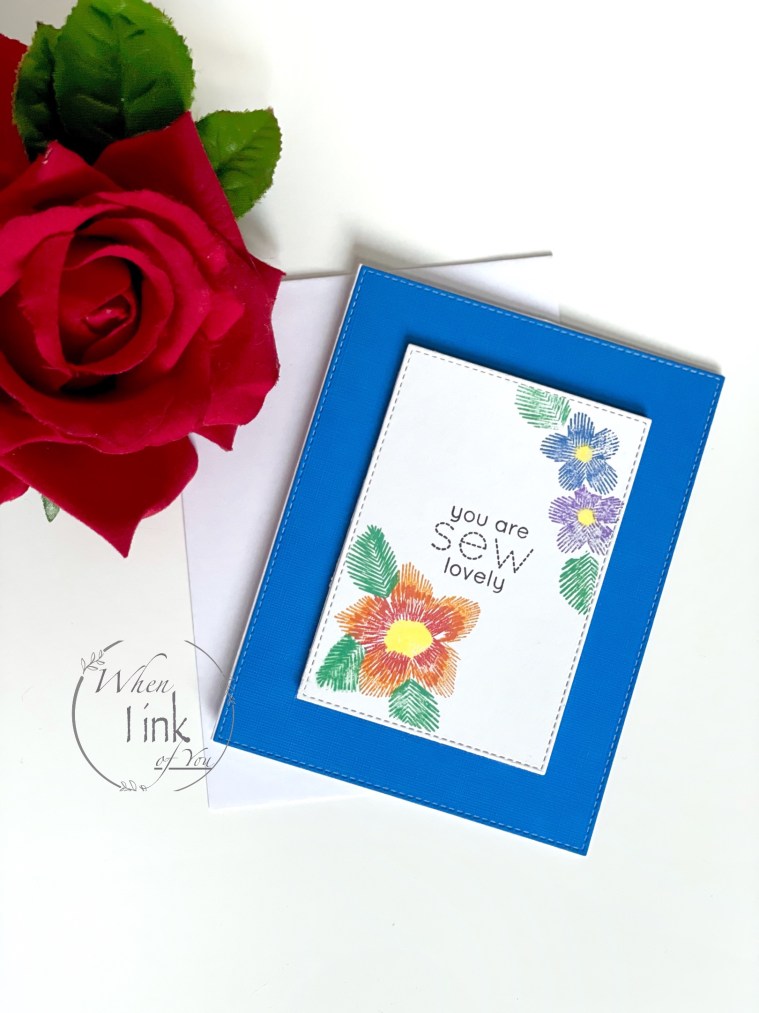
For card 2, I chose the Embroidered Blooms stamp set. Being of Mexican decent, I particularly love this stamp set because it reminds me of a Huipil [wipil] , a traditional garment worn by women in Mexico. I had a few blouses like these growing up and they all had white fabric with colorful embroidery. I wanted to make this card simple yet colorful.
I began with a stitched die cut base in white (cut to about 2.75in by 4in). I chose distressed oxide inks in candied apple, squeezed lemon, spiced marmalade, mowed lawn, prized ribbon, and seedless preserves. I began with the center of the larger flower and worked my way outward. I repeated the process for the smaller flowers by beginning with the flower center and working outward. I added foliage by using masking sheets to prevent covering any portion of the flower itself. I used the sentiment “you are sew lovely” included with the Embroidered Blooms stamp set. I then added my centerpiece to a bright blue A2 sized background using foam tape to add a bit of dimension, and attached that to a white card.
This project made me a little nostalgic, as it reminded me of my childhood, and the time I spent with my family in Mexico.
Materials
- Altenew Embroidered Blooms stamp set
- A2 notecard
- White card stock
- Blue Card stock
- Distressed Oxide Ink (colors listed above)
- Foam tape
- Double sided Tape
Card 3
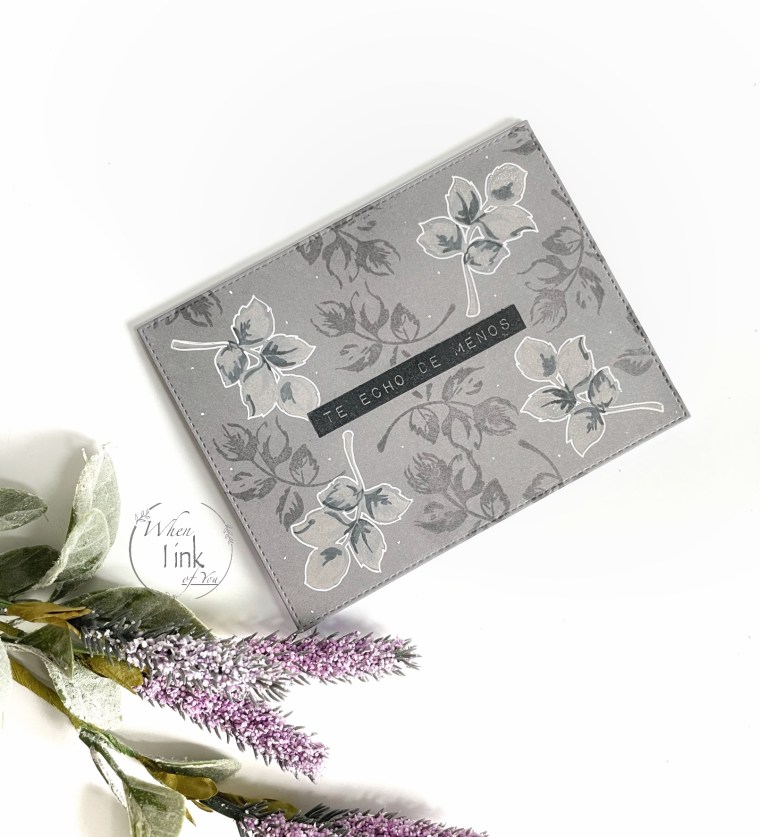
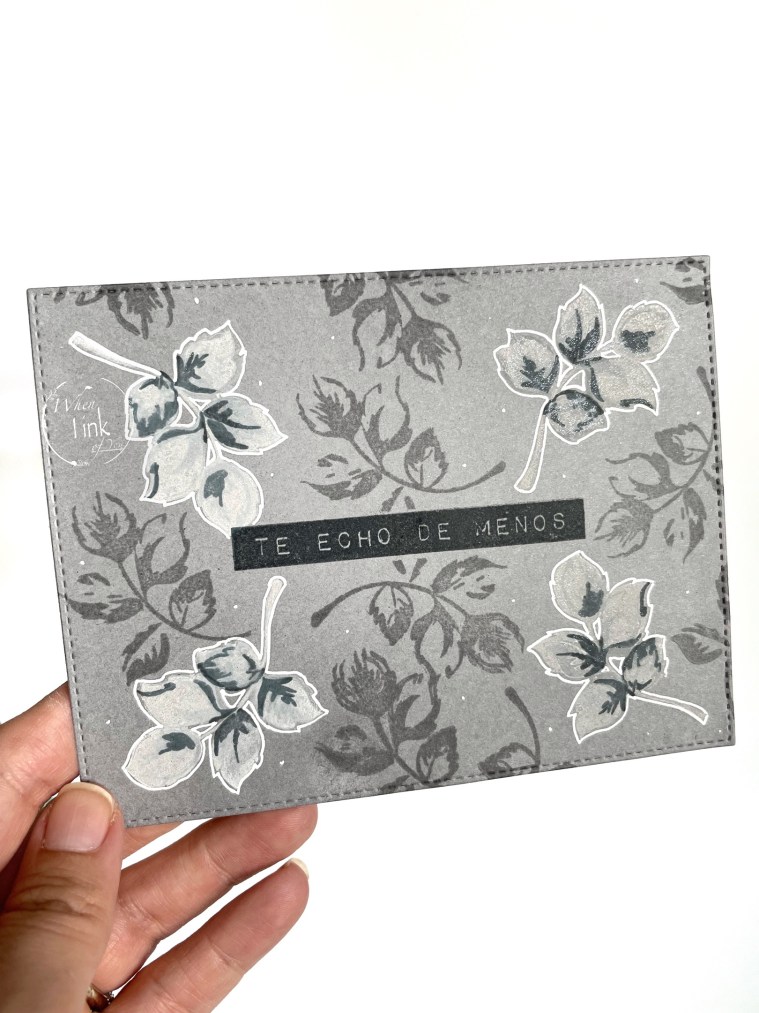
For Lesson 3, I chose a monochromatic gray palette. I used the vintage roses stamp set and vintage roses add-on set, clear embossing ink, black dye ink, white gel pen, and distressed oxide inks in pumice stone, hickory smoke, and black soot.
I began with a A2 sized stitched frame die cut in gray. I first stamped the foliage base (found in the vintage roses stamp set) in each corner using pumice stone color. The second layer stamp (found in the add-on set) followed with hickory smoke, and for the third layer detail I used black soot. I stamped “Te echo de menos” (I miss you) sentiment from the Label Love Spanish stamp set, in black dye ink. I then used the second layer foliage stamp to add watermark detail in clear embossing ink. Once ink was fully dry, I used a white gel pen to trace around the foliage in the corners and to add small dots throughout the card. I also used a shimmer pen to add a little shine to the gray leaves. I attached it to the card base using strong double sided tape.
Materials
- A2 White notecard
- Gray card stock
- Vintage Roses Stamp Set
- Vintage Roses add-on stamp set
- Distress Oxide ink in, Pumice Stone, Hickory Smoke, Black Soot
- Clear Embossing Ink
- Black dye Ink
- White Gel Pen
- Shimmer Pen
- Double sided tape
If you are new to Altenew, you can use my referral link for $5 off your purchase. I’ll also get a point boost, it’s a win win!

4 responses to “All about layering 1”
Beautiful cards
LikeLike
Irene! Congratulations on your first submission for AECP! You have done an absolutely brilliant job!! What a wonderful set of cards! I am blown away!! Keep an eye out for the AECP Fortnightly newsletter!
Thank you for submitting your wonderful work to the AECP assignment gallery.
LikeLiked by 1 person
Thank you so much Erum!!!!!!!
LikeLike
[…] in black! Can you see how Irene cleverly used gold embossing for her learning?! Genius! The black, gold, and gray combination looks […]
LikeLike