

The assignment: Create four masculine cards using birthday, Love/ Thinking of you, Anniversary, and encouragement plus one altered or up cycled item.
Card 1
I created the first card for this challenge by combining techniques learned in Stencil Techniques, Impressive heat embossing, and With a Twist!
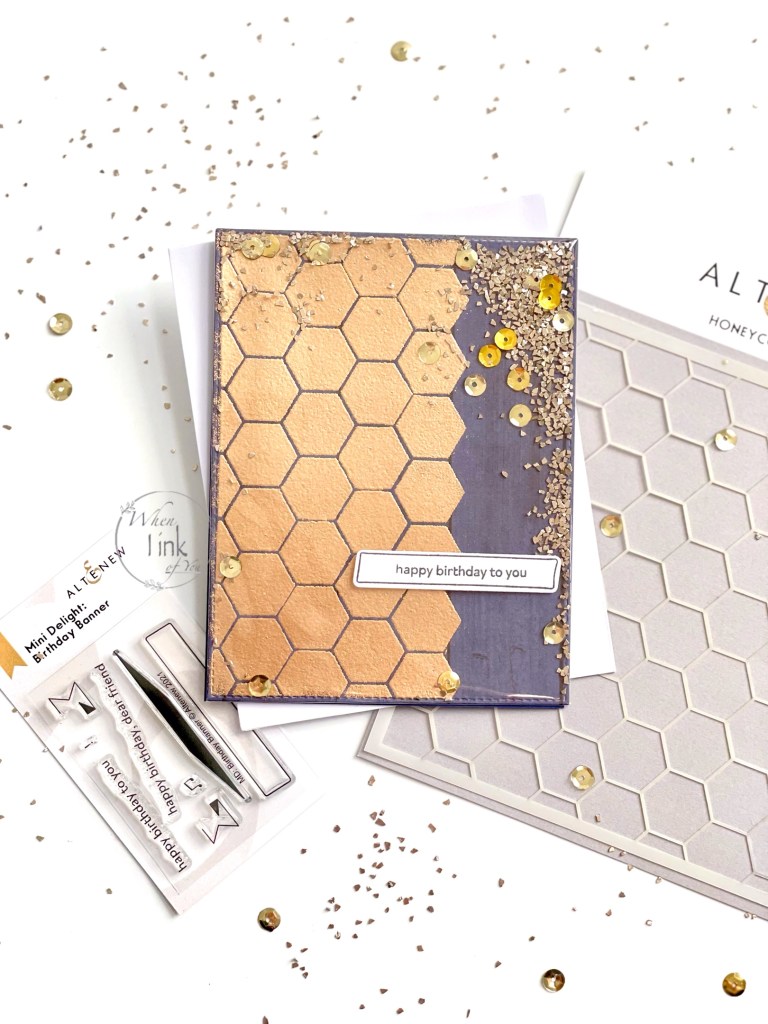
Birthdays are one of my favorite things to celebrate, and I wanted to make a fun, masculine card. I love interactive cards and chose to create a shaker card.
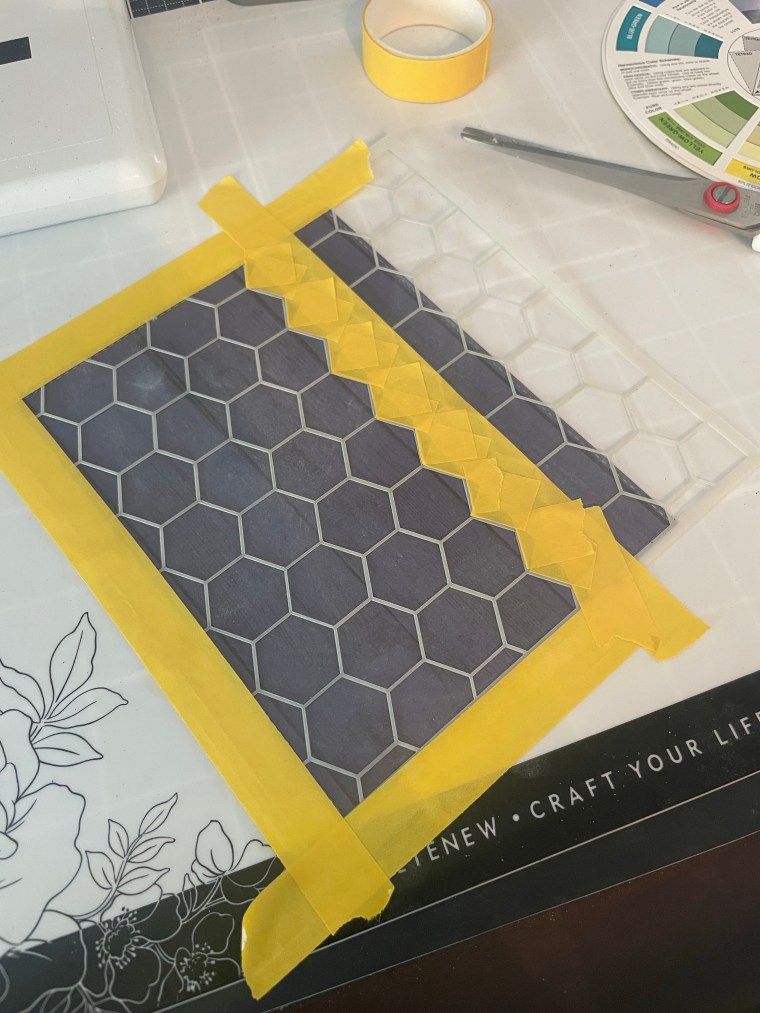
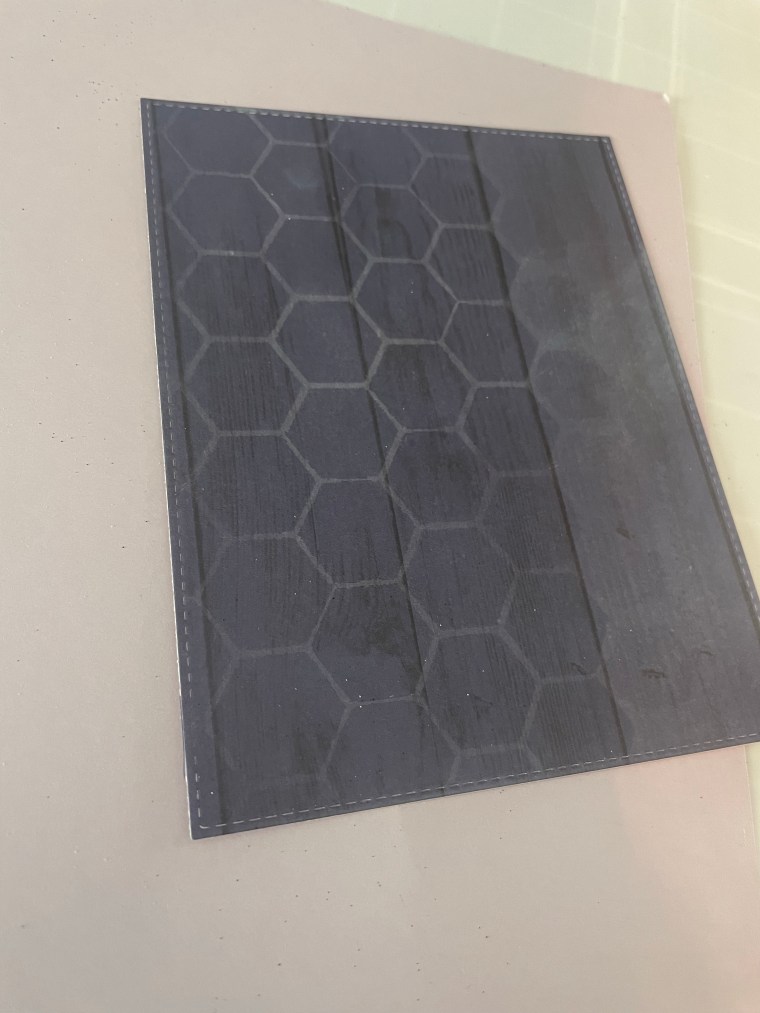
I used Altenew’s Honeycomb Stencil, an ink dauber and clear embossing ink to generously ink the area without moving the stencil. Then, I carefully lifted the stencil, poured gold embossing powder, shook off the excess and heat set the powder, and set it aside to cool.
I stamped and then cut Altenew’s Mini Delight Birthday Banner Stamp and Die Set with jet black dye ink.
I trimmed a 5 x 7 size card storage bag and placed my card panel face down. I used a tape runner on the back and folded the edges of the storage bag on three sides, then I poured specialty gold glitter and sequins into the pocket and sealed the top. Finally, I trimmed any excess cellophane for an even seal.


Next, I placed “happy birthday to you” on the front of the shaker card panel with strong double-sided tape. I then attached the completed panel to a navy-colored note card.

Card 2
I combined All About Layering, Masking unleashed, and Impressive Heat Embossing techniques to create this Bride and Groom Anniversary-themed card.

I began by using a T-Ruler to find the center of the card and masked the right-hand side of my panel with post-it notes. Next, I placed the panel in my Misti and stamped the bow tie image from the “thanks dad” stamp set. Next, I stamped the image ink-black dye ink using the second-generation stamping technique. I then stamped the detail portion multiple times in the same ink.
I then masked the left side with the bow tie image.


Next, I used a black pigment ink pad to generously cover the right side in black ink and set it aside to dry. Once dry, I prepared the panel with anti-static powder, stamped an outline image from Vintage Flowers in white pigment ink, and heat set white embossing powder over the image.
I added “Happy Anniversary” from the Vintage Roses stamp set by first stamping in black, then the right portion in white pigment ink.

Card 3
For this Encouragement theme card, I combined Ink Blending, Masking Unleashed, and Color Your Day techniques.
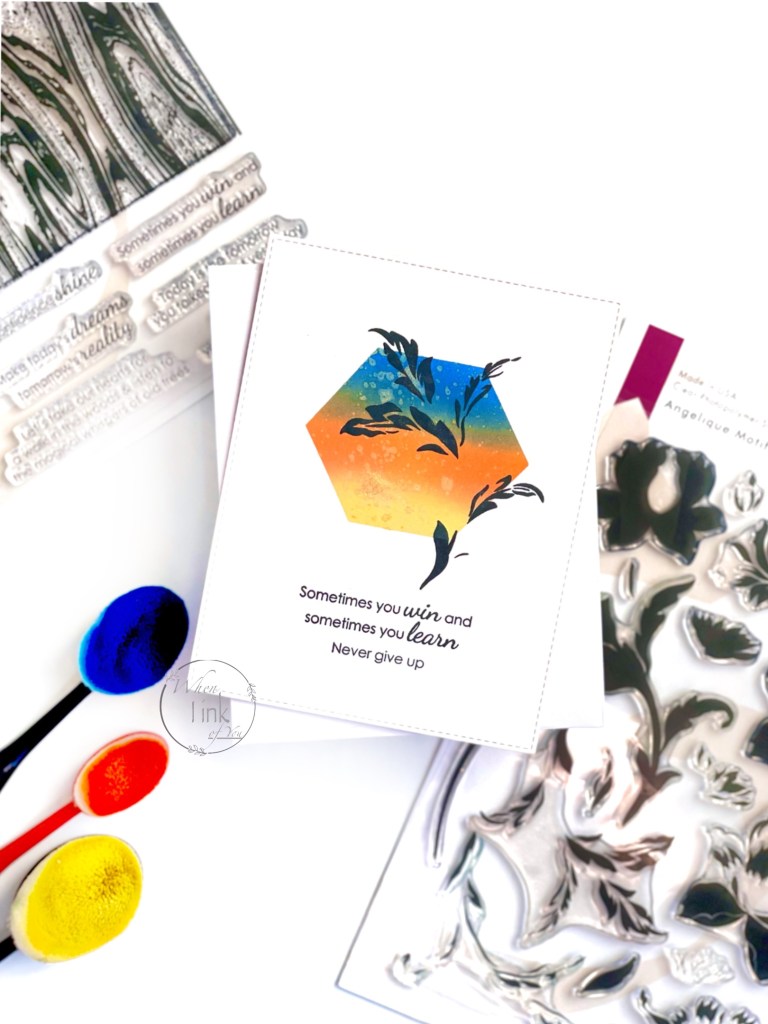
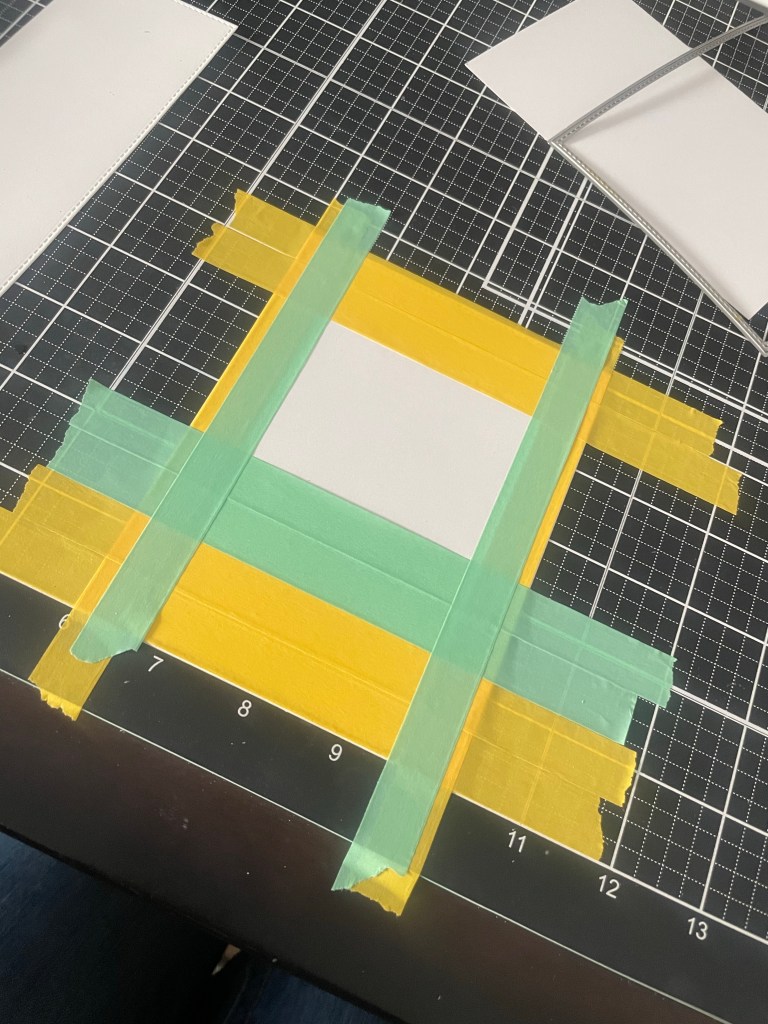
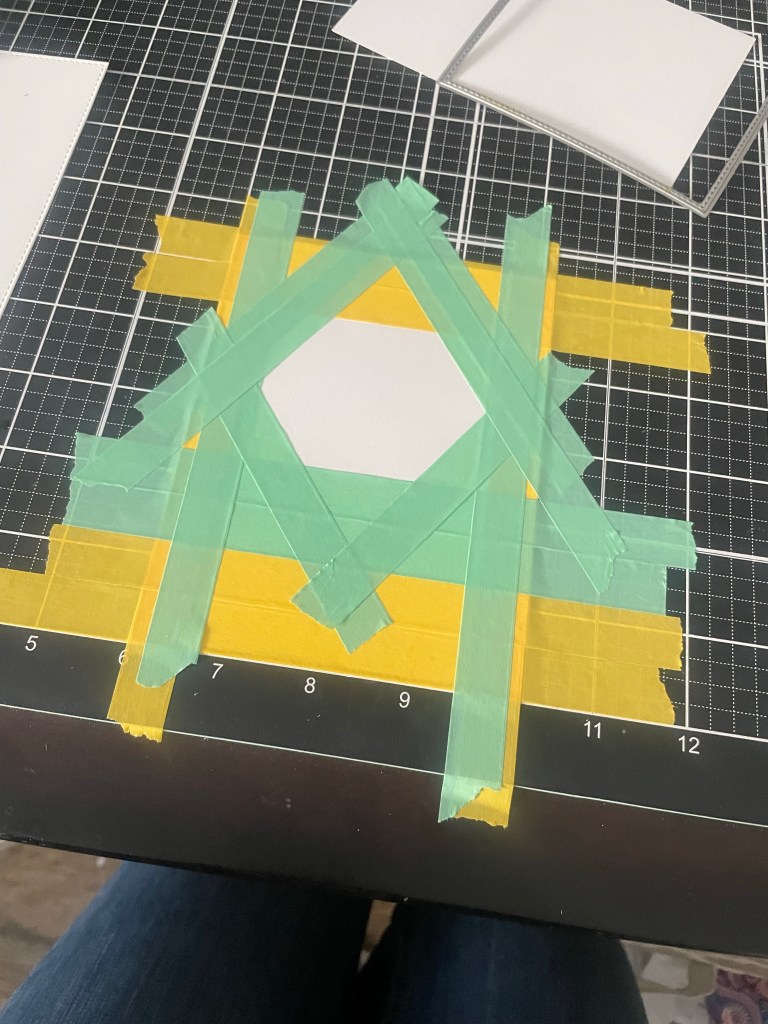
I began with a white card panel I taped down with Washi tape. My initial idea was to create a square shape, but I changed my mind while masking and created a hexagon instead. I selected the split complementary colors of Blue-violet for this card using my color wheel. Next, I blended distress oxide ink in Prize ribbon at the top, carved pumpkin for the center, and squeezed lemon for the bottom.

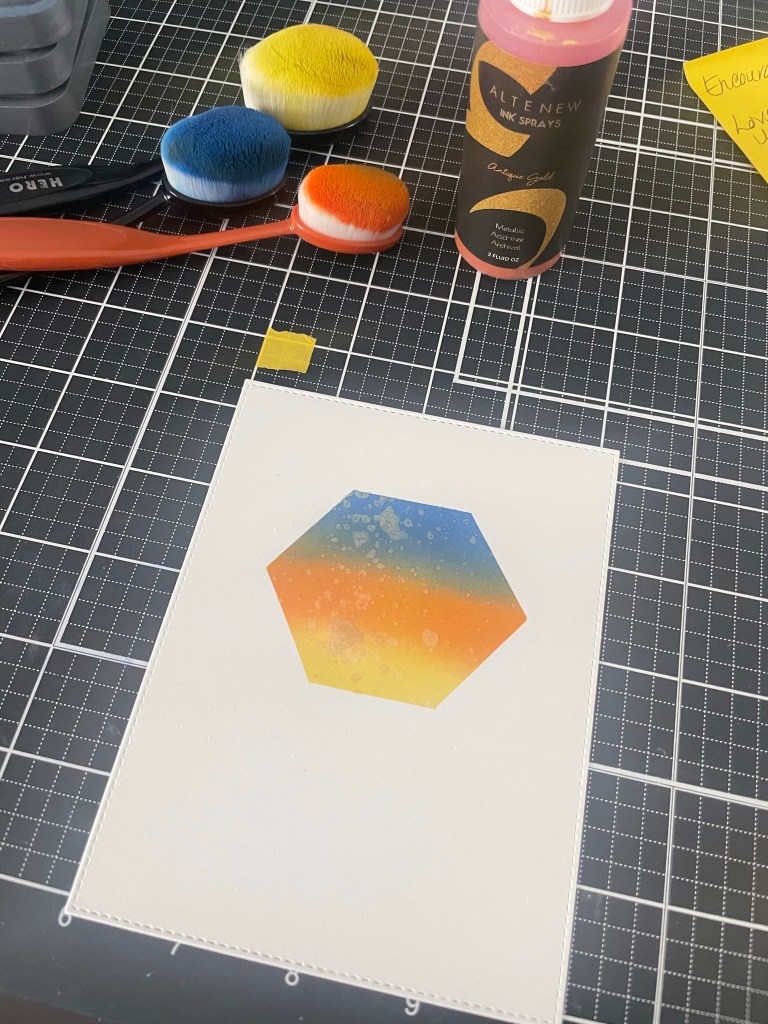
Once dry, I sprayed Altenew Metallic Ink in Antique Gold and carefully removed the Washi tape once dry.
I placed the panel into my Misti, used the second layer leaf stamp of Angelique Motifs in jet black dye ink, and stamped it multiple times to get an even and dark image. I then stamped “Sometimes you win, sometimes you learn, Never give up” from Altenew’s A Walk in the Woods stamp set. Once dry, I attached my panel to a white notecard with strong double-sided tape.


Card 4
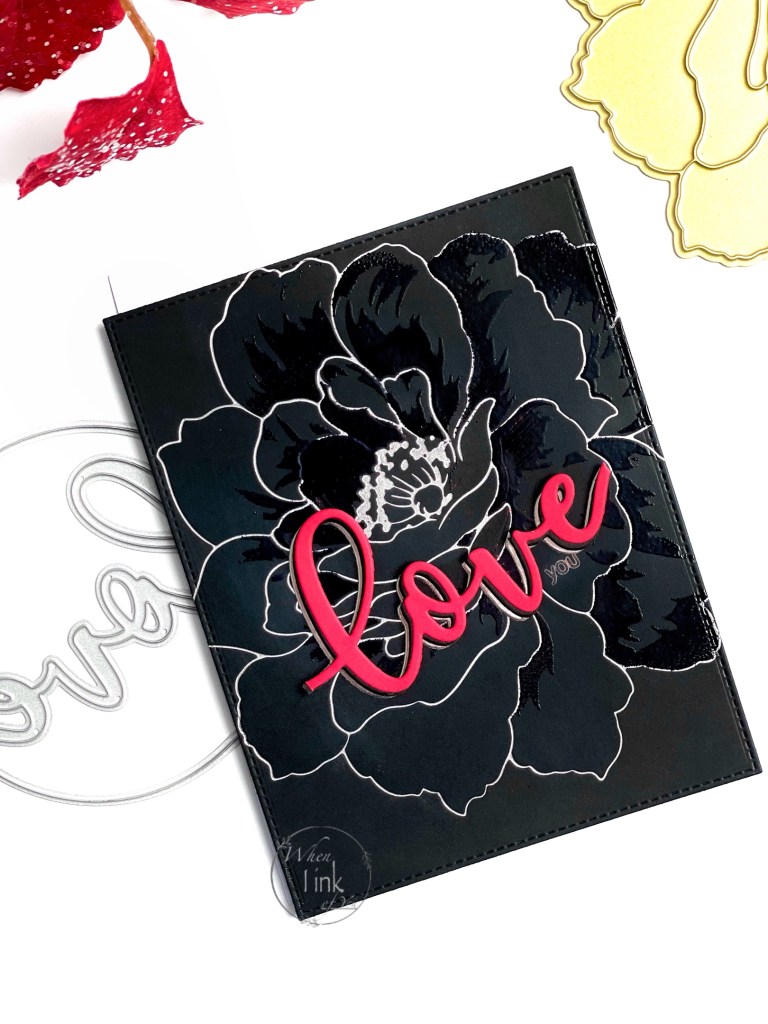
I created this Love-themed card using Stencil Techniques, Easy Die Cutting Techniques, and Impressive Heat Embossing.

I began by foiling 100lbs black card stock with Altenew’s Golden Days hot foil plate and silver foil. I then prepared the surface with anti-static powder and inked the third layer of the Golden Days simple coloring stencil set clear embossing ink. Next, I heat set black embossing powder over it and set it aside.


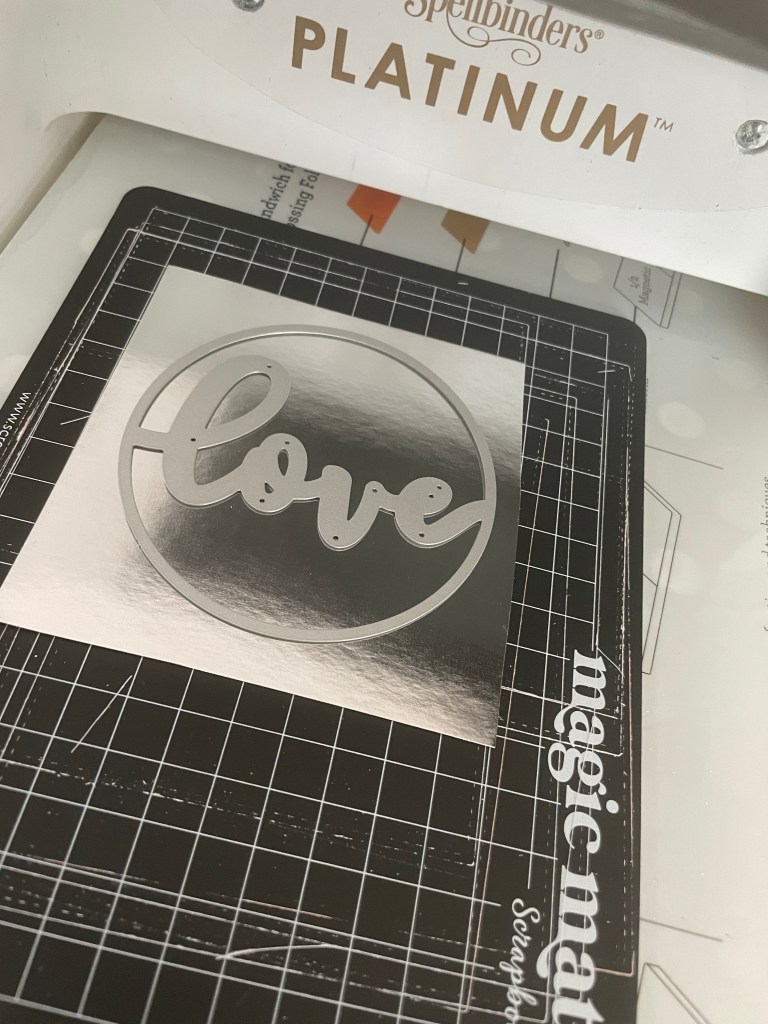
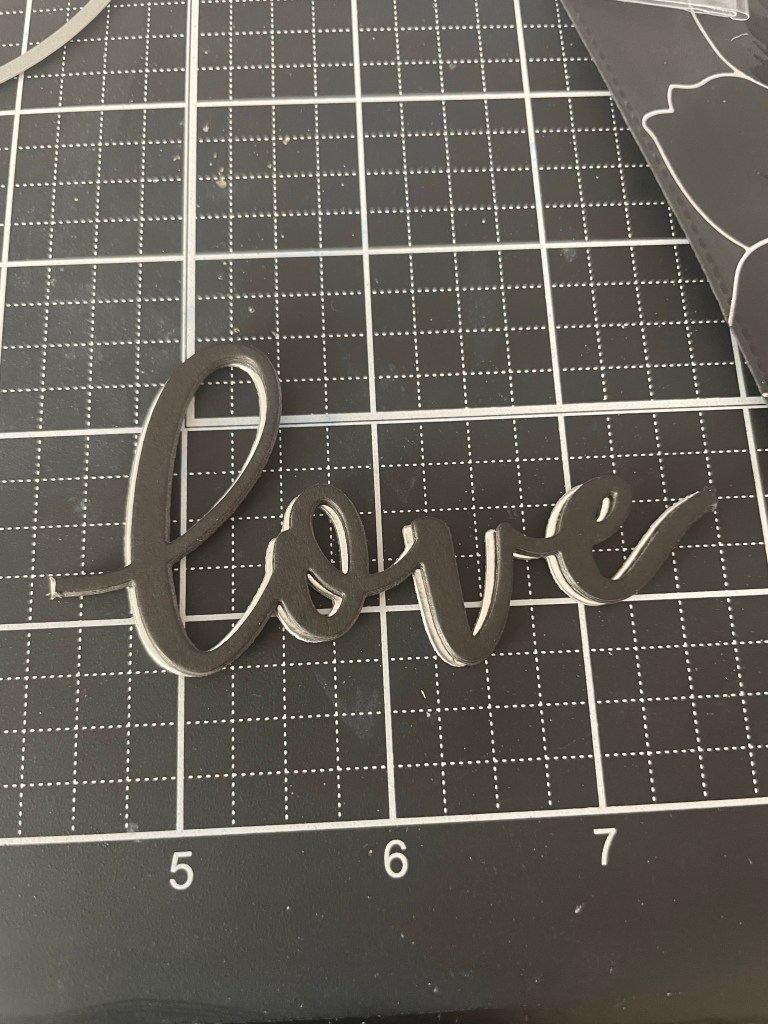
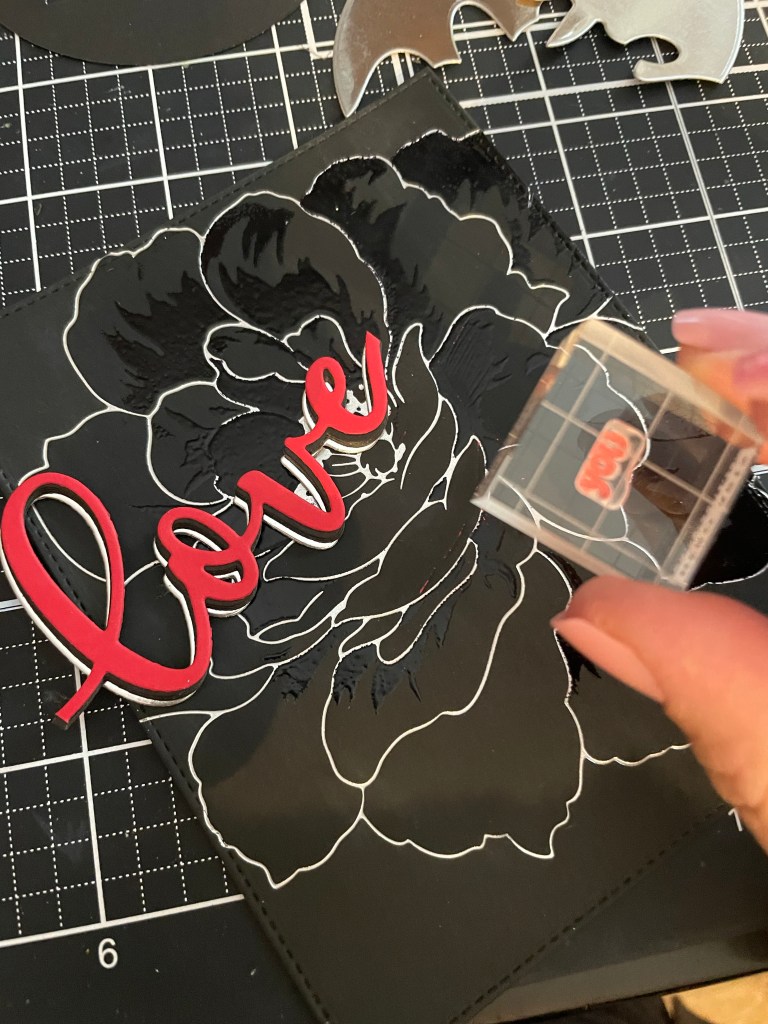
Next, I used Circled Greetings Love Die and cut it 6 times in black, once in silver, and once in red. I l stacked the black layers and glued them with liquid adhesive. I added the silver cut at the back slightly to the left to complement the silver foil of the floral image and the red cut on top and slightly to the right to create a dimensional and shadowed stacked sentiment.

I stamped the small “you” from the Paint a flower Camellia Waterhouse stamp set in red pigment ink and secured the die-cut onto the panel with liquid adhesive. Finally, I attached the completed panel to a white notecard with strong double-sided tape.
Altered/ Upcycled item
I combined Impressive Heat Embossing, Easy Die Cutting Techniques, and Easy Ink Blending Techniques for this project.
Paper Rose Topiary
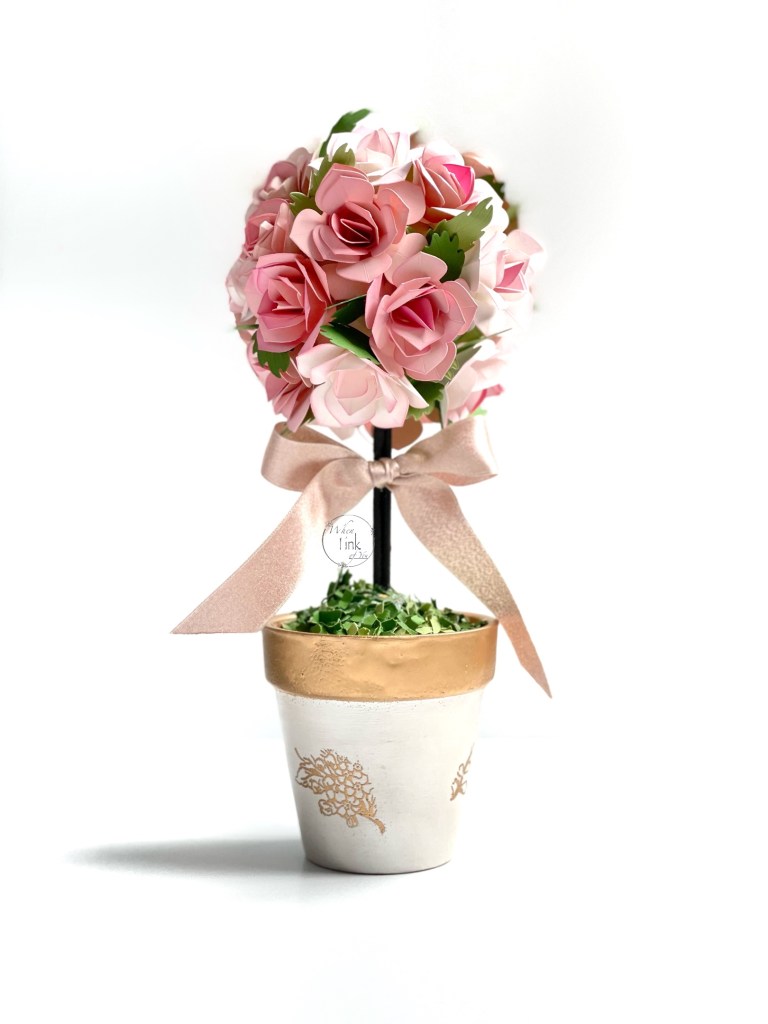
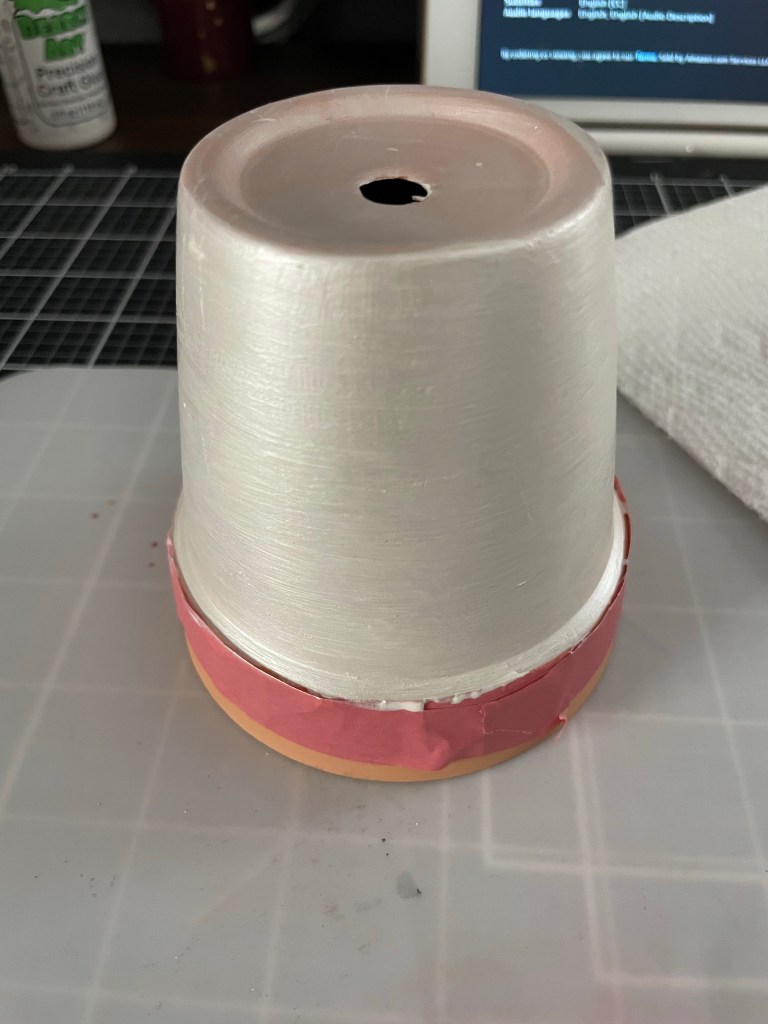
For this project, I wanted to give new life to a terra cotta pot I have had sitting around in my garage after my many, many, MANY failed attempts at gardening. If anyone reading this can make lovely things grow from seeds, I envy your talents as I clearly do not possess a green thumb. (HAHA!) I used the terra cotta pot, skewers from my kitchen, 2.9-inch styrofoam spheres, floral tape, and metallic acrylic paint leftover from a project I made last year.
I taped the pot’s rim with Washi tape and painted the pot with a paintbrush. Next, I did 2 layers of metallic white pearl acrylic paint. Once the paint was dry, I removed the Washi tape from the rim and inked it in clear embossing ink. Next, I poured gold embossing powder over the edge generously, and heat set it. I repeated until the pot’s rim was covered entirely in embossing powder.
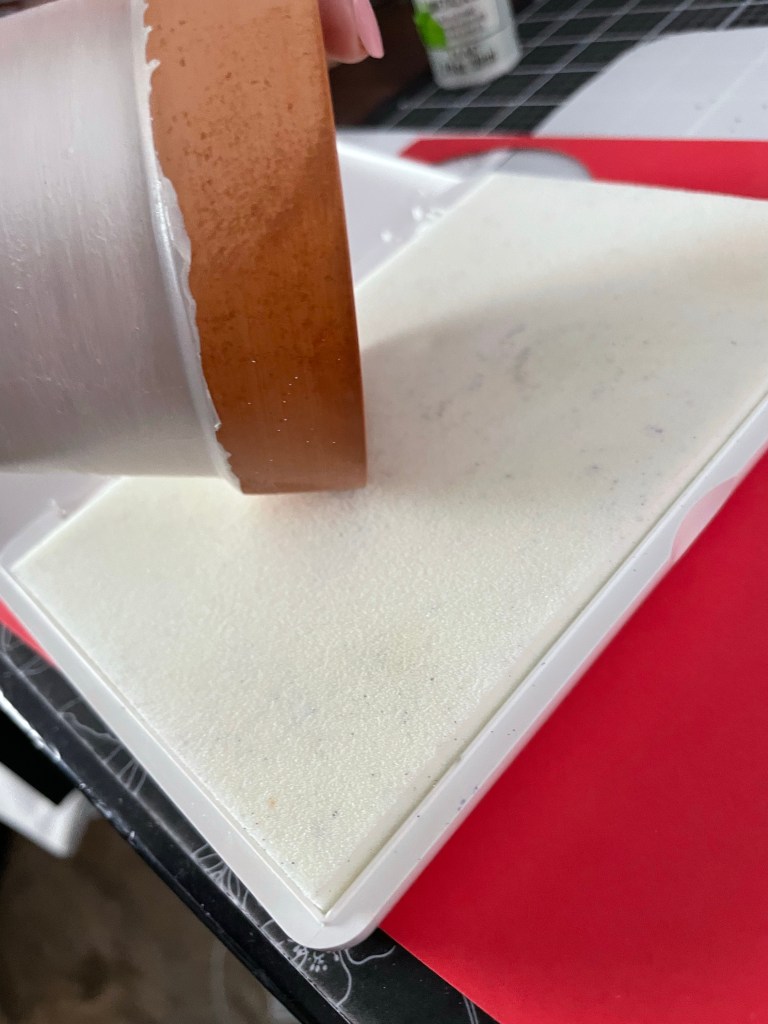
Next, I stamped the small bouquet image from Altenew’s beautiful Day stamp set in white pigment ink twice. I covered the ink in gold embossing powder and heat set it. I stamped this image twice and heat set it in gold embossing powder. I repeated the process with a smaller image from the same stamp set.


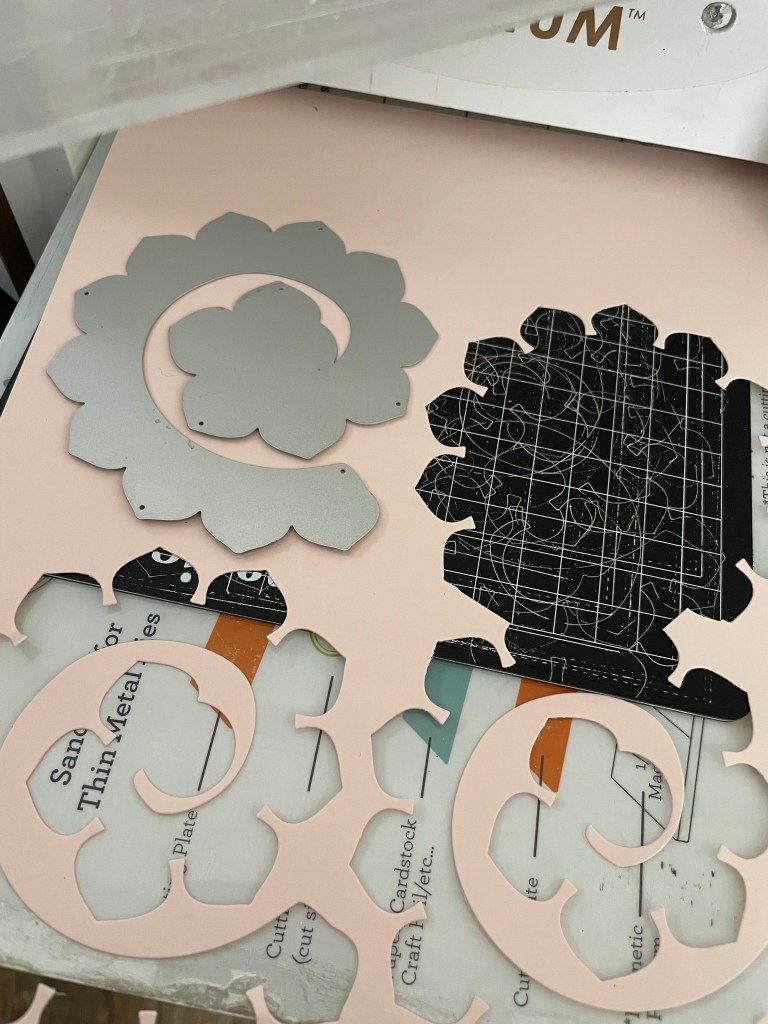
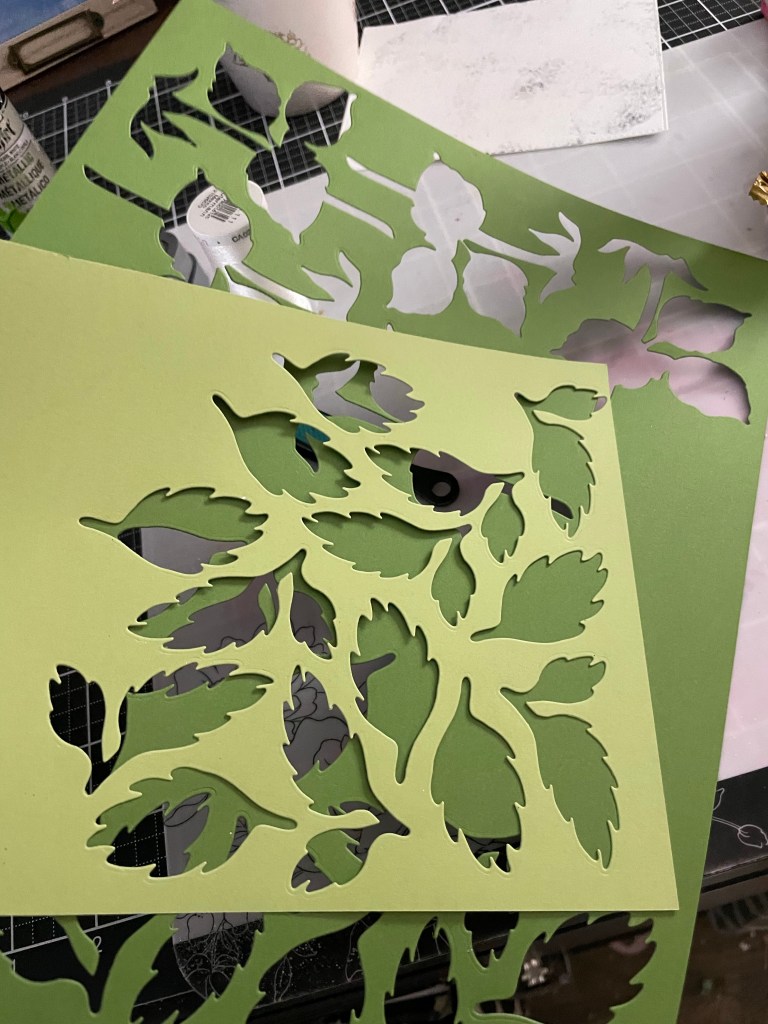
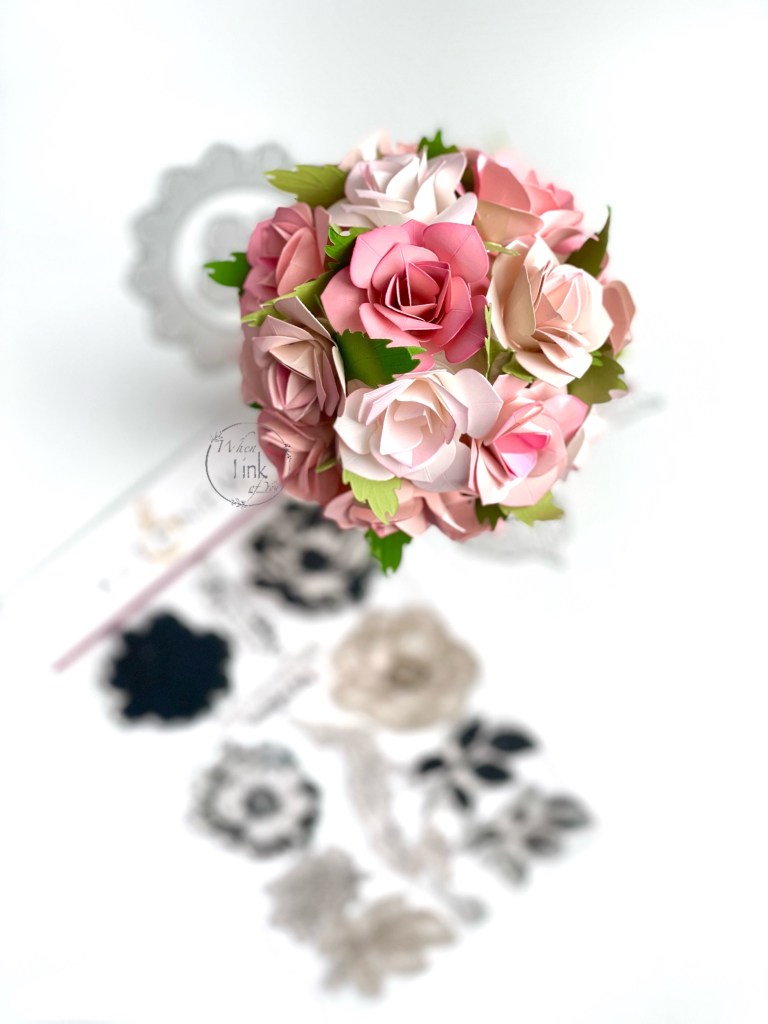
I created multiple roses (24-36, I did not keep count) in white, light, and medium pink card stocks, with Altenew’s Mini Rolled Roses Die Set. I also cut several leaves in two shades of green with the leaf die cuts from this set.
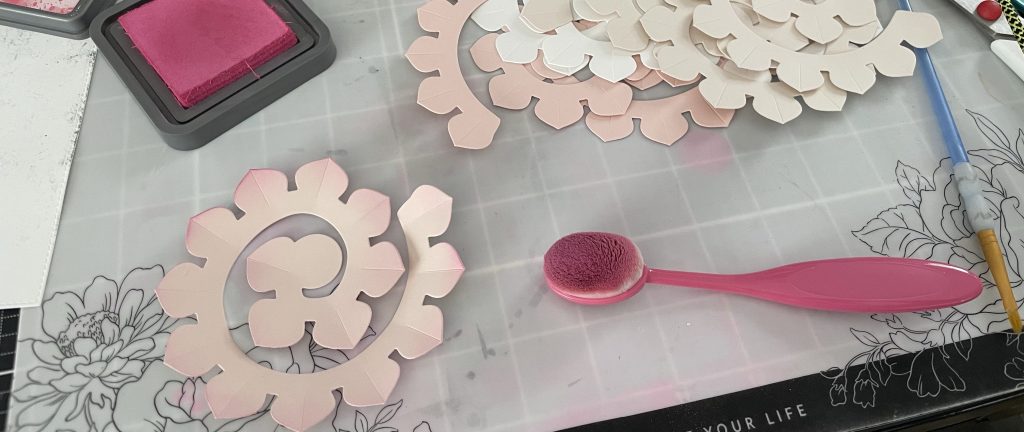
I inked the edges of the rose cuts with oxide inks ink picked raspberries, and worn lipstick.
I began to roll each rose with reverse tweezers and secured them with hot glue. Next, I rolled the edges of each petal using the end of a small paintbrush. Finally, I set the flowers aside.
I trimmed 3 wooden skewers, wrapped them in brown floral tape, and attached the bottom and top of the skewers together with floral tape.


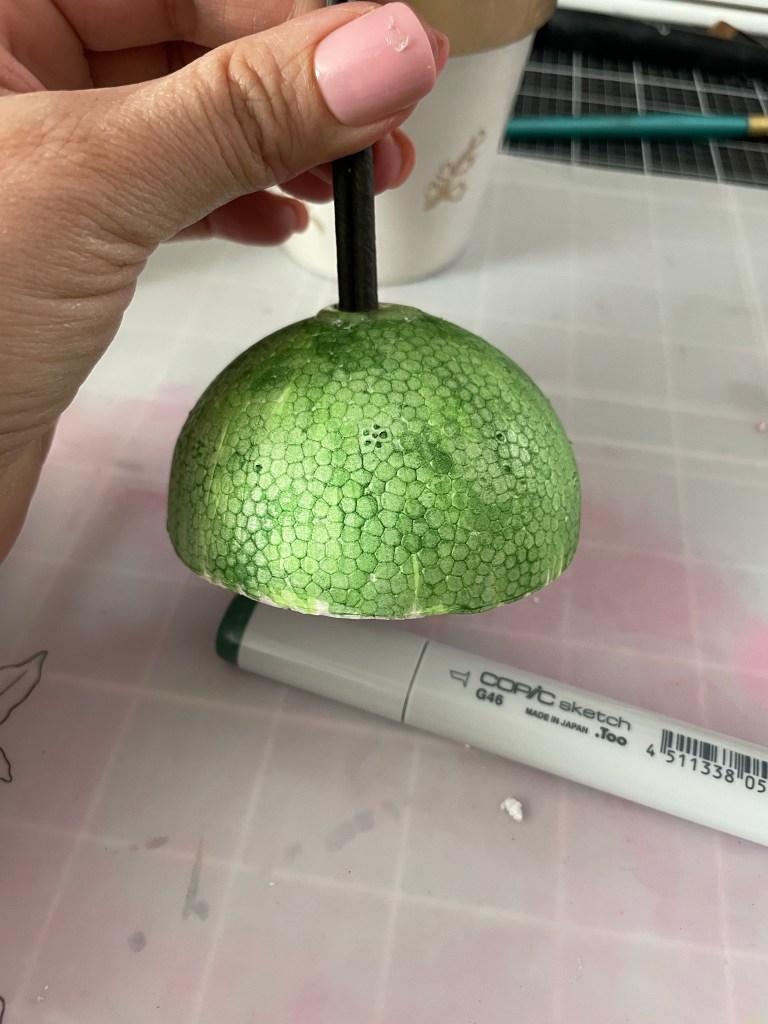
I inserted the skewers into a (previously cut) half foam sphere and into a whole sphere at the top. Then, I secured them with hot glue.
I added the paper roses with hot glue at the bottom of each rose, making sure the colors were evenly dispersed. Next, I added leaves in-between the roses as needed and attached them with hot glue. Finally, I painted the half-sphere with a Copic marker and covered it in liquid glue and transparent glitter.
I attached the half-sphere into the pot with hot glue. I wanted a mossy or grassy look at the bottom of the topiary without purchasing anything new. So I took what was left from the green card stock, ran it through my paper shredder, and sprinkled it around the bottom.
I added a pink satin ribbon to the branches made with the skewers and secured it with hot glue for a final touch.


2 responses to “Level 2 Final Challenge”
Oh my god! I think I always start this way when I comment but OMG! This looks amazing!! Everything from each and every card you made to that GORGEOUS project!! WOW WOW WOW. Bravo!! Top job on this!
LikeLiked by 1 person
Thanks so much, Erum!
LikeLike