
I’m happy to report that I have completed Level 2 of the AECP! It’s official; I am now in Level 3! I have selected the courses for this level, and I will be posting what I create just as before. The first class I will be talking about is Stencils Unleased. Stencils have been tricky for me as I’m never quite sure how to work with their results. I often feel they are too busy, and I find myself having difficulty using a very detailed background. This class has helped very much in my case. I learned ways to use stencils I had not thought of before. I hope you enjoy what I made!
Card 1
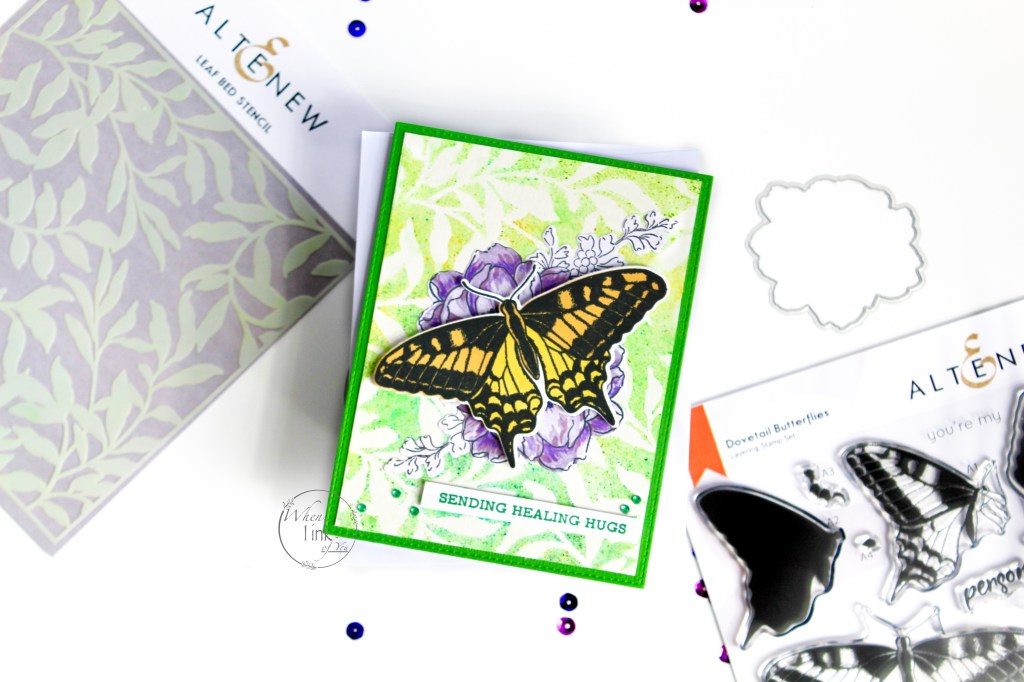
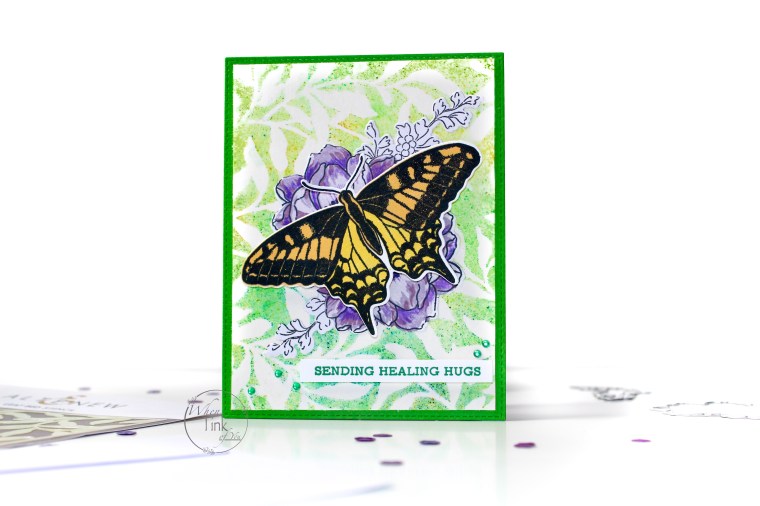
I chose to begin with the Altenew Leaf Bed Stencil. First, I sprayed the back with pixie spray and placed it over watercolor paper. Next, I grabbed a color pencil and a metal scrapper and began to distribute shavings over the stenciled area. Then, I used a misting spray with water to let the watercolor work its magic. I chose several green and a couple of yellow shades and repeated the process several times. Finally, I set the piece aside to dry.
For card centerpiece, I used Altenew’s Beautiful Day Stamp and Die set (a favorite of mine) and the SugarPlums Oval Dyes Ink set. The butterfly was created with Dovetail Butterflies Layered Stamp Set and Dies and Drew Drop Memento Inks in Dandelion and Cantaloupe. The sentiment is from Sentiment Strips 2.
I secured the black and white floral elements to the center with liquid adhesive. Next, I used foam squares for the butterfly and sentiment and added the piece to green card stock. Once the work was attached to an A2-sized card, I added green gem embellishments for a bit of sparkle.
Card 2

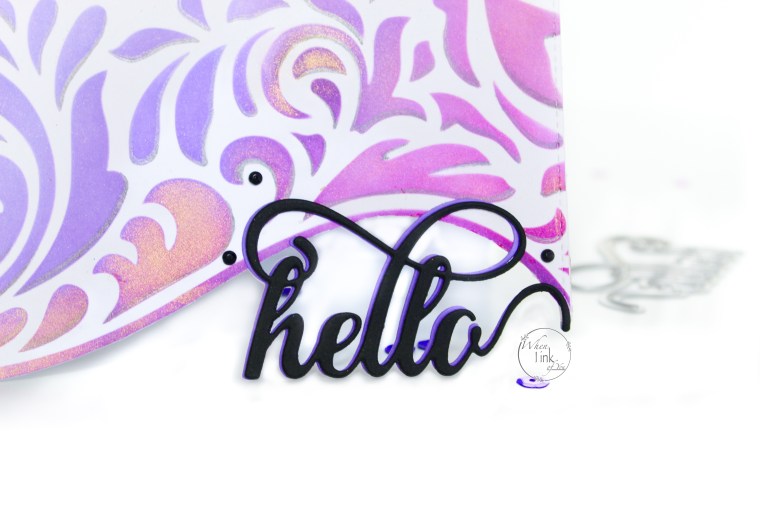
For this peek-a-boo card, I chose Elegant Swirls Stencil. I’ve had this one for a while but have been hesitant to use it before. I used Pixie Spray to secure this stencil to Neenah Solar card stock. Next, I blended Distress Oxide Inks in Seedless Preserves and Wilted Violet over the stencil. Next, I brushed Perfect Pearls in gold in a few areas before the ink had thoroughly dried and removed the stencil. Once the ink was dry, I began shading the lower lines and curves of the swirls with a black colored pencil.

I cut along the large curve of the stenciled image and out of a white notecard. Next, I die-cut “Hello” in black, purple, and white using Altenew’s Fancy Hello Die. For a seamless look on the inside, I glued the white “Hello” on top of the notecard first and then added the inked panel. Next, I added the purple hello directly to the white and offset the stacked black hellos. Finally, I added three black gems in a triangular pattern for sparkle.

3 responses to “Stencils Unleashed!”
So so so gorgeous!
LikeLiked by 1 person
[…] are always blown away by Irene’s creations and this one is no different! We love the gorgeous ink blending and the depth she has […]
LikeLike
Ever so classy and delightful xx
LikeLiked by 1 person