

I love heat embossing! I love the new ways of using this technique that I learned in this class.
Card 1
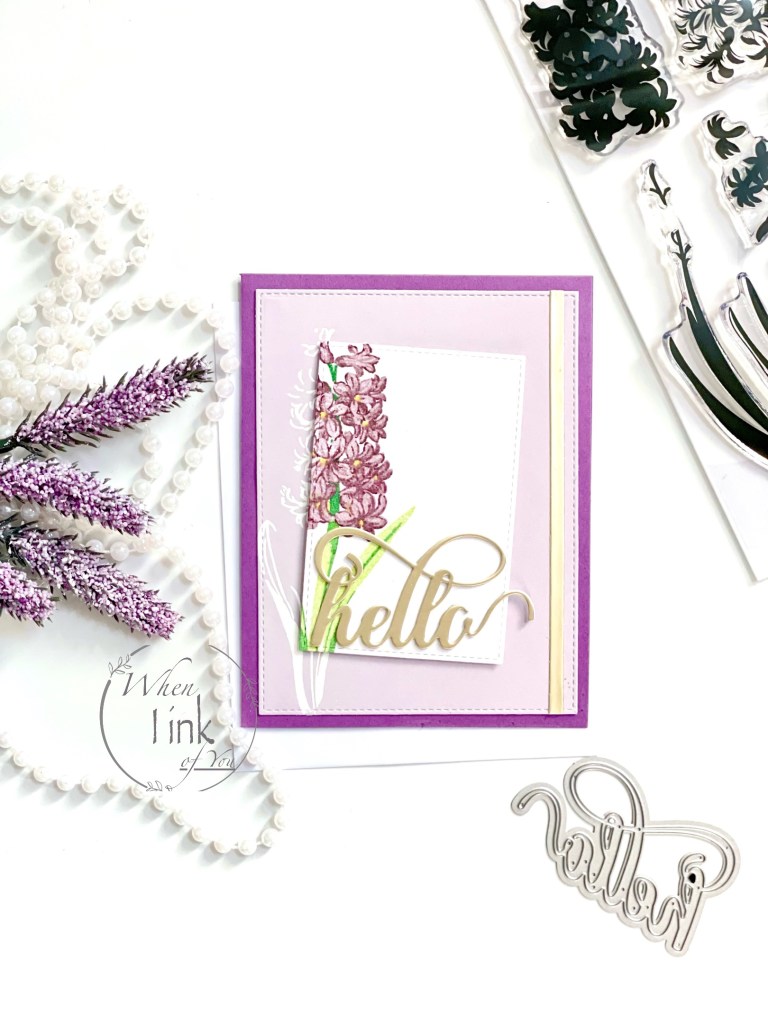
I chose to use Altenew’s Build-A-Flower Hyacinth Layering Stamp Set for this card. I first stamped the detail layer stamps onto lilac-colored card stock in white embossing powder and set it aside. Then, I began to layer the flower on white card stock using Altenew’s SugarPlums Crisp Dye Ink Set. I used Pale Mauve, Amethyst, and Grape Agate. Finally, I used Momento dew drop ink for the foliage and stem in new sprout and cottage ivy.

I cut a small portion of my full-color flower at an angle. Next, I aligned it with the white flower and attached it with foam tape. Next, I die cut “hello” using Altenew’s Fancy Hello Die once in matte gold and twice in white, then stacked them with liquid glue. Next, I cut a thin strip in the same matte gold and adhered it near the right edge with double-sided tape. To finish, I added this piece to a purple notecard.
Card 2
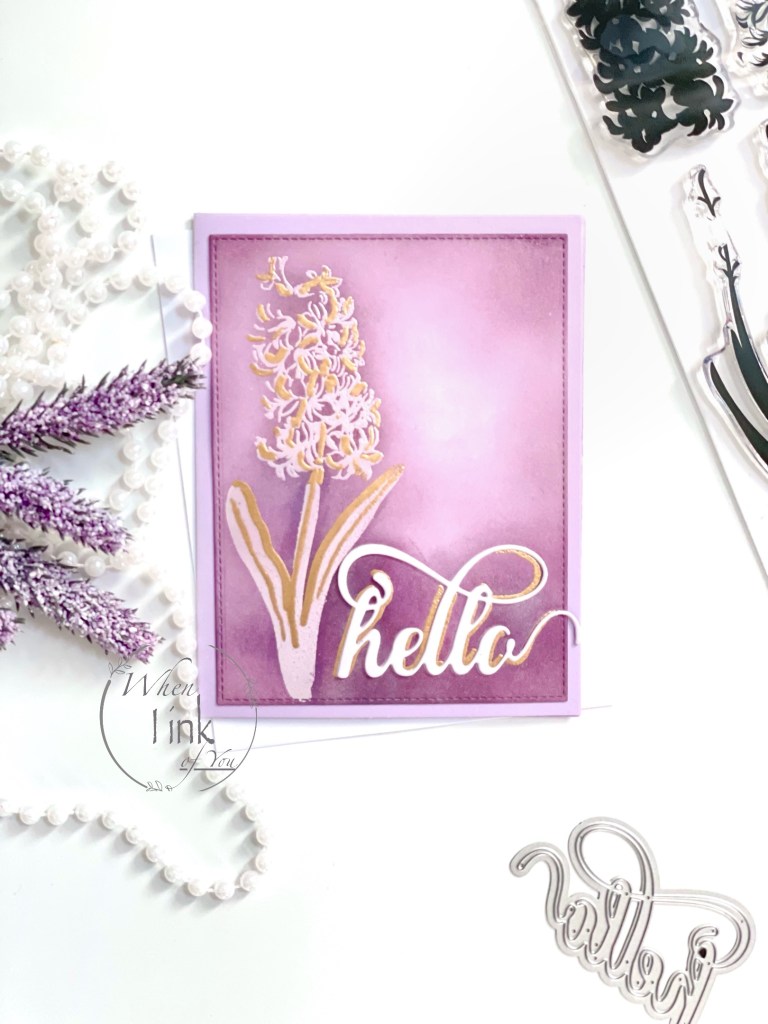
I created this card using the layered heat embossing technique. I once again used the Hyacinth Layering Stamp Set. I stamped the foliage base and the fine detail floral stamp in pearl embossing powder. I added gold embossing using a clear embossing pen over the heat set pearl embossing.
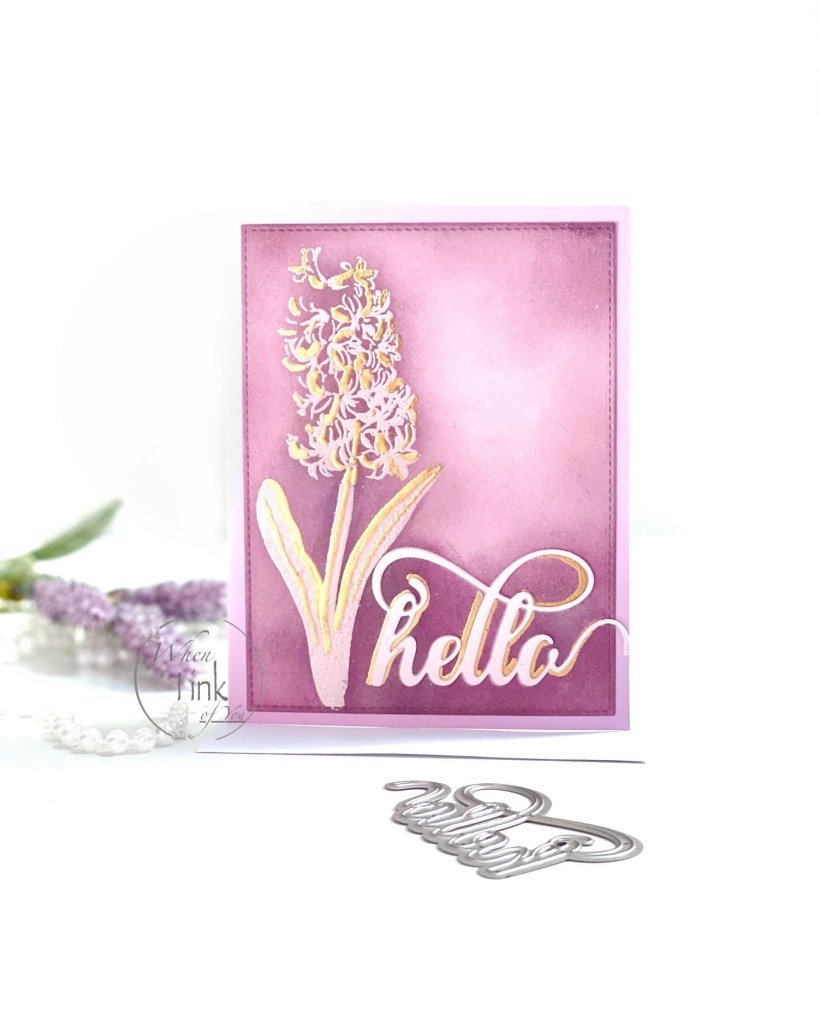
I blended Crisp Dye ink in Plum around the edges and the lower right side of my project. Next, I cut “hello‘ and used one die cut as a mask to blend the ink. Once the blending was complete, I used the clear embossing in pen to outline “hello,” and heat set it in gold powder. I next attached a stacked hello with liquid glue.
I attached my project to a lilac-colored notecard with double-sided tape.
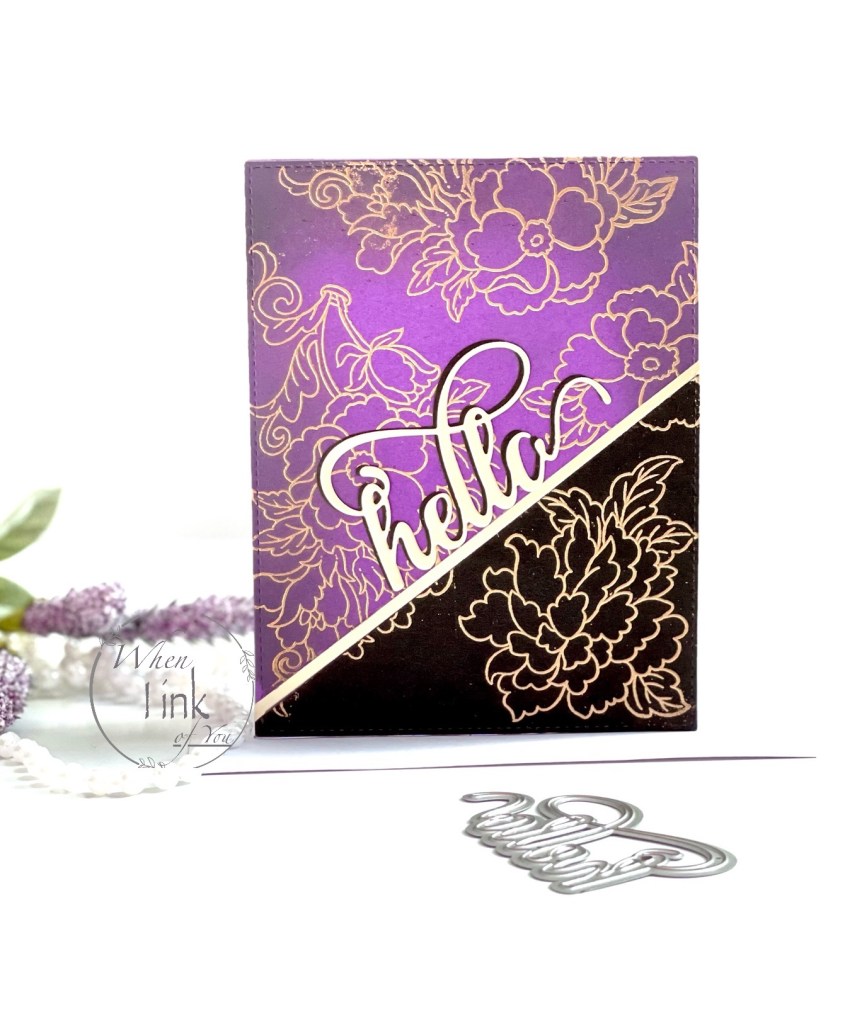
Card 3
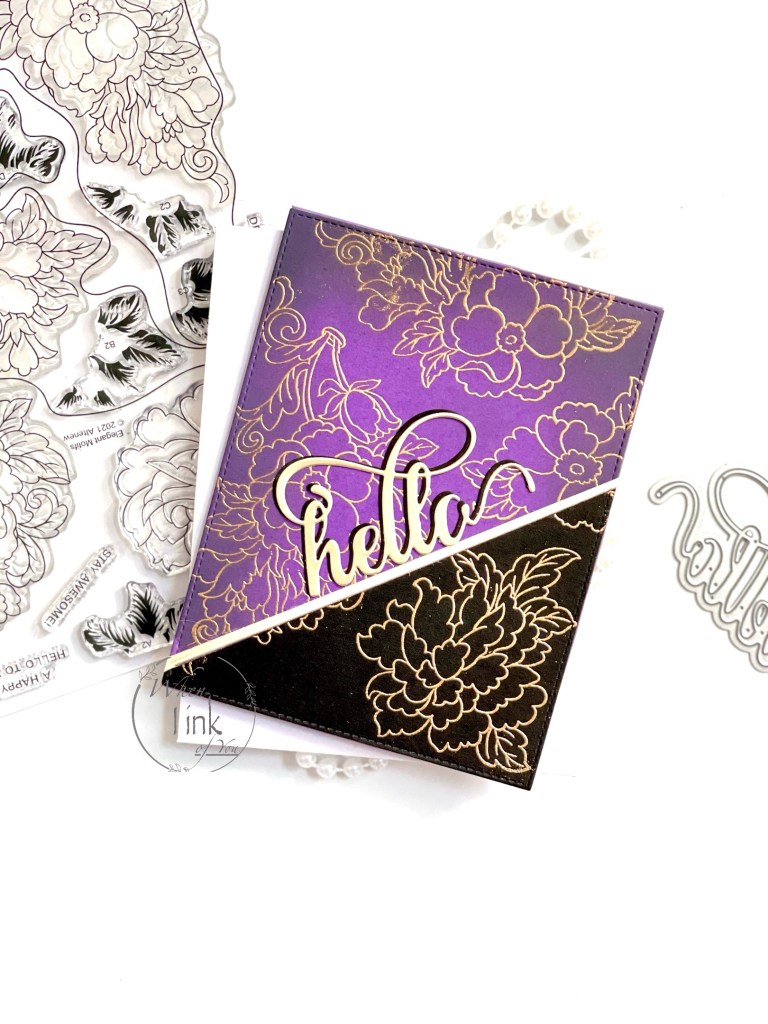
I created card three by prepping purple and black card stocks with anti-static powder. Then, using my Misti stamping tool, I arranged stamps from Altenew’s Elegant Motifs Stamp Set and pressed them onto both card stocks in clear embossing ink. I then poured gold embossing powder and heat set it. Next, I cut the card stocks together at an angle. I chose two of the cuts, aligned them, and used Washi tape to secure them together at the back of the paper. Next, I cut a thin strip of matte gold card stock and adhered it to the diagonal cut. Finally, I added “hello” in matte gold with a black cut offset behind it and placed it alongside the strip.

One response to “Impressive Heat Embossing”
Brilliant work as always!! I have seen these cards on IG! I missed this gallery before!
LikeLiked by 1 person