

In this class we learned how to draw inspiration from objects around us, and how to utilize a color wheel when we need a creative boost.
Card 1
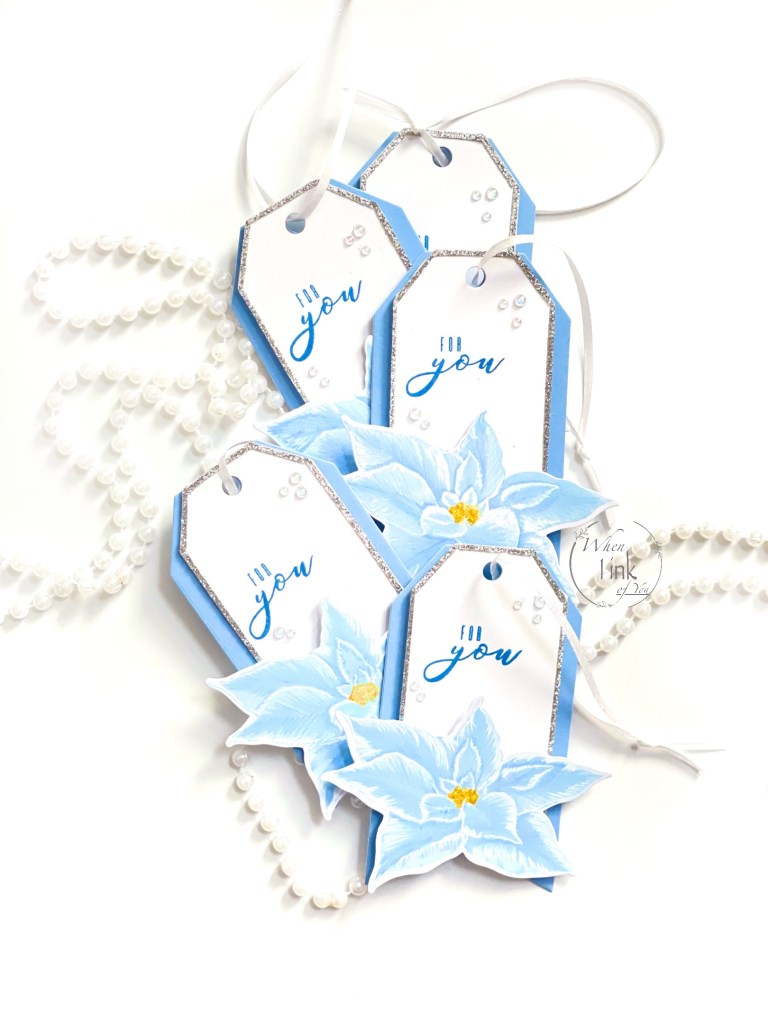
Card 1 is not a card at all. Instead I chose to make gift tags inspired by my Christmas tree. I have always loved the non-traditional Blue, silver and pearl ornaments I first purchased back in 2005, for my husband and I’s first Christmas. However, my color scheme is not always easy to find in decor or wrapping.

I have a confession… I am not a member of the blue flower fan club. I don’t gravitate towards them when creating despite having a few blue poinsettias displayed on my tree. I went against my usual rule for these tags. I began with Altenew’s Build-a-Flower Poinsettia Layering Stamp and Die Set. I chose momento dew drop ink in summer sky for all the poinsettia layers. I began with the base, then the mid detail stamp, and finally the fine detail. I skipped the outline layer entirely as I did not want harsh lines. instead, I added detail with a colored pencil and white gel pen. I used Altenew’s Crisp Dye Ink in Butternut and Pumpkin Pie for the center of the flower. I added Stickles in diamond over the center for a bit of sparkle.

I cut tag shapes with Altenew’s Terrific Tags Die Set. I used blue card stock for the larger portion and white for the smaller. I stamped “For You” included with the poinsettia stamp set in summer sky. I cut thin silver glitter card stock strips and used them to border the white tag. I then attached the white tag to the blue with foam tape. I attached the poinsettia with double-sided tape and foam tape where needed. For a final touch of sparkle, I added iridescent beads. Finally, I added a white satin ribbon to hang my tags onto wrapped gifts.
Card 2
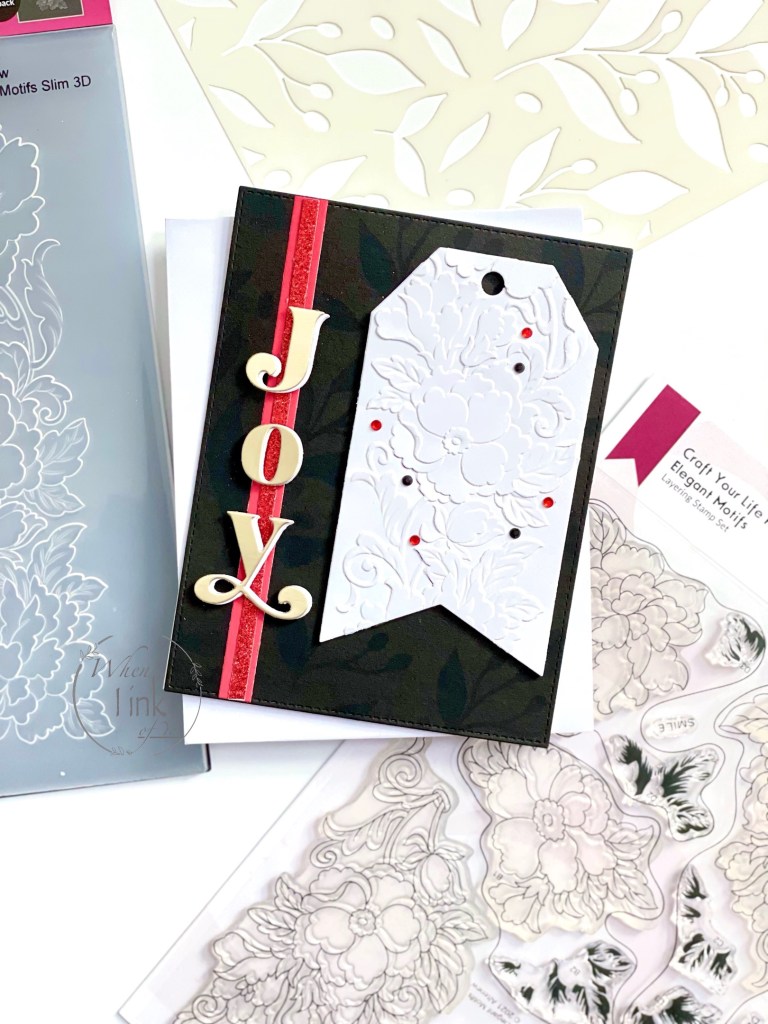
I created a second also drawn from inspiration. While shopping for blue wrapping paper, I came across luxury black wrapping paper rolls. Red and yellow, or in this case, gold, are complimentary and part of a triad in the color wheel.
I began by using Altenew’s Slim Botanical 3D Embossing Folder and white card stock. Next, I cut my embossed paper with a tag shape from Altenew’s Terrific tags. Next, I added black foam tape to the back and set it aside. I then taped Altenew’s Leaves and Berries Stencil onto black card stock and blended watermark ink over the stencil. Once dry, I attached the embossed tag onto the right side of the black card stock. Next, I cut red and red glitter card stock into strips and used double-sided tape to attach them to the card. Next, I cut “Joy” in matte gold foil card stock and used foam tape to attach the letter over the red strips.


One response to “Color Your Day”
These are absolute perfection!!!
LikeLiked by 1 person