
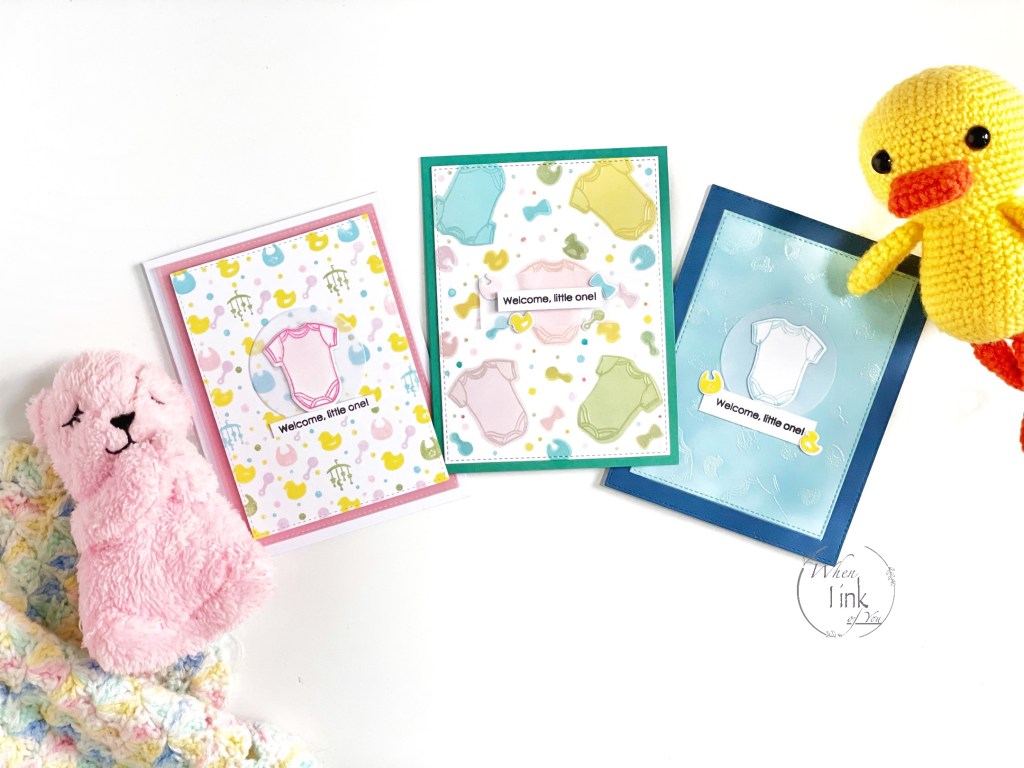
This course is all about creating backgrounds that go beyond basic stamping and it helped me think outside the box. I chose a baby theme for all three cards.
Card 1
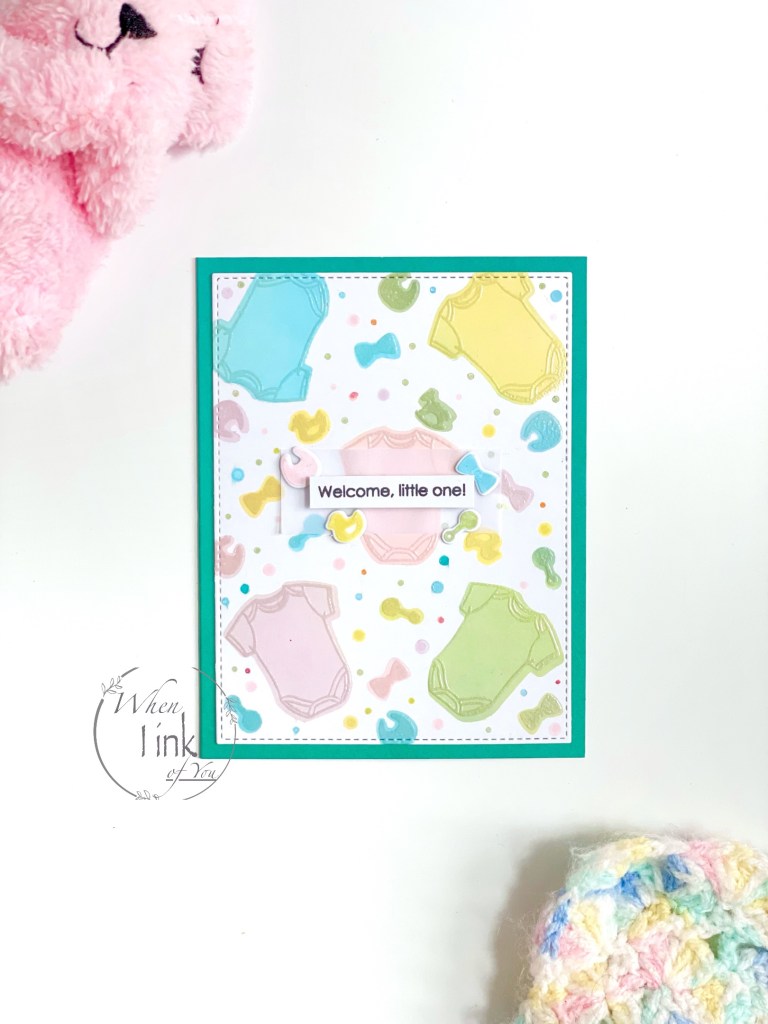
I began by creating a stencil with the onesie-shaped die. Next, I made five cuts in different directions and created smaller stencils with the rest of the shapes in this set. I then blended ink using the onesie stencil first and followed with the smaller shapes at random. Next, I let the ink dry and then prepared the surface with anti-static powder. Next, I stamped the images with clear embossing ink, poured white pearl embossing powder, and heat set it. Finally, I added various dots using the dot stamps included in this set.
I stamped “Welcome, little one!” on white card stock and attached it to white vellum with foam tape. Next, I added a strip of double-sided tape on the back and attached it to my background. Finally, I added die-cut shapes I set aside when creating the stencils, stamped the images, and attached them to the vellum with liquid glue.
I attached my completed piece to a teal card for a gender-neutral look.
Card 2
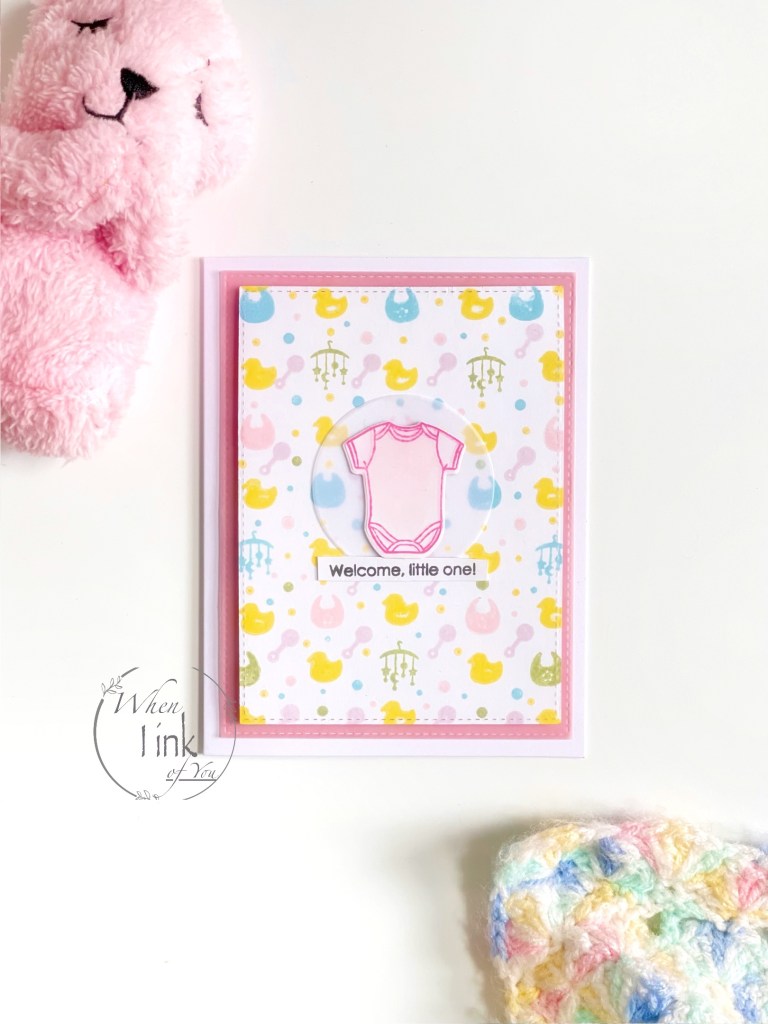
I created this card by simply stamping shapes at random to create a patterned paper look. I lightly shaded a die-cut set aside from card one and stamped the onesie outline in picked raspberries ink. I used double-sided tape to attach the cut to a small vellum circle and centered it onto my background. Next, I stamped “Welcome, little one!” onto white card stock and cut it into a small strip. I placed it at the bottom with double-sided tape.
I attached pink vellum to a white base card with double-sided tape. Next, I placed foam tape on the back of my complete patterned paper piece and centered it.

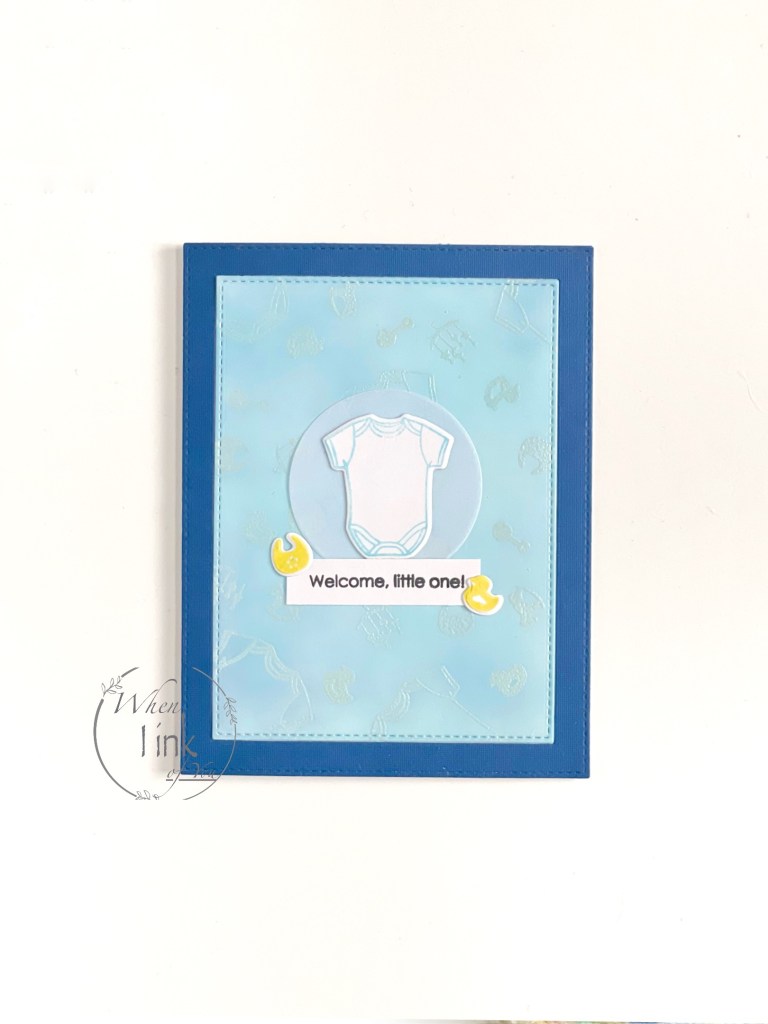
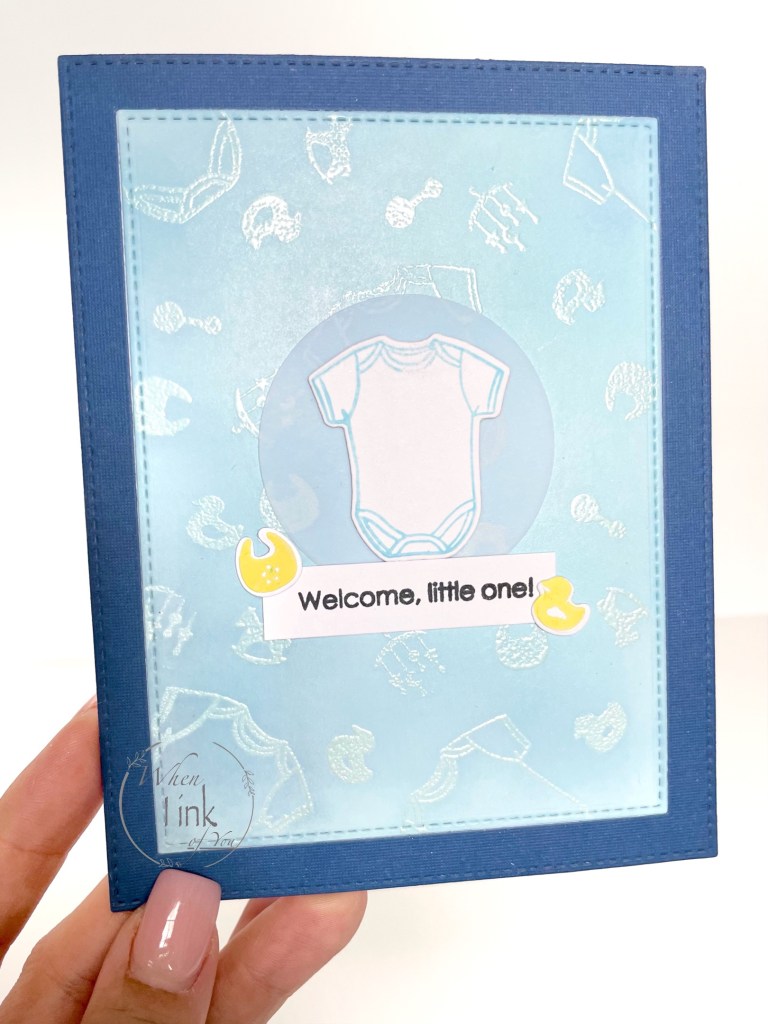
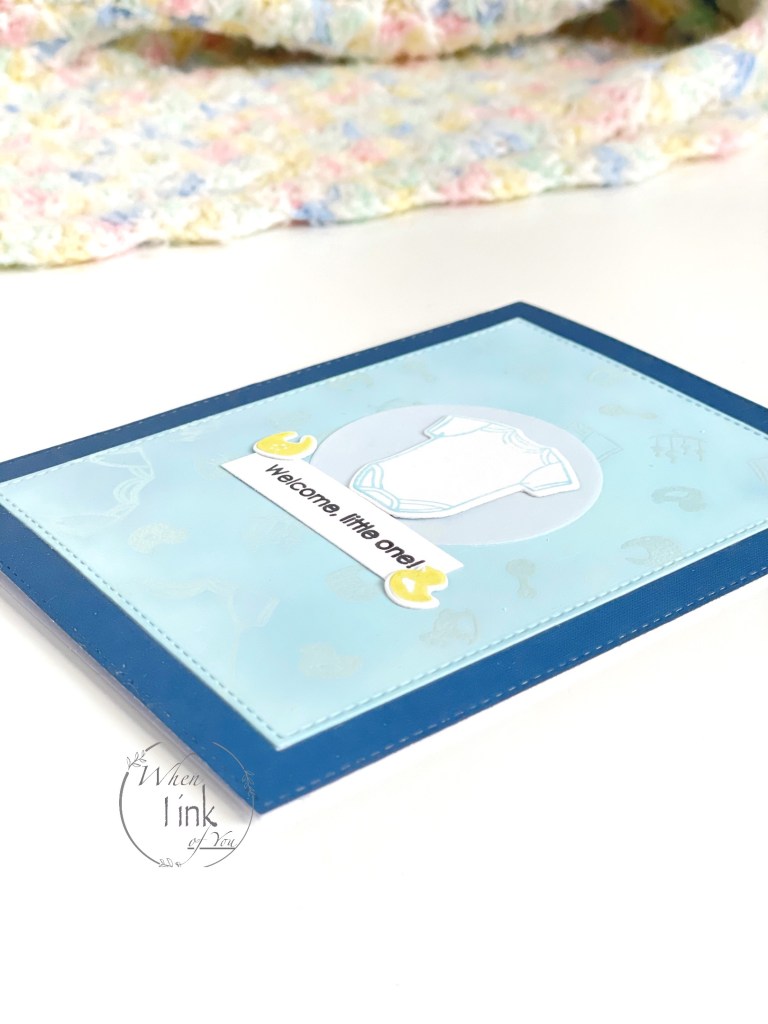
Card 3
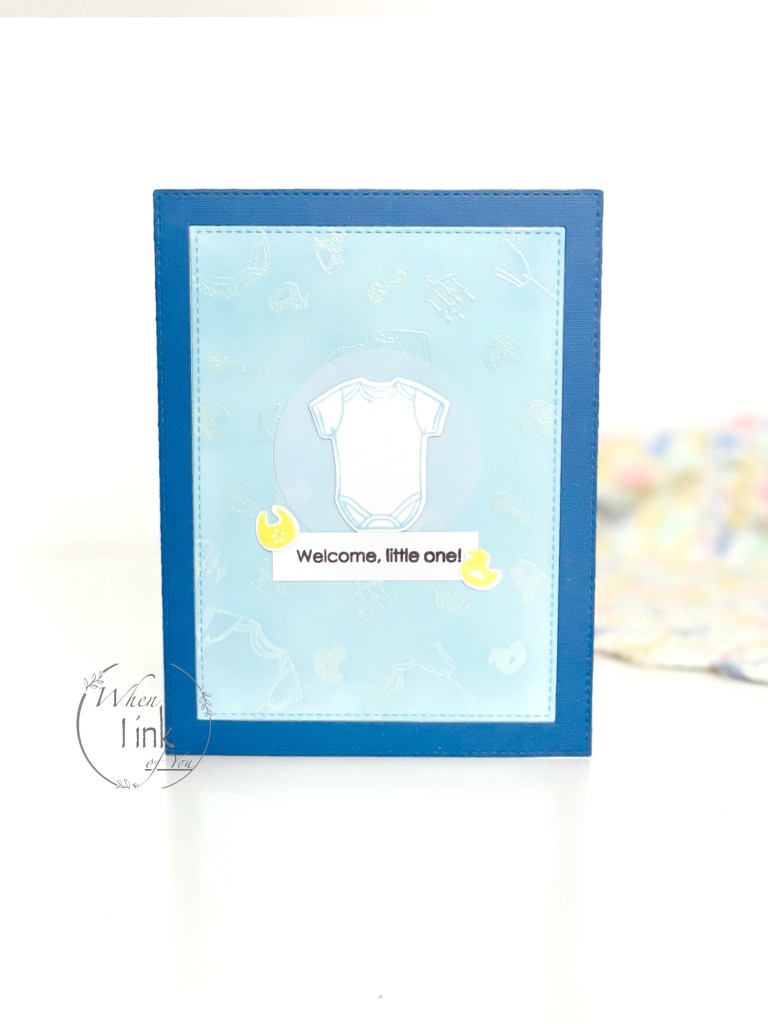
I began by blending ink onto white card stock cut to 4.75 inches by 3.5 inches. Once the ink was dry, I prepared the surface with anti-static powder and stamped the images at random. Next, I poured white pearl embossing ink and heat set it.
I placed a onesie die-cut stamped in blue and centered it to a white vellum circle. Next, I added the sentiment on a white strip and attached two die cuts in yellow for a pop of color. Finally, I die-cut navy cardstock with a frame in the center to fit my piece for a simple inlay.
Materials/Products
- Little One Stamp/Die Bundle
- Distress Oxide inks Spun Sugar, Picked Raspberries, Tumbled Glass, Squeezed Lemon, Bundled Sage, and Milled Lavender
- Clear Embossing ink
- Vellum
- Black dye ink
- Double-sided tape

3 responses to “Beyond Basic Backgrounds”
Beautiful cards.
LikeLike
Absolutely brilliant cards, Irene!! you rock!
Thank you for submitting your wonderful work to the AECP assignment gallery.
LikeLiked by 1 person
Thank you so much, Erum!!!
LikeLike