In this course, I learned of different ways to use die-cutting shapes. Not only can you use them for their intended purpose, however, you can also use them to emboss your projects. I love this technique and the many different ways to stretch your supplies.
Card 1

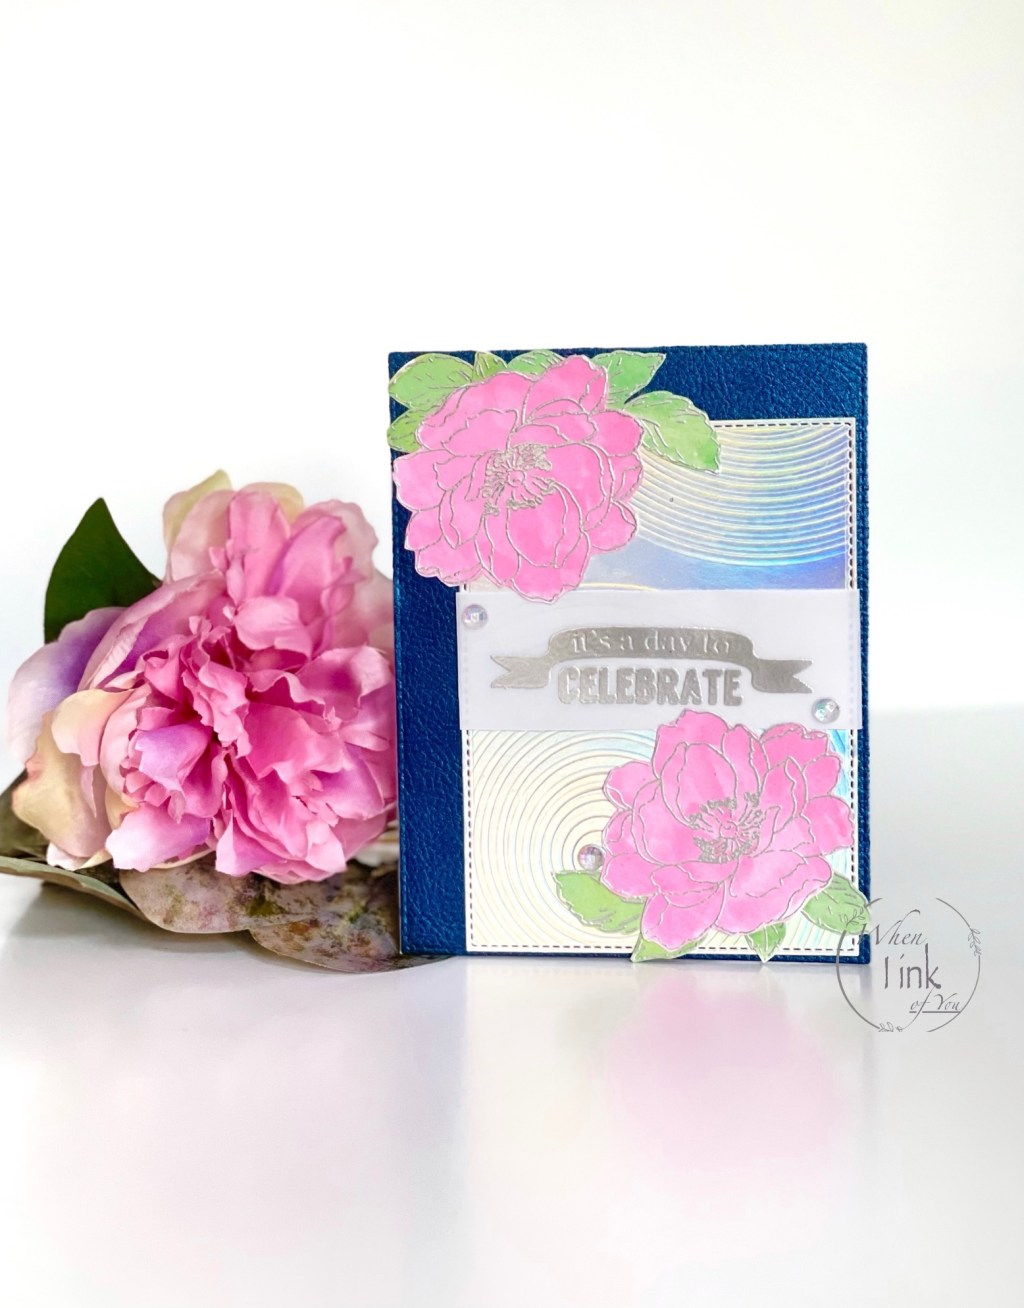
I was eager to try out embossing with die shapes. I selected round nesting dies and holographic card stock for my first project. I placed my paper onto my base and bottom plate. I organized the circle dies and taped them together and onto the paper with Washi tape. I ran it through my platinum machine a few times to emboss the card stock in multiple places. I used a rectangle stitch die frame to cut out a small portion of my piece and set it aside.
On white card stock, I stamped outlined images from Altenew’s Beautiful Day Stamp Set. This stamp set has become a favorite of mine and I find myself using it for several projects. I used clear embossing ink and silver embossing powder to set my images. I used Distress Oxide ink in Picked Raspberry and mixed it with water to color the florals in. I repeated the process in Distress Oxide ink in Mowed Lawn for the leaves. First, I tried coloring an acrylic block to stamp my color but did not like the result. I used a brush for the remainder of my stamped images and fussy cut them out.
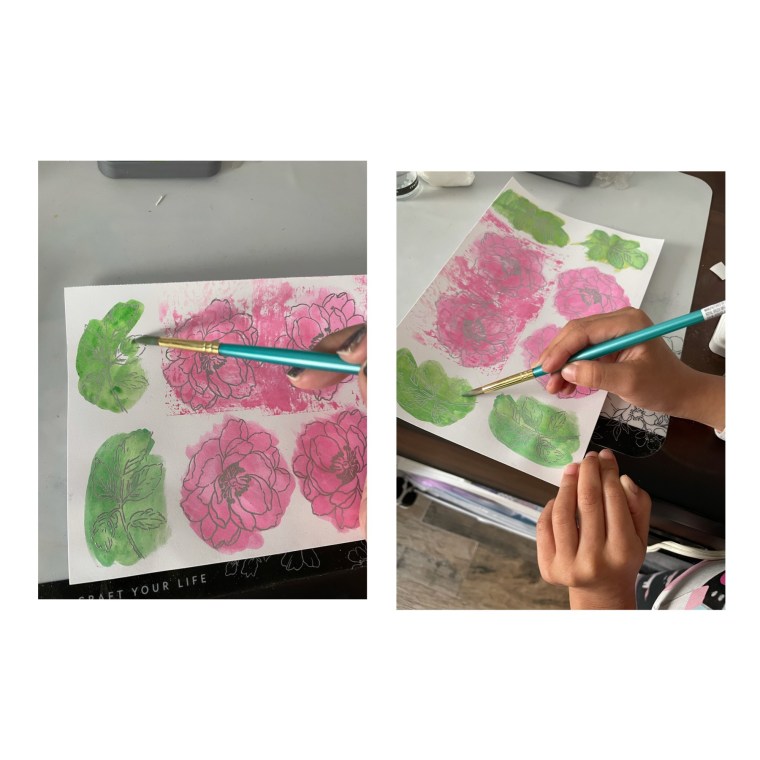
On the left: Watercoloring stamped images. On the right: My 6 year old daughter wanting to join in on the fun.
To add more texture to my project, I chose navy blue faux leather for the background. I trimmed the leaves and arranged them first. I secured the leaves and flowers with double-sided tape.
The sentiment from Altenew’s Birthday Bash Stamp Set was stamped with clear embossing ink and silver embossing powder. I didn’t want to hide the holographic paper too much, so I chose to use white vellum for the sentiment’s background. Since vellum wasn’t part of the original plan, I had to do “card surgery” to add it. I lifted the holographic card stock just a bit and tucked the overlapping vellum behind each side. I pressed down with force to make sure it was secure. I added iridescent gems for a touch of sparkle and secured my complete piece to the base card.

Materials
- Altenew Beautiful Day Stamp Set
- Altenew Birthday Bash Stamp Set
- Clear Embossing Ink
- Silver Embossing Power
- Distress Oxide Ink in Picked Raspberries and Mowed Lawn
- Paint brush
- Faux Lather
- Holographic card Stock
- Double-Sided Tape

Card 2

I began card 2 with plain white card stock and die cut it with a stitched frame. I traced vintage roses images (I had these leftovers from all about layering classes) in the bottom right corner, I placed my die shapes over it and ran them through my die cutting machine. I traced the white card stock over pink adhesive foam, and die cut it as well.
I placed the pink adhesive foam over the card base, and I glued the foliage and rose image in the die-cut space on the bottom right corner. I directly stamped “Hello, Friend” from Altenew’s Mega Greetings 3 Stamp set onto the white card stock in black dye ink. I felt the white needed a bit of color. I used Distress Oxide ink in Spun sugar and a blending brush to add color around the edges. I attached this piece over the pink foam with double-sided tape. Lastly, I glued pink sequins to the upper left and bottom right corners of my card.
This simple yet beautiful project took no time at all from start to finish.

Materials
- Altenew Vintage Roses Stamp and Dies
- Altenew Mega Greetings 3 Stamp Set
- Black Dye Ink
- Distress Oxide ink in Spun Sugar
- Adhesive Pink Foam
- Double-sided Tape

One response to “Easy Die Cutting Techniques”
Beautiful cards!! Thank you for submitting your wonderful work to the AECP assignment gallery.
LikeLiked by 1 person