

It’s challenge time!
The mission: Create two sets of cards (one masculine and one feminine) worthy of gifting.
Requirements: Use three techniques learned in level one and use recycled material in either the cards or their packaging.
Since my family and I are fluent in English and Spanish, I made my card sets bilingual.
Set 1

II wanted bright colors and golden tones for the feminine set. I relied heavily on pinks, yellows, gold, and rose gold.
Card 1

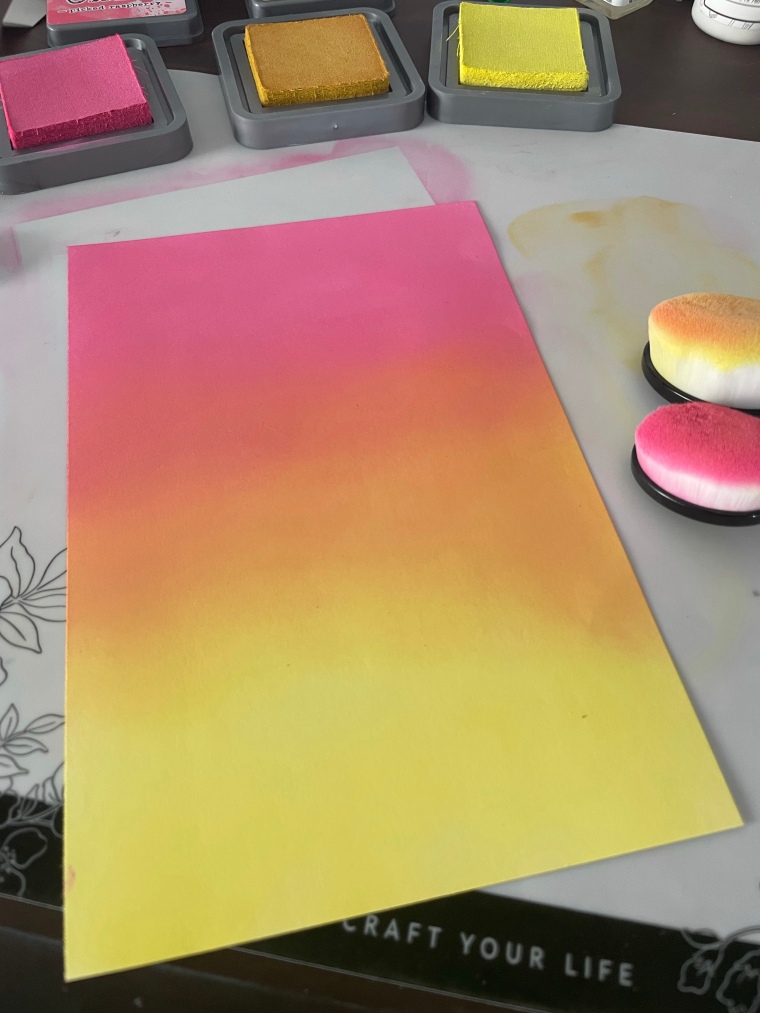
I created this card by using techniques learned in All about layering, Easy ink blending, and Easy die-cutting Techniques. I began by stamping butterfly outlines onto white card stock. I stamped the inner layers with distress oxide ink in spun sugar, worn lipstick, and festive berries. Once the inks were dry, I placed coordinating dies over my stamped images and ran the paper through my die cutter using the embossing plate. This technique left an outline around the images rather than cutting through. Now that the images were complete, it was time to work on the background. I stamped my butterfly outlines onto masking sheets and use the coordinating dies to cut them out. I placed my masking paper over my stamped images and began to blend my background. For the background color, I used distress oxide inks in Picked Raspberries and Squeezed Lemon. I blended the Picked Raspberries over the top half of my paper and Squeezed Lemon at the bottom. I blended the two in the center to create an orange hue to resemble a sunset.
Once the ink was dry I removed the masking sheets. I then prepared my card surface with anti-static powder and stamped “Gracias” (thank you) from Altenew’s Thanks around the world Stamp Set in clear and embossing ink. I poured black embossing powder onto my sticky ink and heat set it. I attached my project to an A-2 sized notecard using double-sided tape. For the finishing touch, I added beads with liquid glue.


Card 2

The second card of the set was created using techniques from All about Layering, Stencil Techniques, and Let it Shine.
I began this card by die-cutting white card stock and rose gold card stock with the leaf frame cover die. I used washi tape to tape the die-cut over the base sheet. I then used distress oxide Ink in tatted rose to ink my base. Once the ink was dry, I prepared my surface with anti-static powder and stamped thank you in clear embossing ink. I used gold embossing powder to heat set my sentiment. I placed the rose gold cut onto my inked base. I placed it offset to give extra detail and adhered it with liquid glue. I think created the butterfly. I began by using the solid images first, followed by the outline stamp in clear embossing ink. I heat set it in gold embossing powder.


I attached my project onto the card base with double-sided tape before completing it. To give the butterfly dimension, I used foam tape at the top portion of the wings. I used double-sided adhesive tape for the antennae and body.
Tip: Your foam tape will become much more flexible by removing the paper backing before placing it.

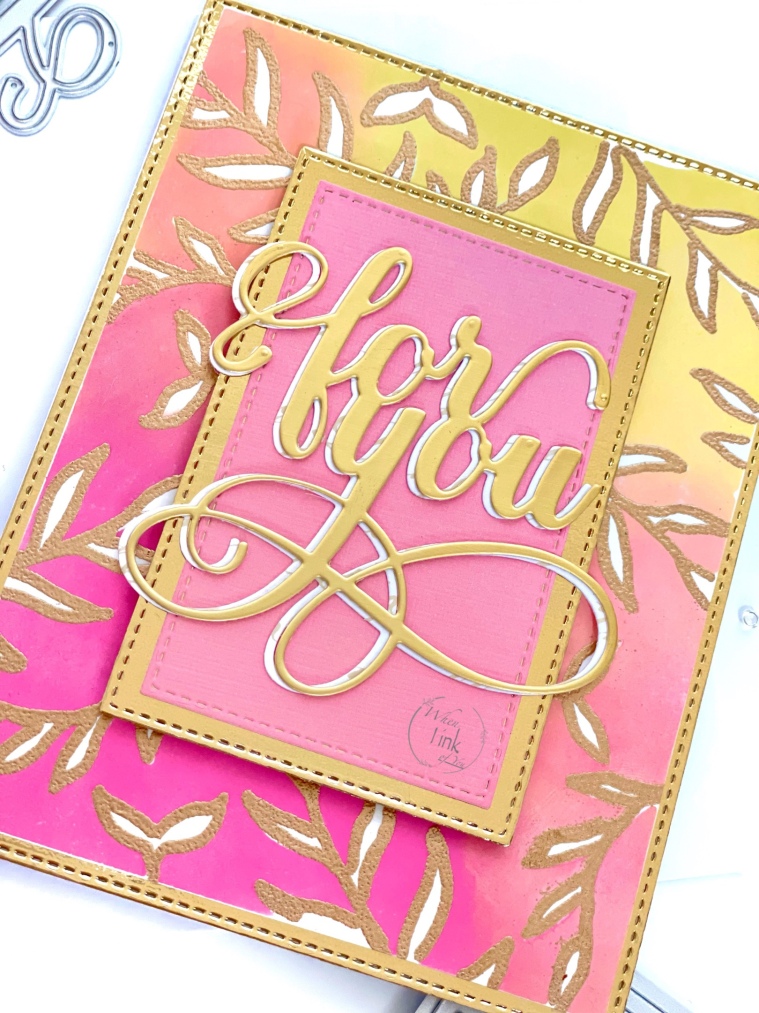
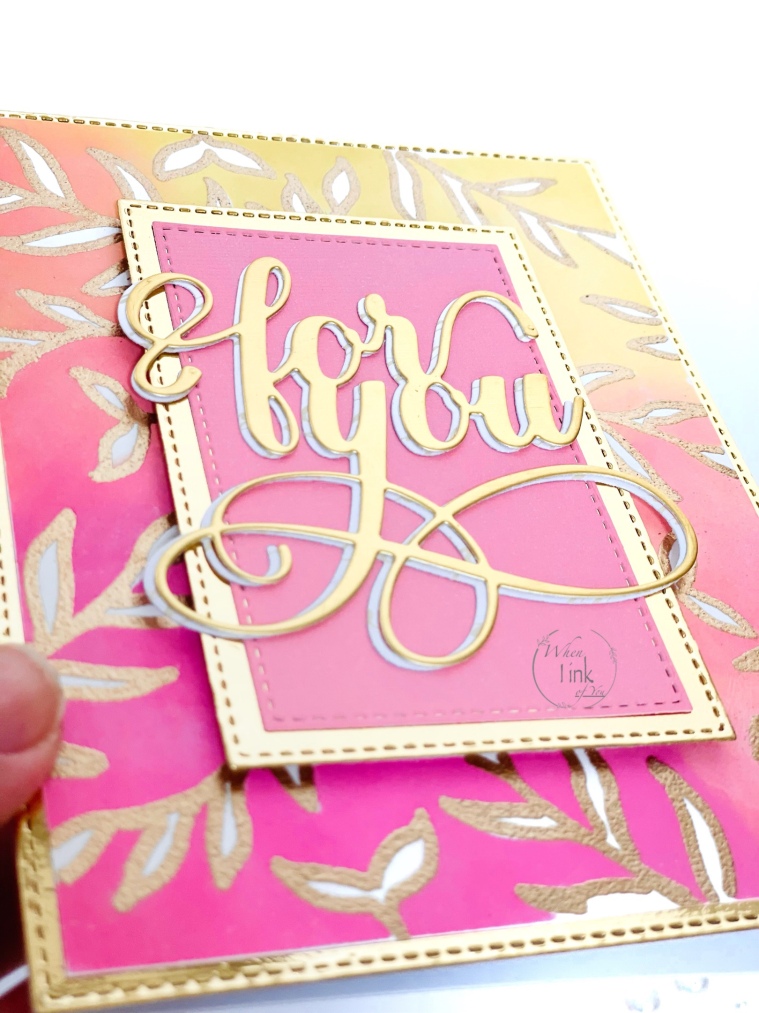
Card 3
This card shows techniques from Easy ink Blending, Let it Shine, and Stencil Techniques.
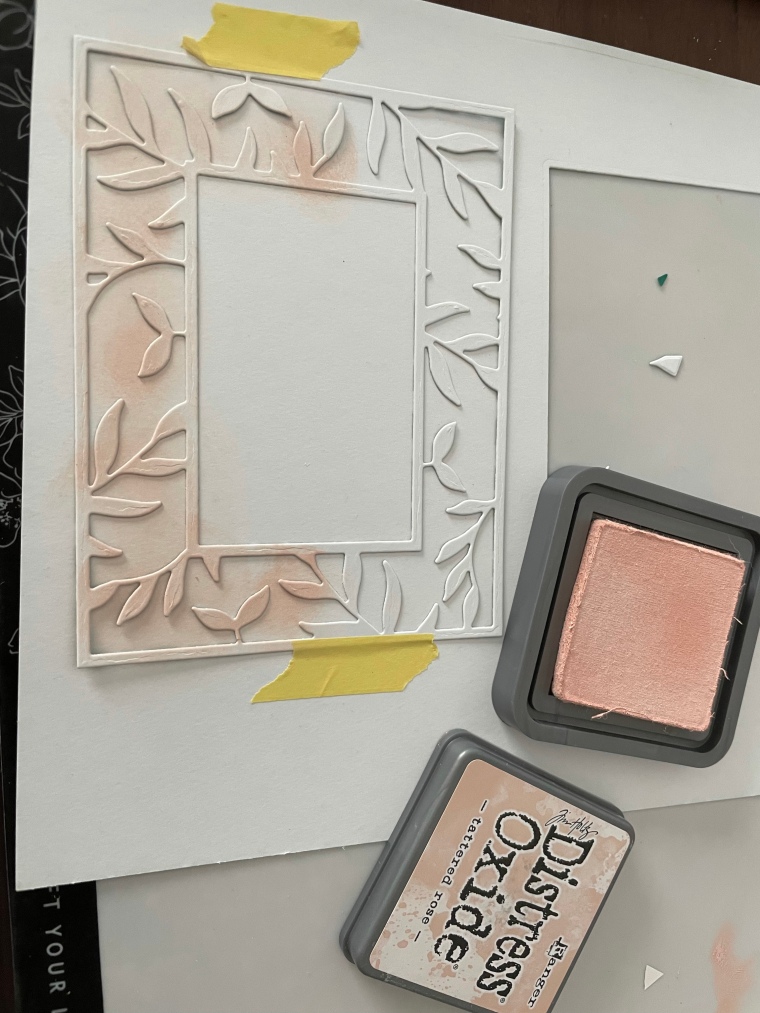
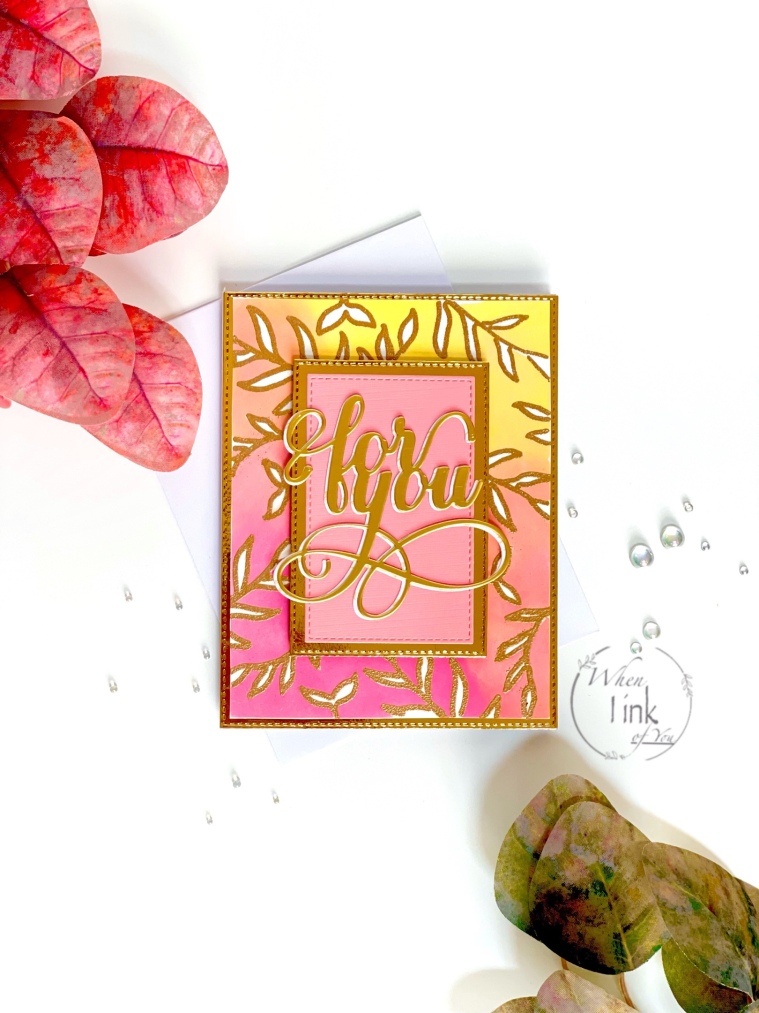
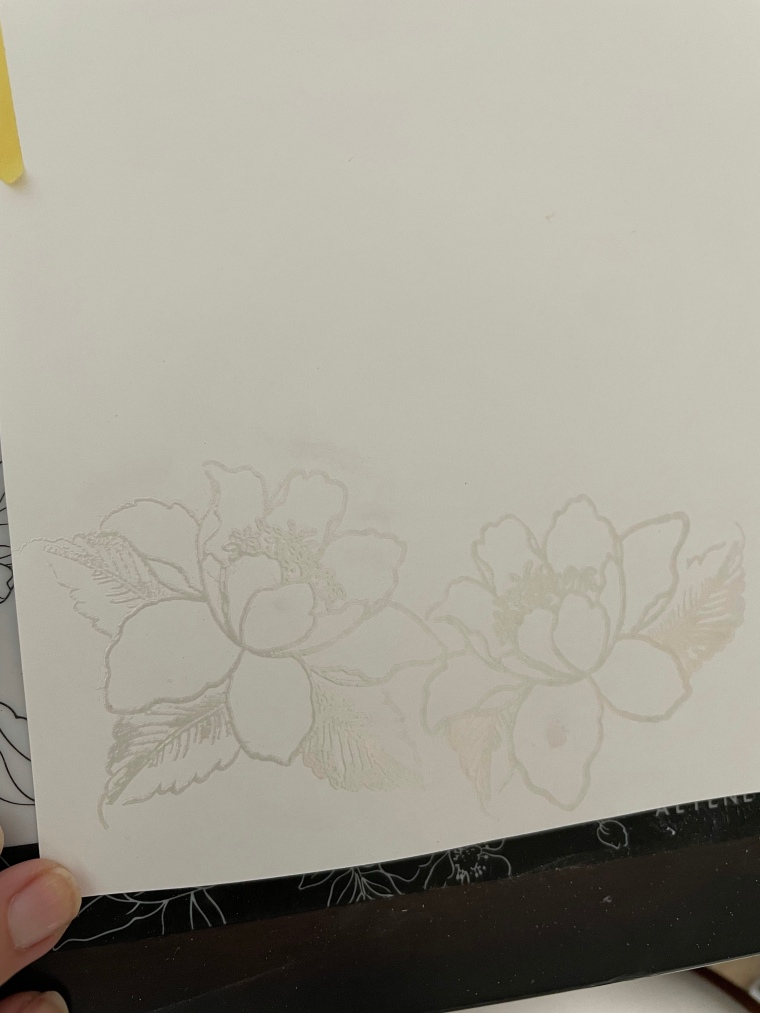
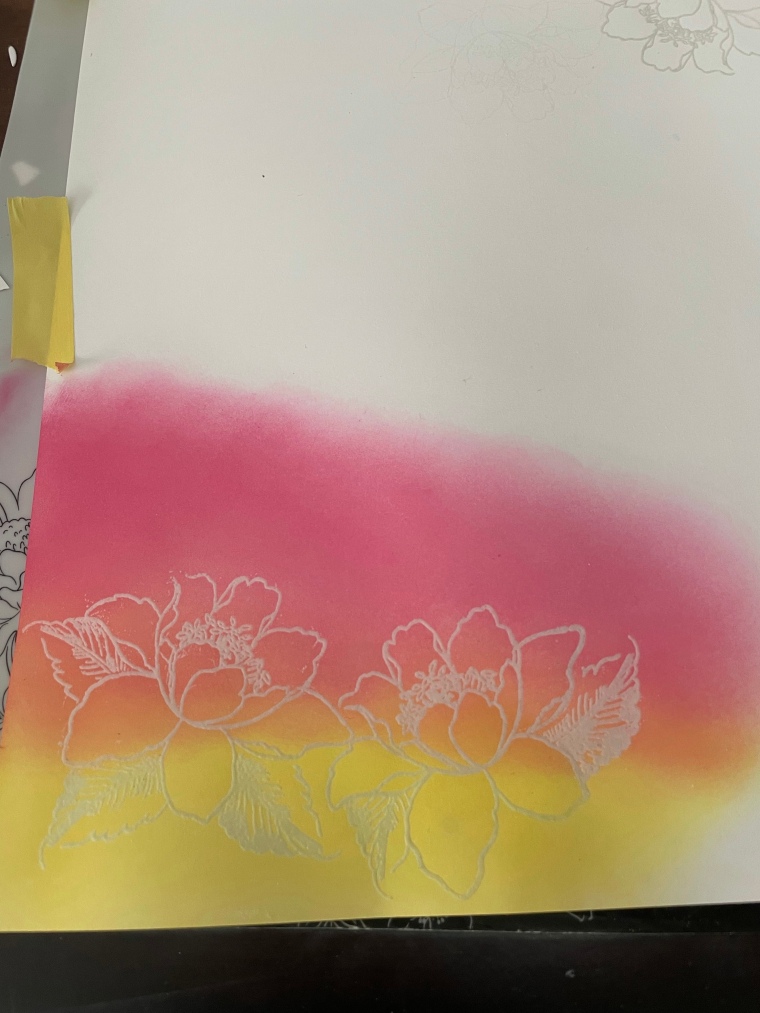
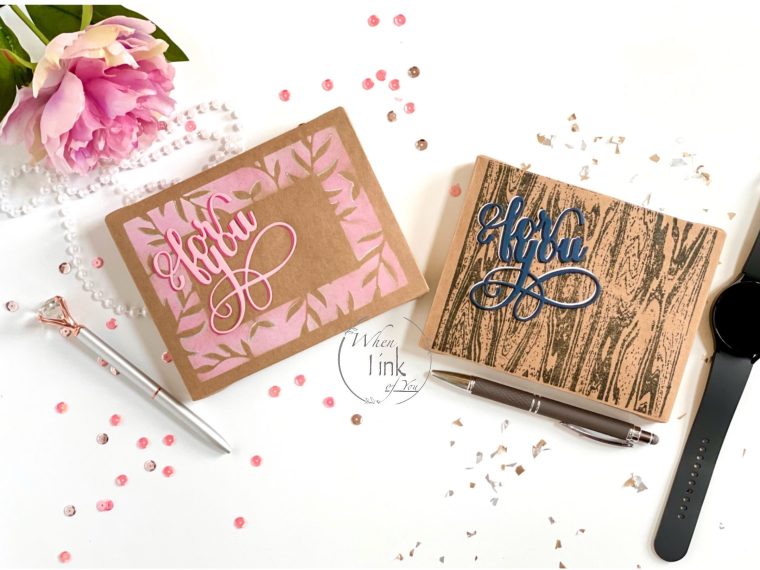
I began by using the framed die cut from card 2 as a stencil for this project. I placed it over my paper using washi tape. I began to ink the base using a blending brush and distress oxide inks in picked raspberries and squeezed lemon. I prepared my project with anti-static powder. Next, I used an embossing pen to outline the leaf images and poured gold embossing powder over it. I heat set the outlines. Next, I die-cut a rectangle for the center portion in gold and pink. “For You” was cut in thick foil card stock and a patterned paper. I centered shiny gold card stock onto my project with foam tape for dimension. I attached pink card stock to the center of it using double-sided tape. I adhered the die-cut sentiment with liquid glue and attached the project to a base card.


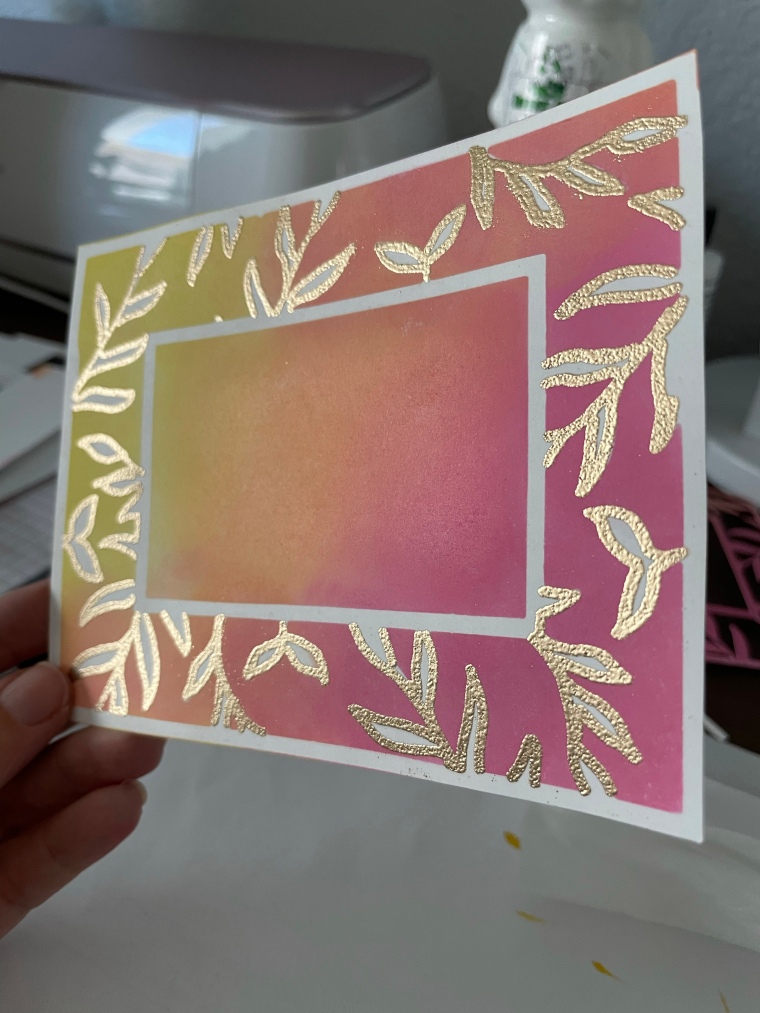

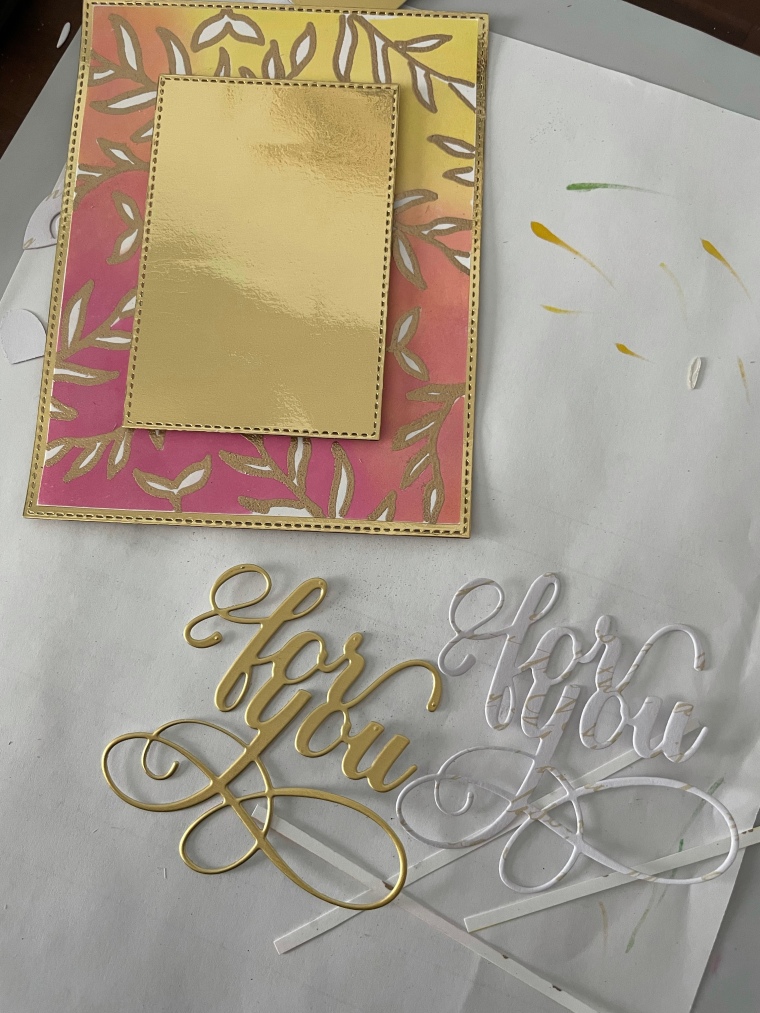
Tip: Placing a regular sheet of printer paper between foil card stock and cutting plates will prevent unwanted marks or fogging.
Card 4


Card 5

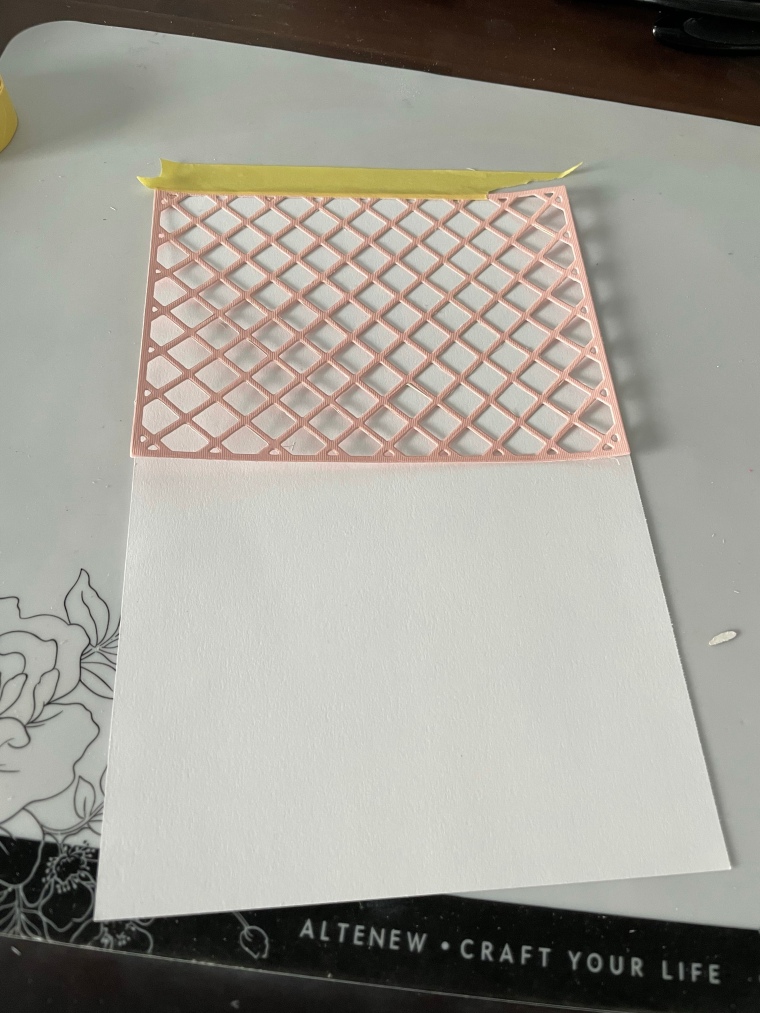
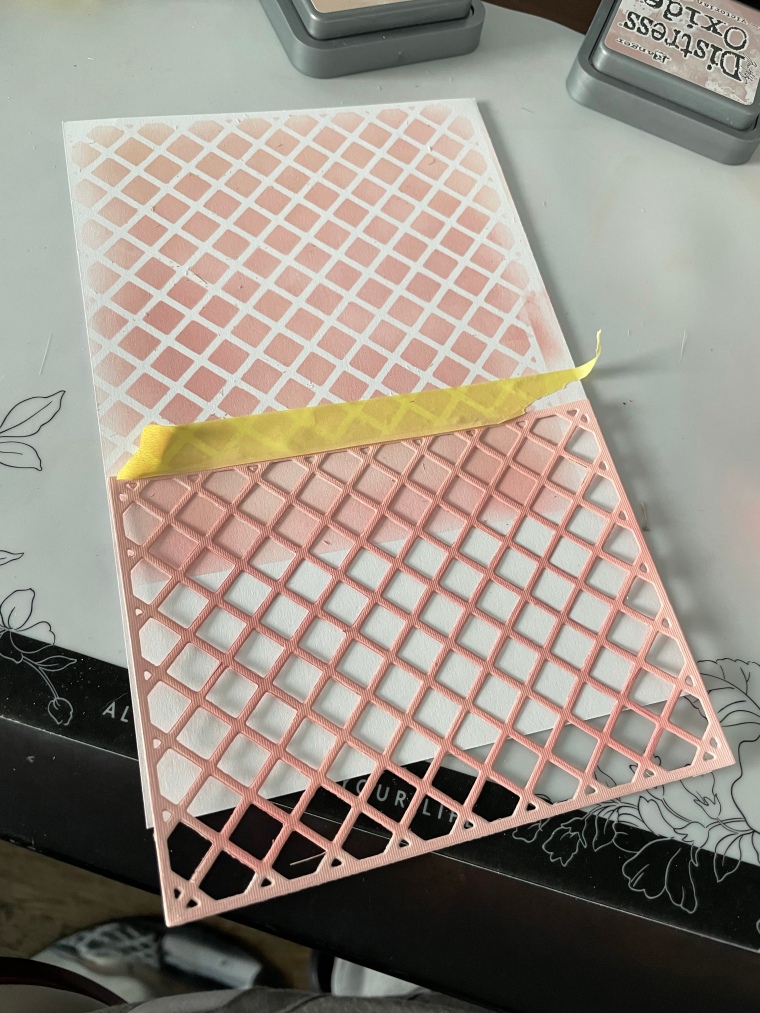
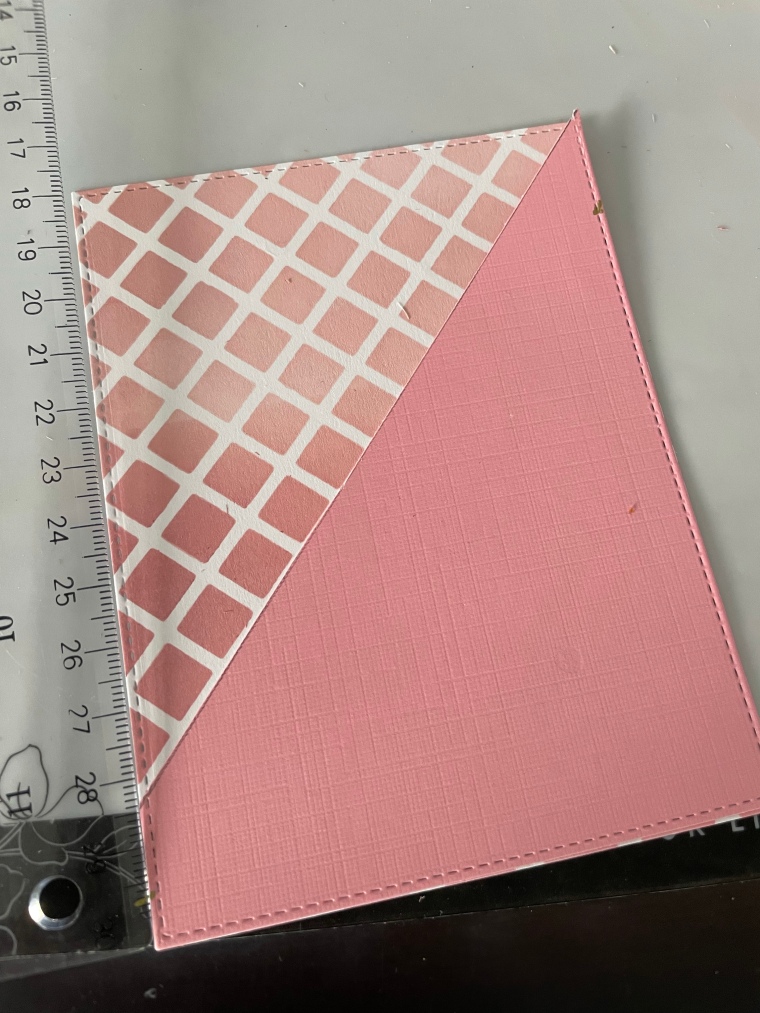
Card 5 shows off techniques from Stencil Techniques, Easy Ink Blending and All About Layering.I began creating this card by placing a trellis die cut over the base mixed media paper. I blended distress Oxide Ink in Tattered Rose, Victorian Velvet, and Worn Lipstick. I covered the entire sheet in inks by moving my die-cut made stencil. Once the ink was dry, I die-cut the area I liked best with a stitched die-cut frame. I had a die-cut leftover from a Let it Shine project and used it for this card. I lined it up to the trellis and marked it at the sides where I needed to trim it further. I attached the diagonal cut over the lattice pattern with double-sided tape.
I used Altenew’s Strength in Blooms Stamp and Die Bundle for the flowers. I did not use the first layer of this stamp set. I instead lightly blended Spun Sugar distress oxide ink onto white card stock. I stamped the second layer of the blooms in Spun Sugar, the third layer in Worn Lipstick, and the detail layer in Festive Berries. I also stamped the foliage in worn lipstick. I die cut them using the coordination dies. I arranged the leaves and one flower then added them to my project with double-sided tape. I used foam tape for the second flower to add dimension. The sentiment from Altenew’s Label Love Spanish stamp set reads “Solo Para Ti” (Only for you). It’s adhered with foam tape. I added a bit of shine by attaching this piece to gold rose foil card stock. For the finishing touch, I added beads with liquid glue.


Card 6

Card 6 features techniques learned in All About Layering, Seasonal Scene Building, and Easy Ink Blending.
I began by blending Distress Oxide Inks in Picked Raspberries and Squeezed Lemon with a blending brush. I split the colors in half and blended them in the center with Fossilized Amber. Next, I grabbed 2 sets of layering stamps and began stamping them with my Memory Misti Stamping tool. I decided on the beautiful Layered Lily Stamp and Die Bundle for this card. I used Spun Sugar, Worn Lipstick, and Picked Raspberries Distress Oxide Inks. For the center of the flower, I first stamped the center of the flower in white pigment, then I used an embossing pen. I heat set gold embossing powder for the center. Next, I added a thin gold frame to the blended background with liquid glue. I began to arrange the flowers. I used double-sided tape for the first flower, and foam tape for the other two. I wanted the flowers to pop and give the appearance of a real-life floral bouquet. I then added the leaves by carefully lifting the petals of the lilies.
I added some. “stars” with a white gel pen. I stamped “Eres Increible”(You are incredible) from Altenew’s Label Love Spanish stamp set and used foam tape to secure it to my completed project.


Set 2
I wanted to keep this set fun and bright and a little lux. I used plenty of metallics, blues, and some wood elements.

Card 1
This card showcases techniques learned in Easy Die Cutting Techniques, Celebration Stencil Techniques, and Let it Shine.

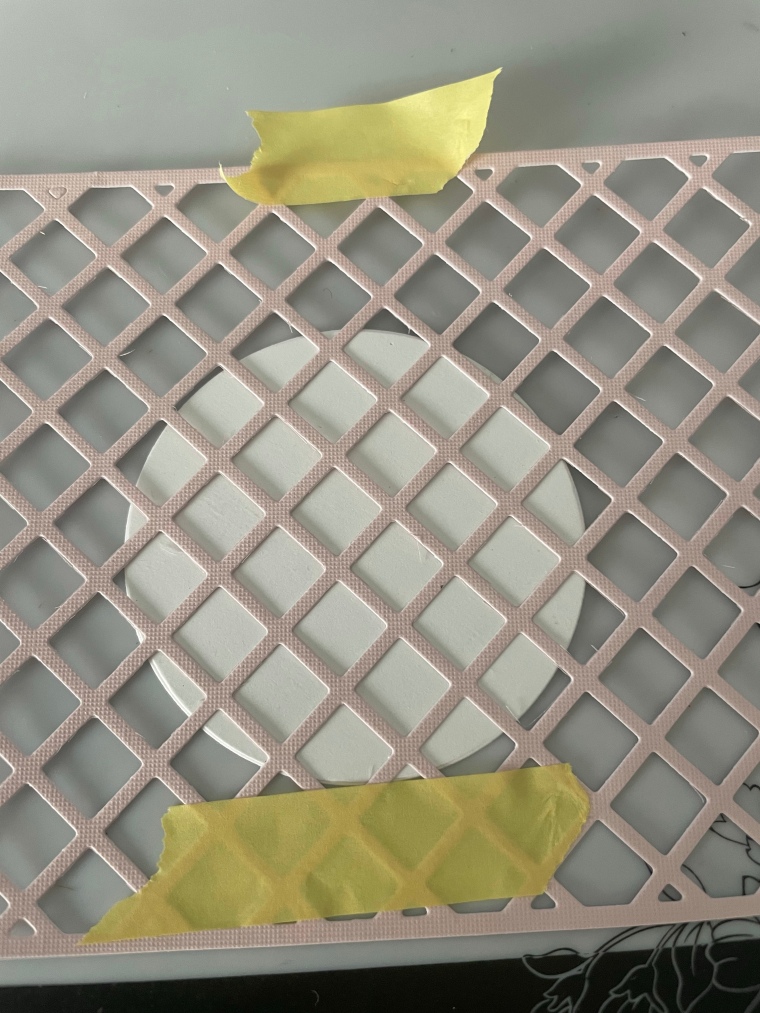
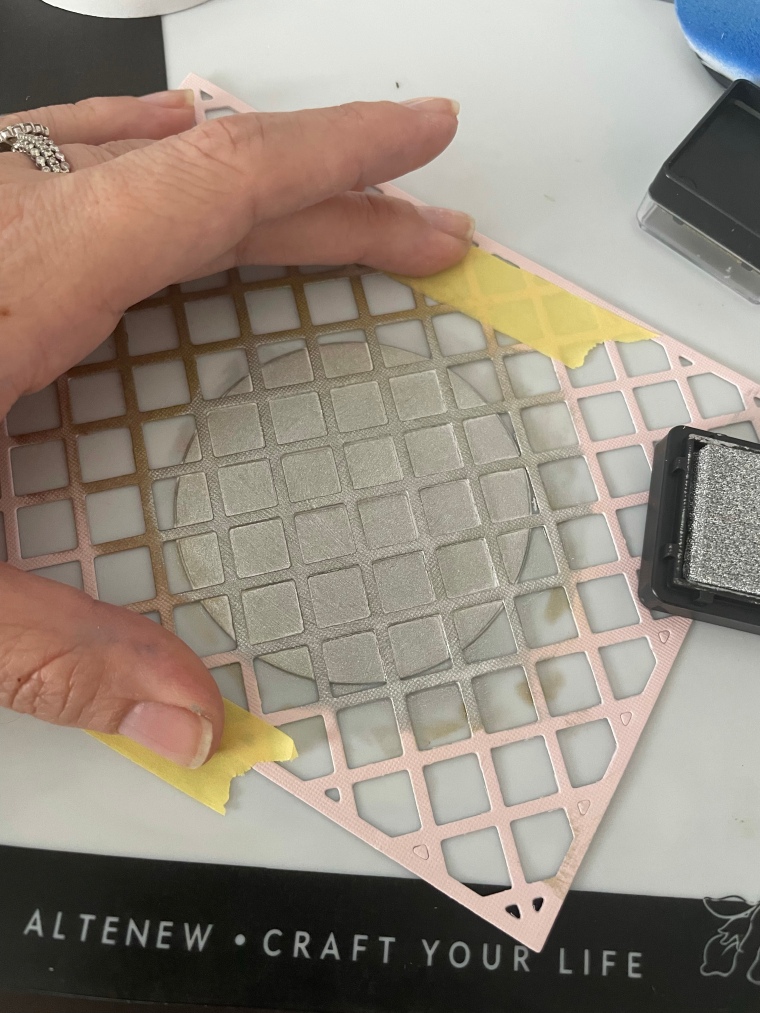
I initially began to create this card with black card stock but ultimately decided on navy. I started by placing washi tape with the sticky side up on my work surface to have control over the dies. I placed nesting circle dies from smallest to largest. I placed a foil card stock over and flipped it, and ran it through my die-cutting machine with the embossing plate. I did this with gold, silver, and copper foil card stock. I arranged the partially cut and embossed circles, and glue them to black cardstock. I then die-cut an A-2 sized frame. This is where I changed course. Instead of using the die-cut frame, I used the outer portions of the cut. I trimmed around the curves and arranged them on a navy blue notecard. I didn’t want the circles to be identical, so I pulled a couple of circles out of the silver die cuts. I secured the circles with liquid glue and some double-sided tape. I trimmed off the excess and set the project side. I die-cut white and gold circles. I set the gold aside and place a stencil over the white. I used is a lattice frame die-cut as a stencil and inked the exposed surface in metallic silver ink. I adhered the gold circle onto the card with double-sided tape. I added the stenciled piece with foam squares to give dimension to my project. I added “Thank you” from Altenew’s Thanks Around the World Stamp Set. I inked the edges of it with silver metallic ink. I then added double-sided tape to the right half and a few foam squares to the left. I then attached it partially over the stenciled piece.


Card 2
This card showcases things I learned in Easy Die Cutting techniques, Let it Shine, and For The Guys.

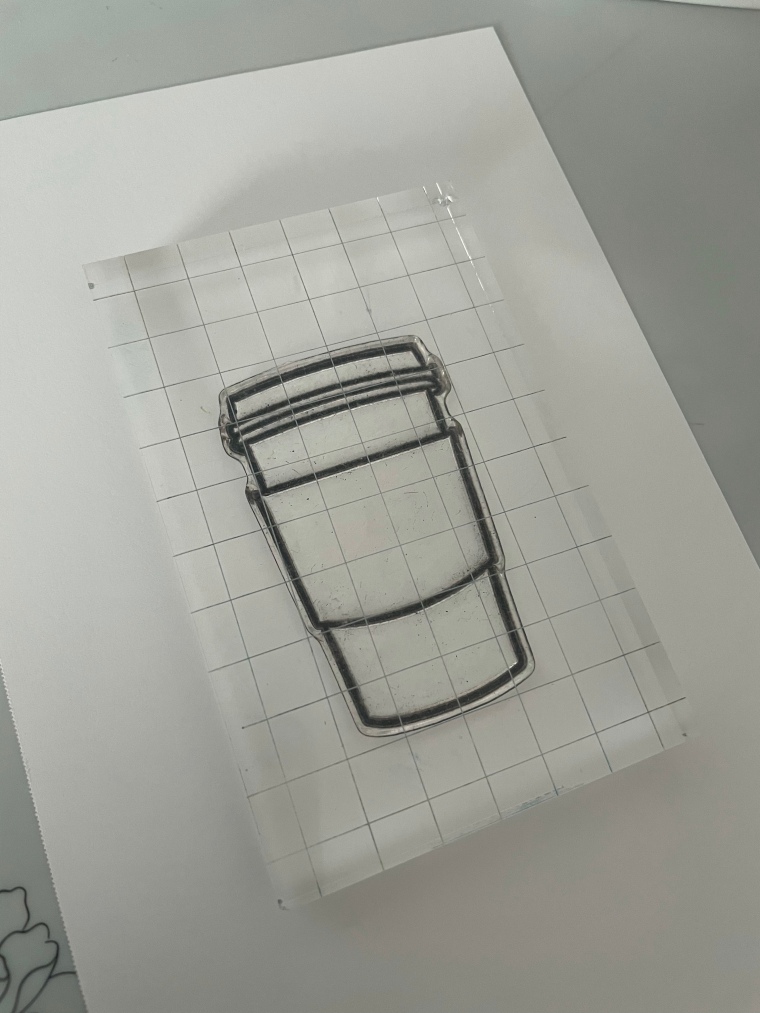
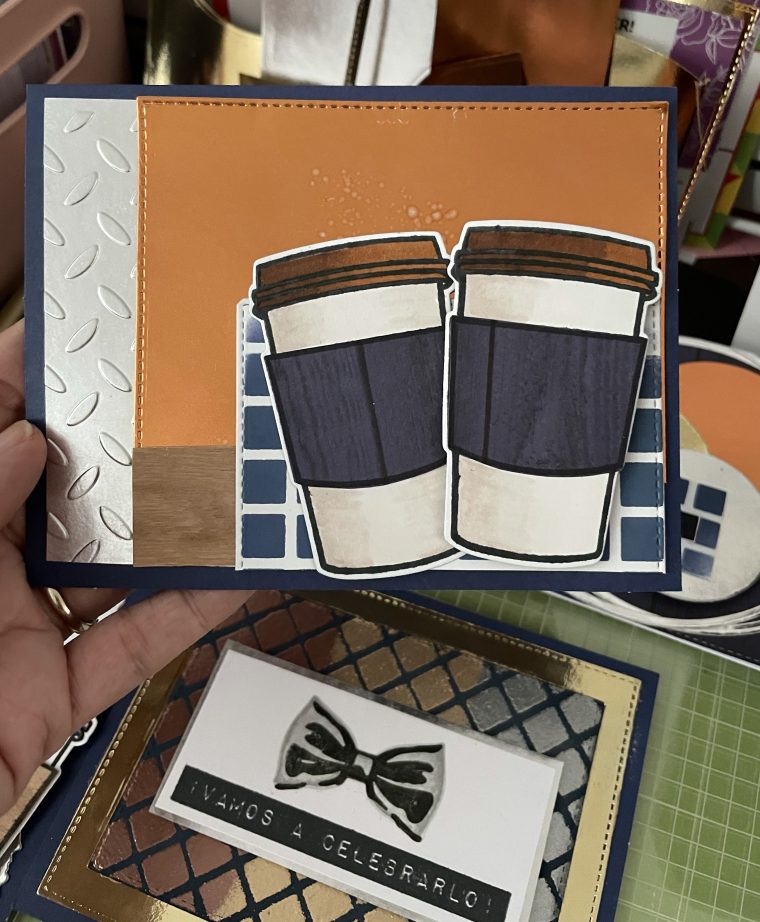
I began with using Altenew’s Mix and Match Frames. I cut a previously embossed paper from my stash with the second-largest frame die in this set and attached it to a navy note card. Then I stamped images from Altenew’s Friends Forever Stamp & Die Bundle. I stamped the coffee cup onto white card stock, and partially onto wood veneer paper. I used the coordinating die to cut the stamped images and to cut non-stamped metallic coffee cup shapes. I cut the coffee-cozy portion of the wood veneer with scissors and glued it with double-sided tape to the stamped images on white card stock. I then attached them to die-cut coffee cup shapes in copper and gold and added them to the background portion. I felt the cups were too plain, so I colored the lid portion with gray alcohol-based markers. I used the smaller frame of the Mix and Match die set to make a background for the sentiment. I used copper card stock for the stripes and attached them with foam tape. I stamped and hand cut a birthday sentiment from Altenew’s birthday bash stamp set.


Card 3
This card was made using things I learned from Let it shine, All about Layering, and For the Guys.
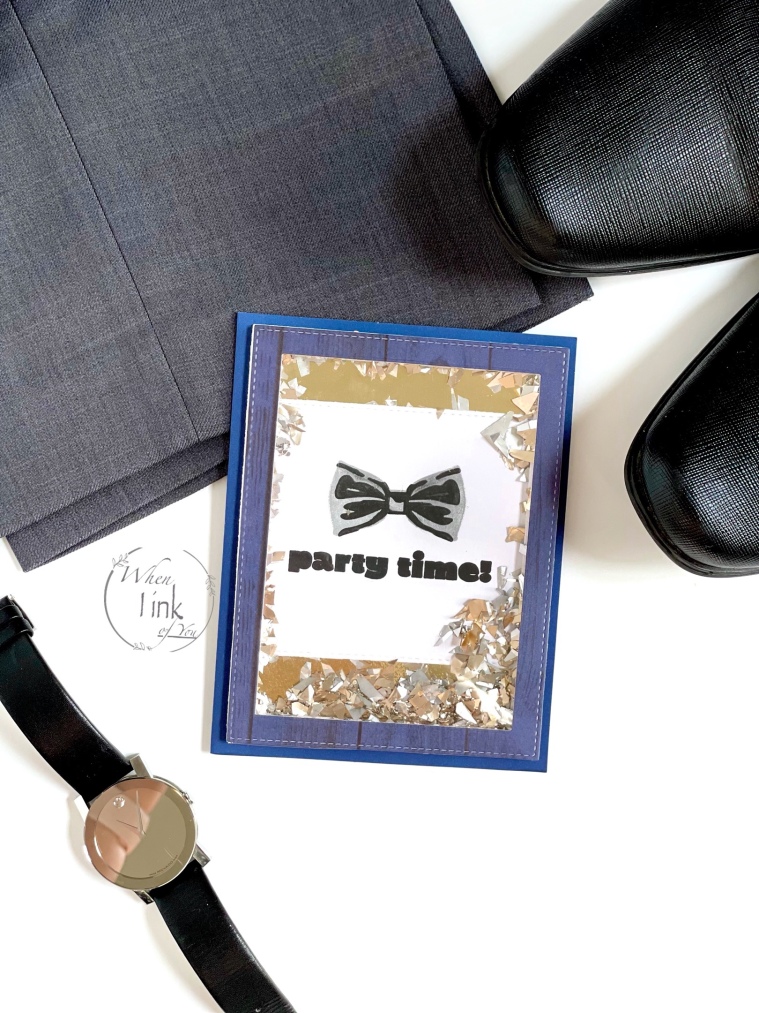


I began with a stitched die cut of shiny gold card stock, which I made slightly smaller than the navy note card. I centered it and attached it with double-sided tape. Next, I created solid white frames and one navy blue wood panel frame with a nesting die cut set. I glued all but 2 white frames together with liquid glue. I then began layering a bowtie image from Altenew’s “Thanks, Dad ” Stamp set. I stamped the solid image in metallic silver ink, and the detail stamps in black ink. under the bowtie, I stamped “Party time” from Altenew’s birthday bash stamp set. I trimmed this piece and attached it with double-sided tape. I used liquid glue on and around this piece and poured specialty glitter onto these areas. I used liquid glue to attach the white frame around the gold background. I glued the 2 white frames together and added the navy frame on top. I used foam tape on the frame already attached to the project. I added more glitter and secured the top frame to close.

Card 4
This card showcases things I learned in Celebration Stencil Techniques, Let it Shine, and Easy Die Cutting Techniques.

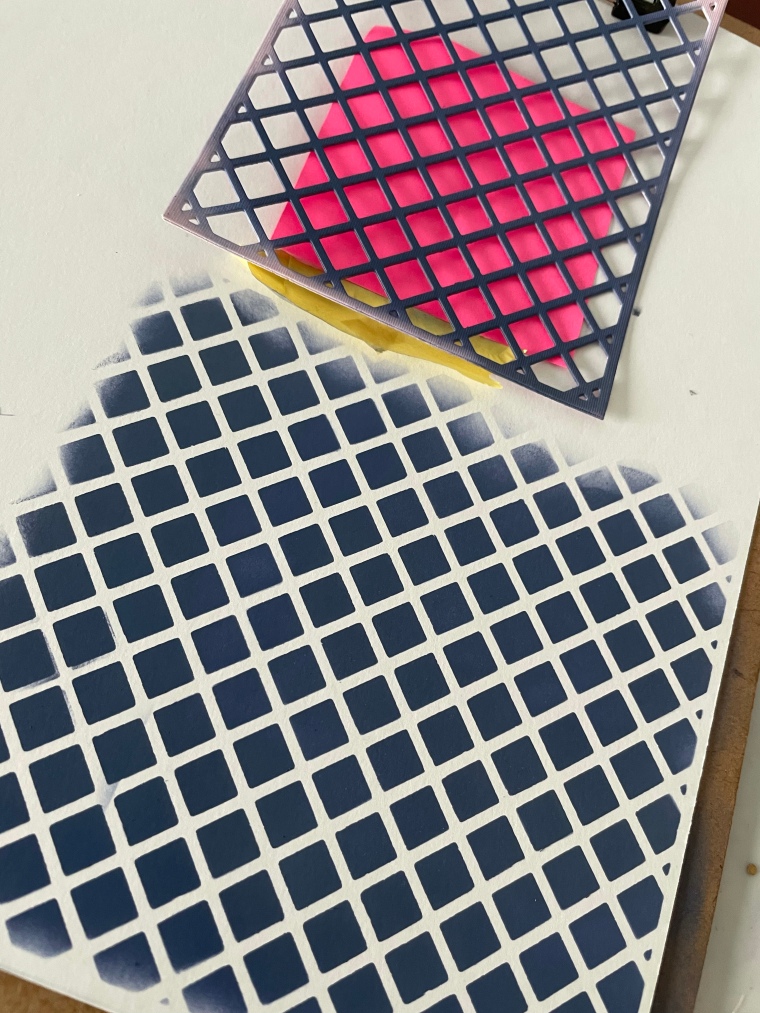
I began creating this card using my trusty trellis cover die and used it as a stencil. I used a blending brush and Distress Oxide ink in chipped sapphire to heavily saturate the exposed areas. I created an area larger than needed to save what’s left for future use. I then die-cut silver, gold, and copper foil card stock into different sized circles. I used the patterned blue wood panel paper from card #3 and die-cut to create the background for this card. I also used the outer circles die-cut for card #1. I attached the blue wooden panel paper to my base card with double-sided tape and arranged the circle die-cuts to the right side of the card. I used foam squares to give dimension to the silver circle. I overlapped the circle outlines and adhered them with liquid glue and trimmed the excess. Next, I cut a small portion of my stenciled piece and used both double-sided tape and foam squares to add it to my project. For the sentiment, I used ” Eres impresionante” (You are impressive) from Altenew’s Label Love Spanish Stamp set and added it with double-sided tape and foam squares.


Card 5

I created this card using techniques learned in All about layering, Let it Shine, and Celebration Stencil Techniques.
First, I prepared the navy cardstock surface with anti-static powder. I began stenciling clear embossing ink onto the card stock with a trellis die cut. I poured copper embossing powder onto the bottom third of the inked paper, gold to the center, and silver to the top third. I heat set the powders with a heat gun. I attached it to the center of a blue notecard and placed a gold die-cut frame around it.


I layered the bowtie stamp set onto white card stock, beginning with silver metallic ink, then black dye ink. I used “Vamos a Celebrarlo!” (Let’s celebrate it!) from Altenew’s Label Love Spanish stamp set at the bottom. Once dry, I trimmed this piece with scissors and adhered it to silver cardstock. I centered the sentiment and bowtie with blue adhesive foam.


Card 6

This card showcases techniques I learned in Easy Die Cutting Techniques, Let It Shine, and For the Guys.


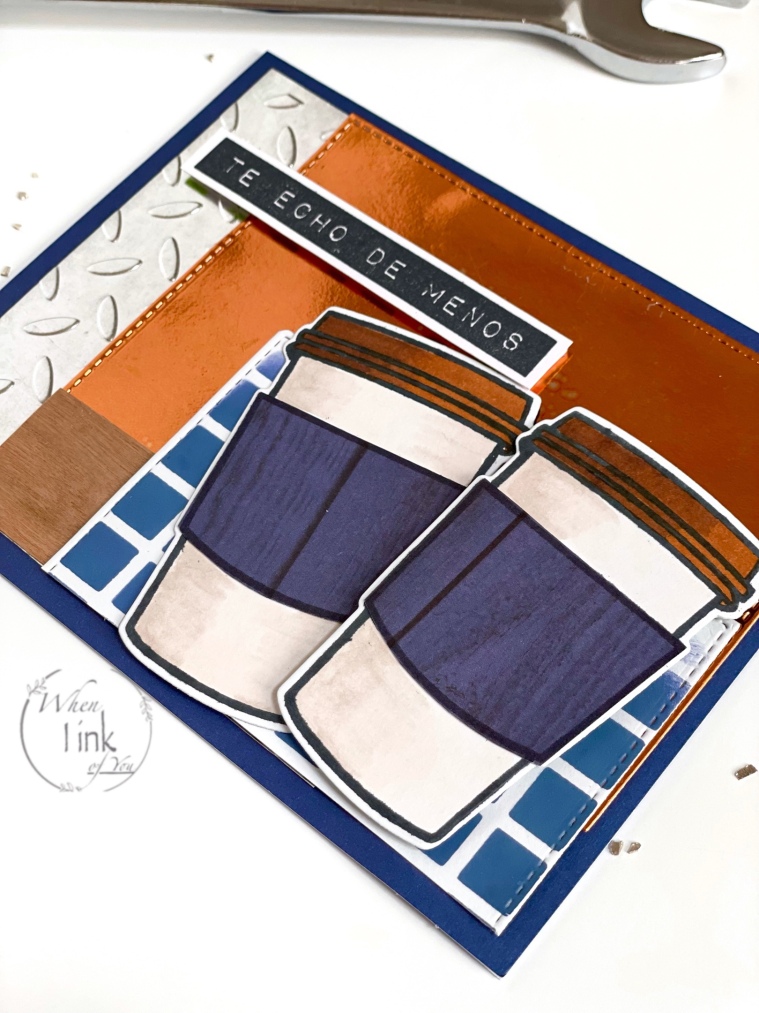
I used many scraps from 4 cards in this set to create this one. I began with a scrap from card #2. I used the embossed paper and glued it to the left, I then die-cut the leftover copper foil card stock into a stitched frame. I added a wood veneer panel leftover from card 2 to the bottom. I then trimmed a portion of the stenciled piece from card #4 and added it to the project. I stamped 2 coffee cup images on white card stock and used the coordinating dies to cut them. I used the same stamp to create the cozy, out of scrap paper from card #3. I trimmed the portion out with scissors and attached it to the coffee cup.I colored the lids using brown alcohol ink-based markers and added shadows to the cups with warm gray markers. I used foam squares for one of the coffee cups. I chose “Te echo de menos” (I miss you) for the sentiment strip and added it with double-sided tape.
Packaging
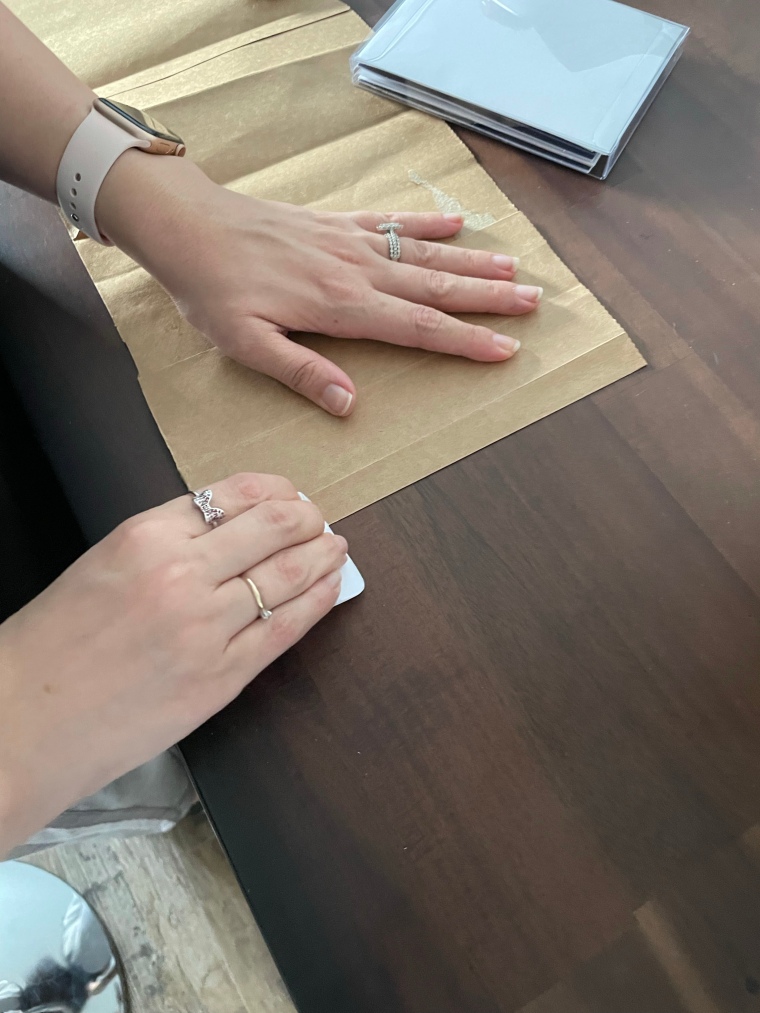
When I was growing up, it was popular to wrap your textbooks in paper groceries bags. I remember some groceries stores added prints to their bags for this purpose. I chose to do this with my card sets. I used gifts bags given to me containing homemade snacks by a friend of mine (she’s amazing).
I placed the card sets into acrylic card boxes.
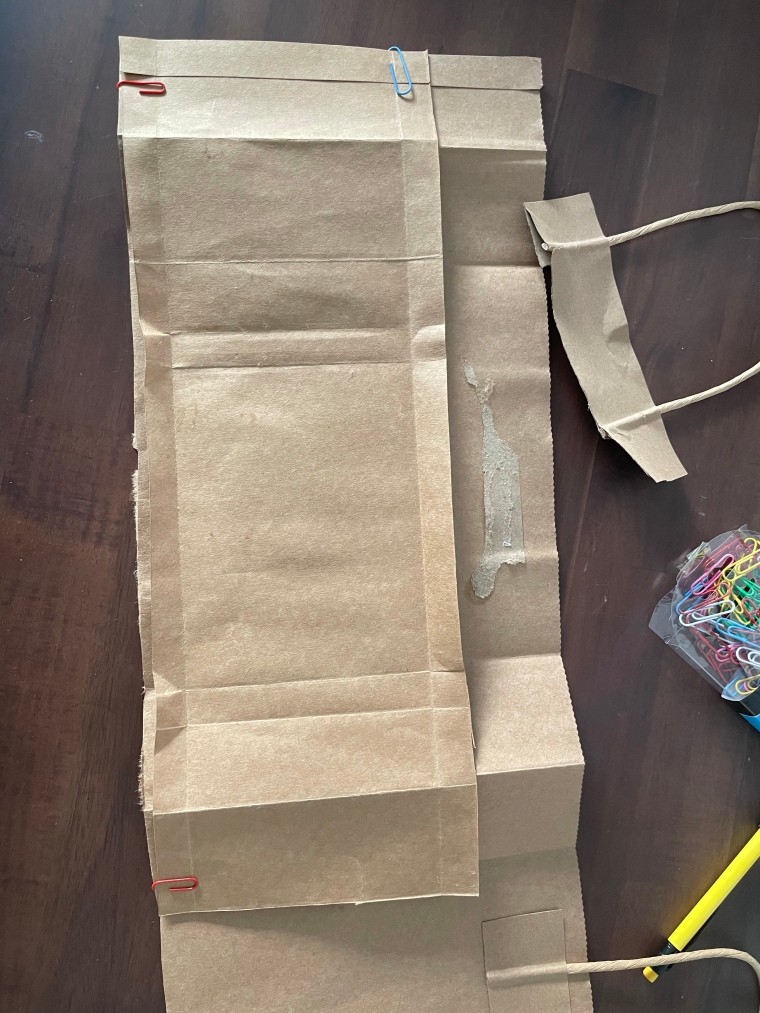
I began to create the wrapping for my boxes by first cutting the bottom portion and side of the bag. I placed a card box on the bag, and fold it over to get the necessary crease lines. Once the crease lines were lightly made, I removed the box and began scraping them with my paper scrapper. I used a T-ruler to evenly mark where cuts needed to be made then, removed the handles. I lined up the unfinished bag with the prepared one and secured it with paper clips. I folded the second bag along with the first to get matching creases.


I used Altenew’s A walk in the woods for the masculine set. I first placed post-it notes along the creases to only get a panel at the front and back. I stamped the image in black ink with a large acrylic block.
For the feminine set, I used a die-cut leftover from card #3 of the feminine cards. I used washi tape to secure around the edges to keep it from moving, and I placed a post-it note at the center to keep ink off. I used spun sugar, and worn lipstick distress inks to blend onto the paper. I wrapped the gift sets and used double-sided tape for the edges. I created “For You” die cuts, layers them, and added them to the upper left corners of my freshly wrapped gifts.
Altenew products
- Crisp Embossing Powder -Copper
- Thanks, Dad Stamp Set
- Mix and Match Frames Die Set
- Forever Friends Stamp and Die Bundle
- Fancy For You Die
- Thanks Around The World Stamp Set
- Painted Butterflies Stamp and Die Bundle
- Birthday Bash Stamp Set
- A Walk in the Woods Set
- Layered Lily Stamp and Die Bundle
- Leaf Frame Cover Die
- Garden Treasures Stamp Set
- Strength Blooms Stamp and Die Bundle
- Label Love Spanish Stamp Set
- Garden Trellis Cover Die

6 responses to “Level 1 Challenge”
Love this project. Well done! Congratulations on finishing Level one.
LikeLiked by 1 person
Thank you Mel!!!!
LikeLike
WOW WOW WOW WOW!! I am blown away by the happy, fun cards for the feminine sets and the cool, rocking masculine cards! You have done a fabulous job, Irene! Bravo! Thank you for submitting your fabulous work to the AECP assignment gallery.
LikeLiked by 1 person
Thank you so much, Erum!! You made my day!!!
LikeLike
Fabulous job Irene!!! Love the cards, especially bilingual!! WooHoo! Great job!
LikeLiked by 1 person
Lori! Thank you so much!!!
LikeLike